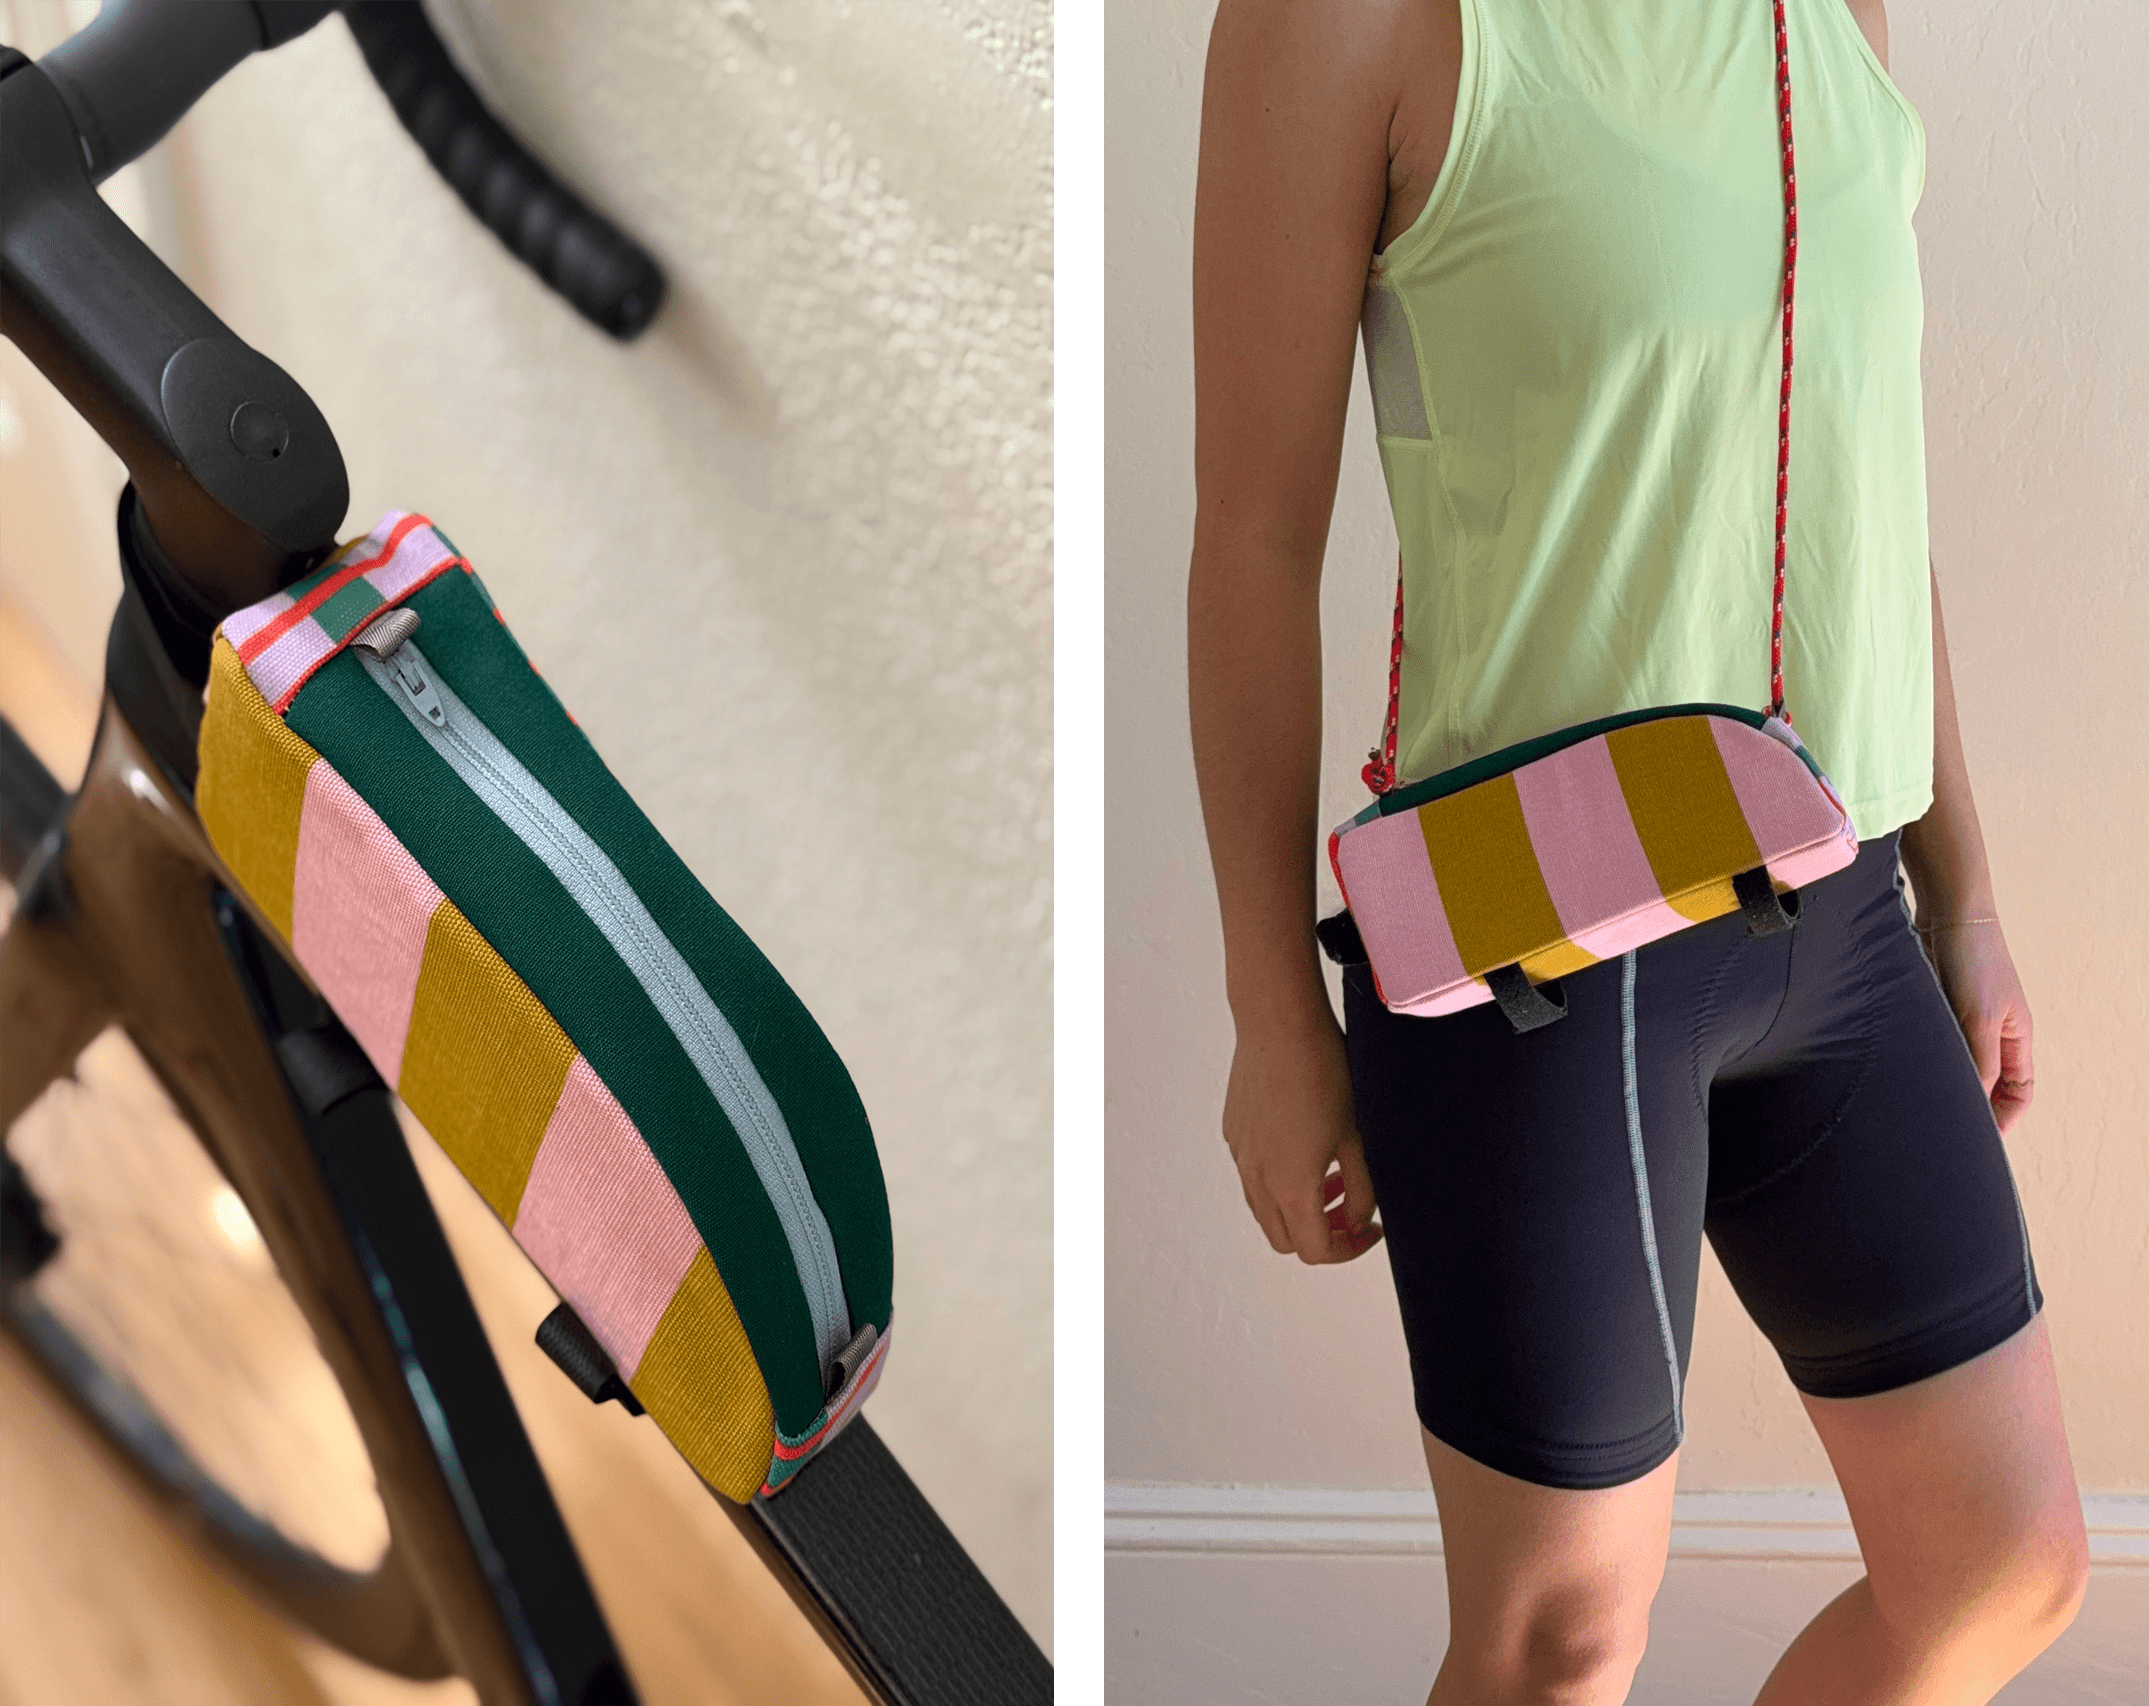
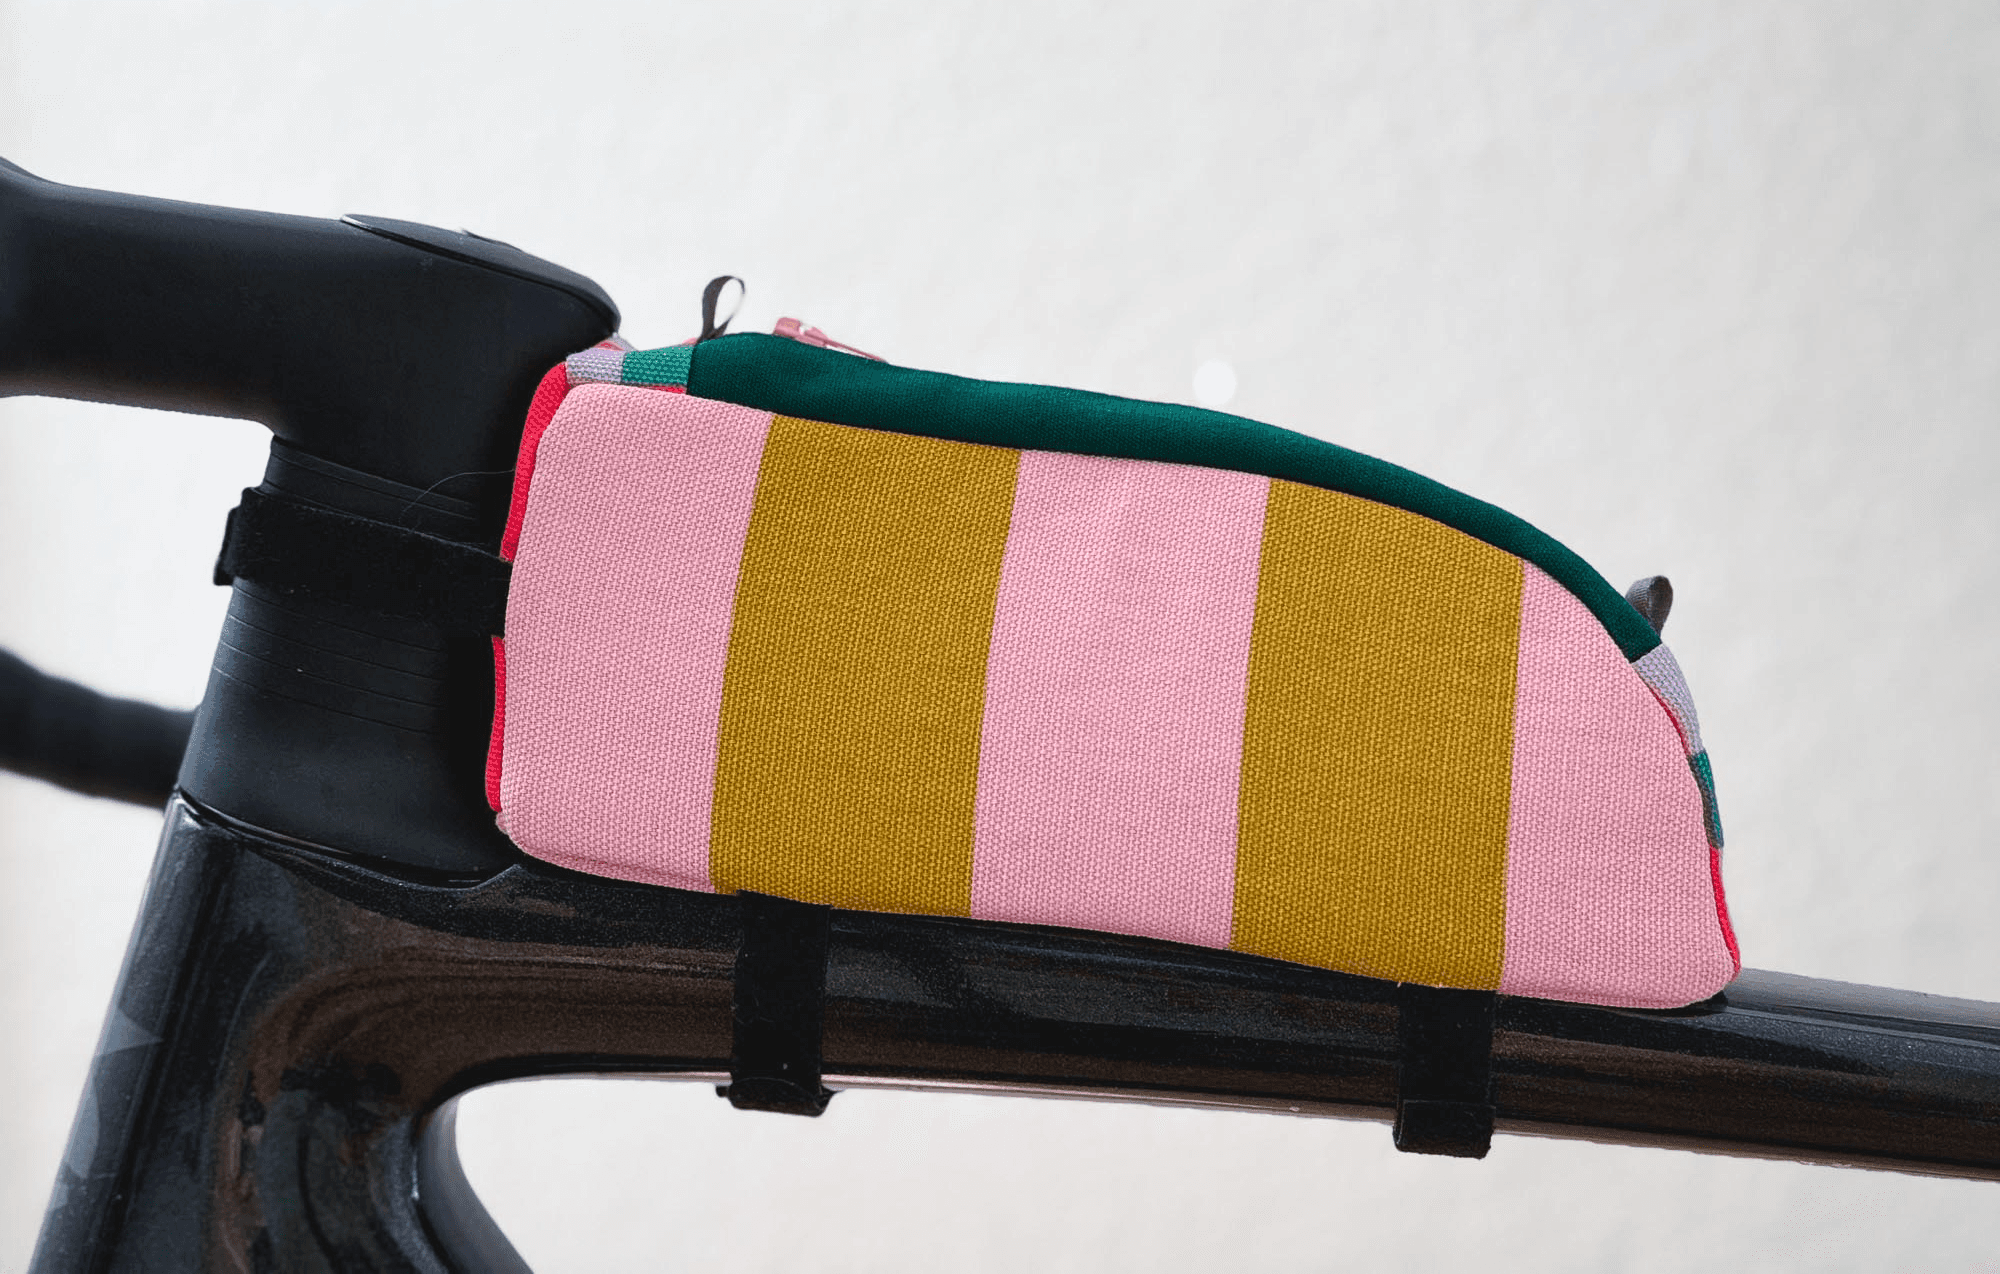
A top tube bike bag that transforms into a cross-body purse.
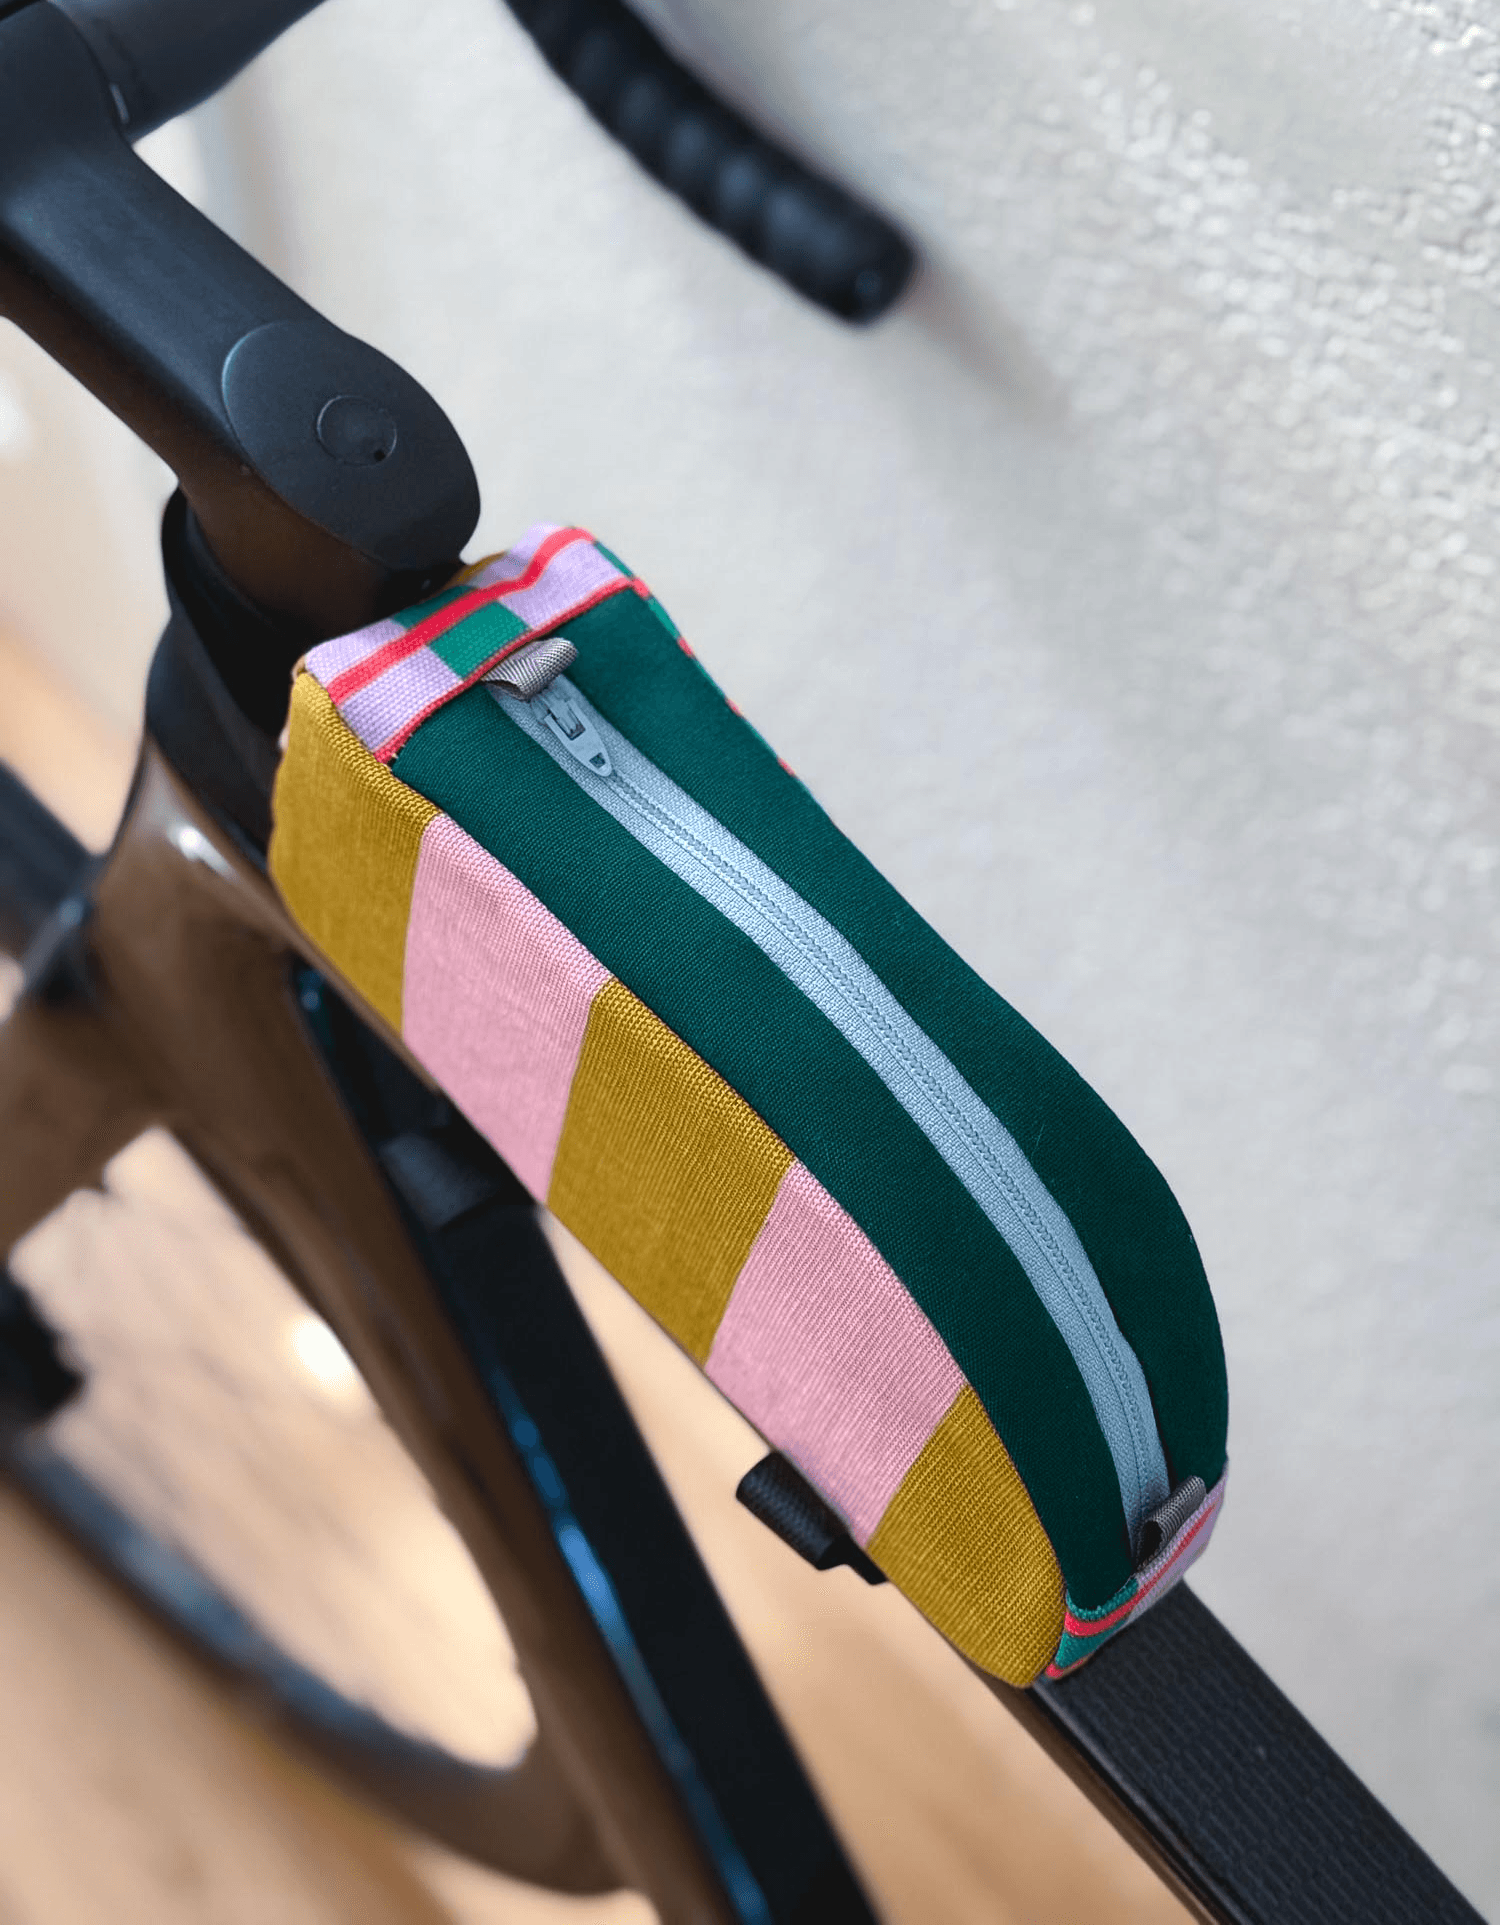
Sew a top tube bag to hold your phone, sunglasses, and a few snacks on your bike. Velcro makes it quick to remove, and a length of cord is all you need to switch it over to a cross-body purse.
I designed this bag for an overnight "bikepacking" trip to Napa. We needed to pack everything on our bikes, but I also knew I wanted a small bag to carry around town and to dinner once we got there. This multi-purpose bag held essentials on my bike, and needed hardly anything to transform into a cross-body purse.
Overview
Below are general instructions that you can use to eyeball the pattern and follow the basic method. If you would like a complete pattern with detailed instructions, diagrams, and pattern pieces, you can get the pattern on my Etsy!
I'd classify this as an advanced beginner project because it requires familiarity with sewing zippers, plus it can be difficult to sew the thick layers and keep them lined up around the curves. However, it doesn't have too many parts, so should still be manageable!
Materials
This is a great project for fabric scraps because most of the pieces are fairly small and you will need less than a quarter yard. I used a heavier upholstery weight cotton for the outer fabric and some scraps of a cotton solid for the lining.
The thick interfacing is the trick to giving the bag shape so it doesn't flop over. You can also use 3mm EVA foam — you're just looking for something with a bit of thickness and stiffness, but still bendable. It doesn't matter whether you get iron-on interfacing, because you won't be ironing it anyway.
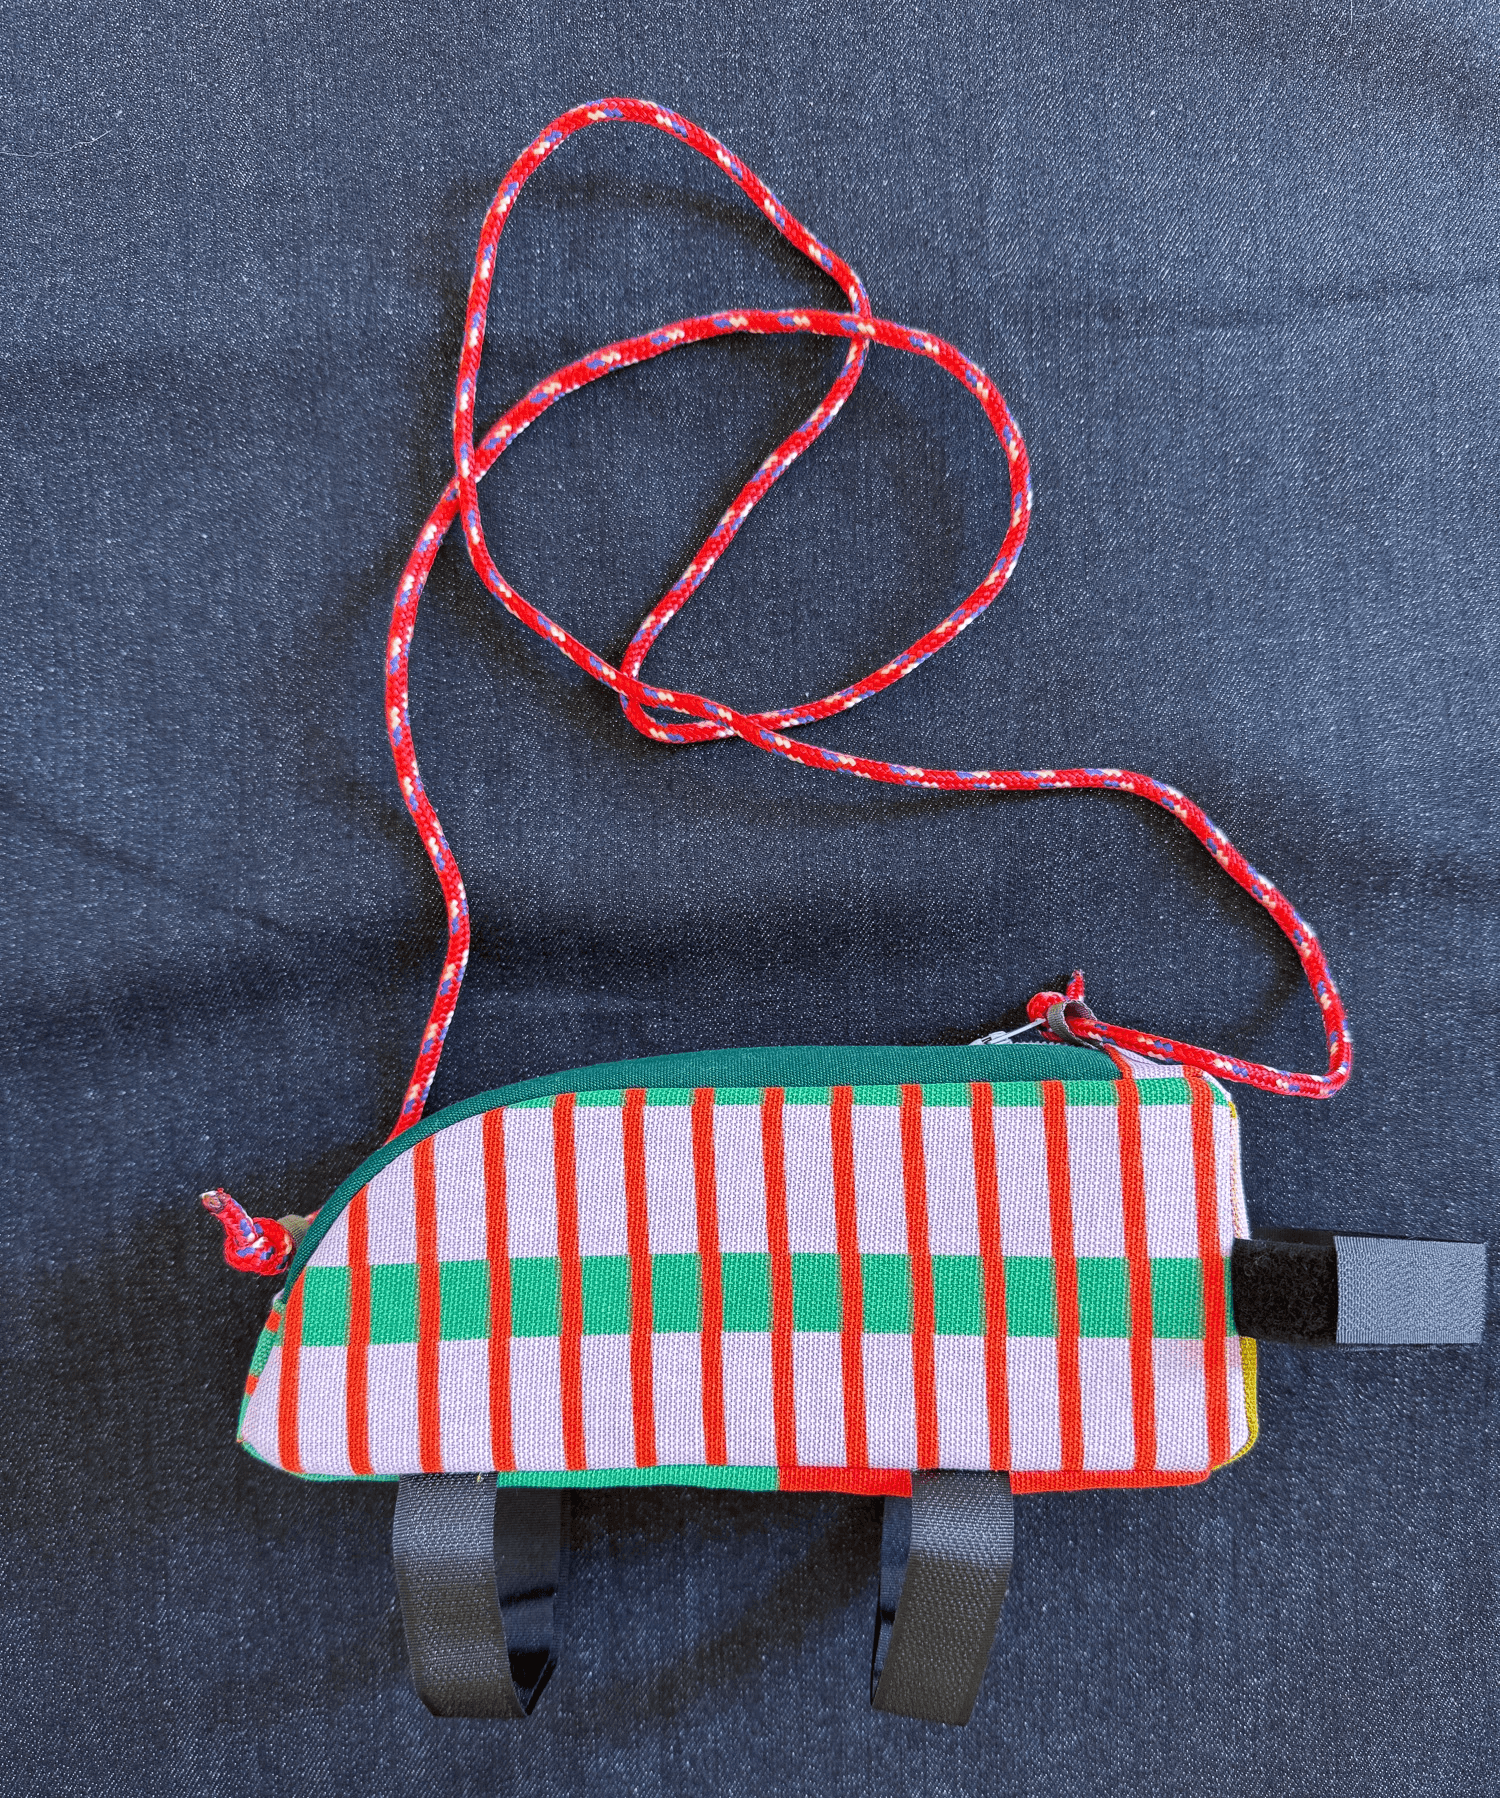
Other special materials include a bit of ribbon or webbing, a zipper, velcro, and paracord for the strap.
Sewing the panels
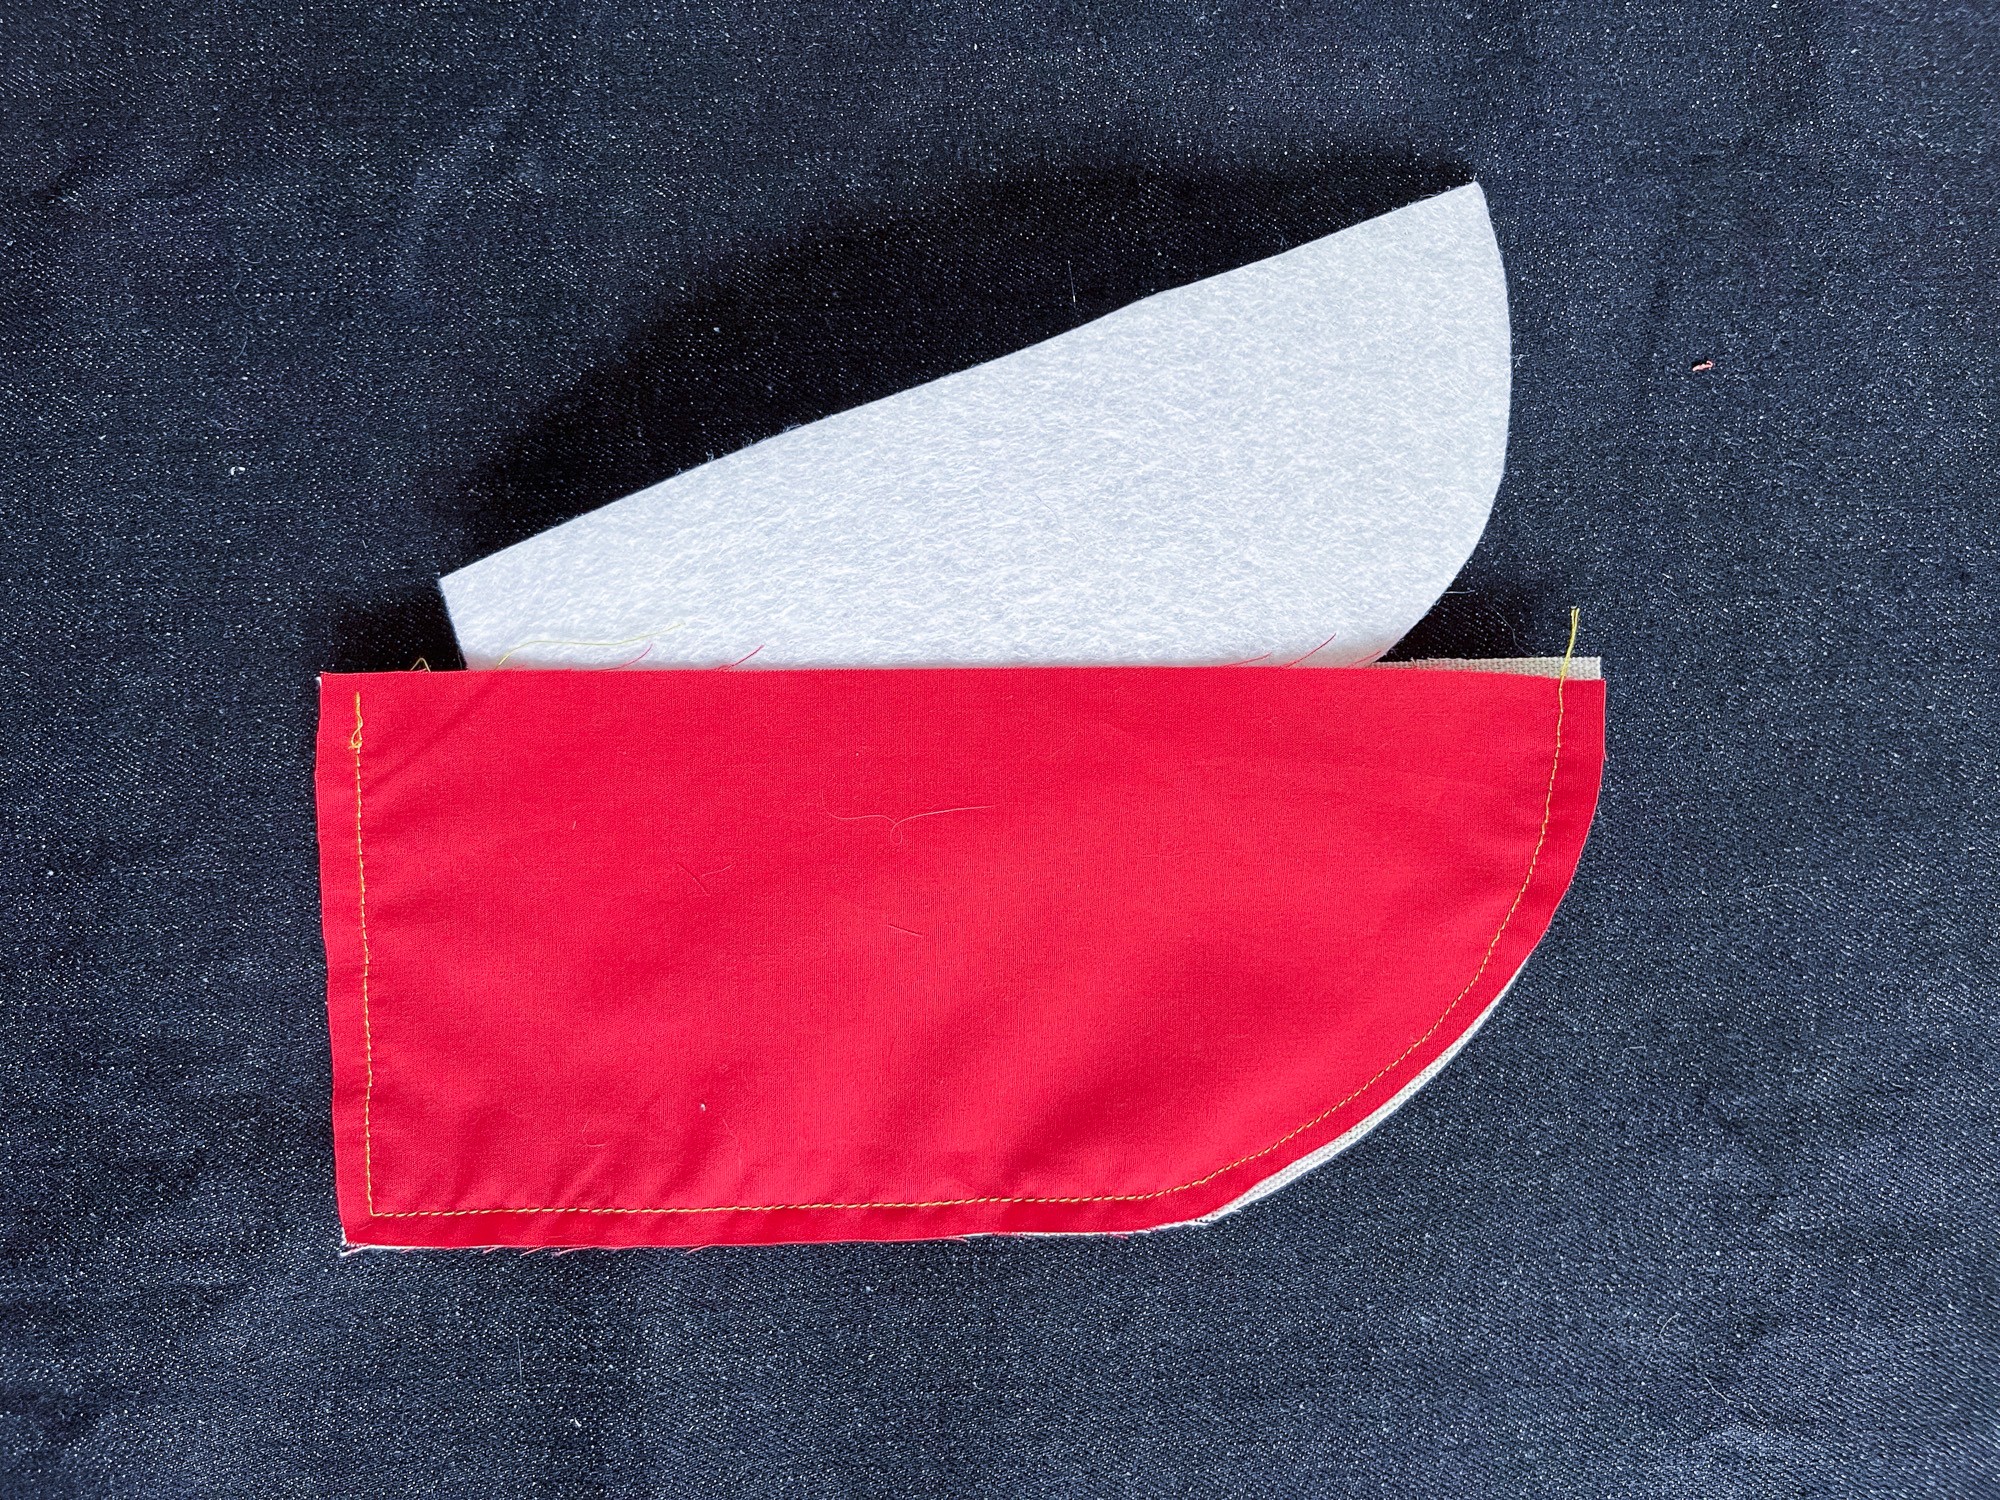
The basic construction consists of sandwiching the interfacing between layers of the outer fabric and lining, and then sewing together each of those "sandwiches". You'll have the same three layers for each side (except the zipper).
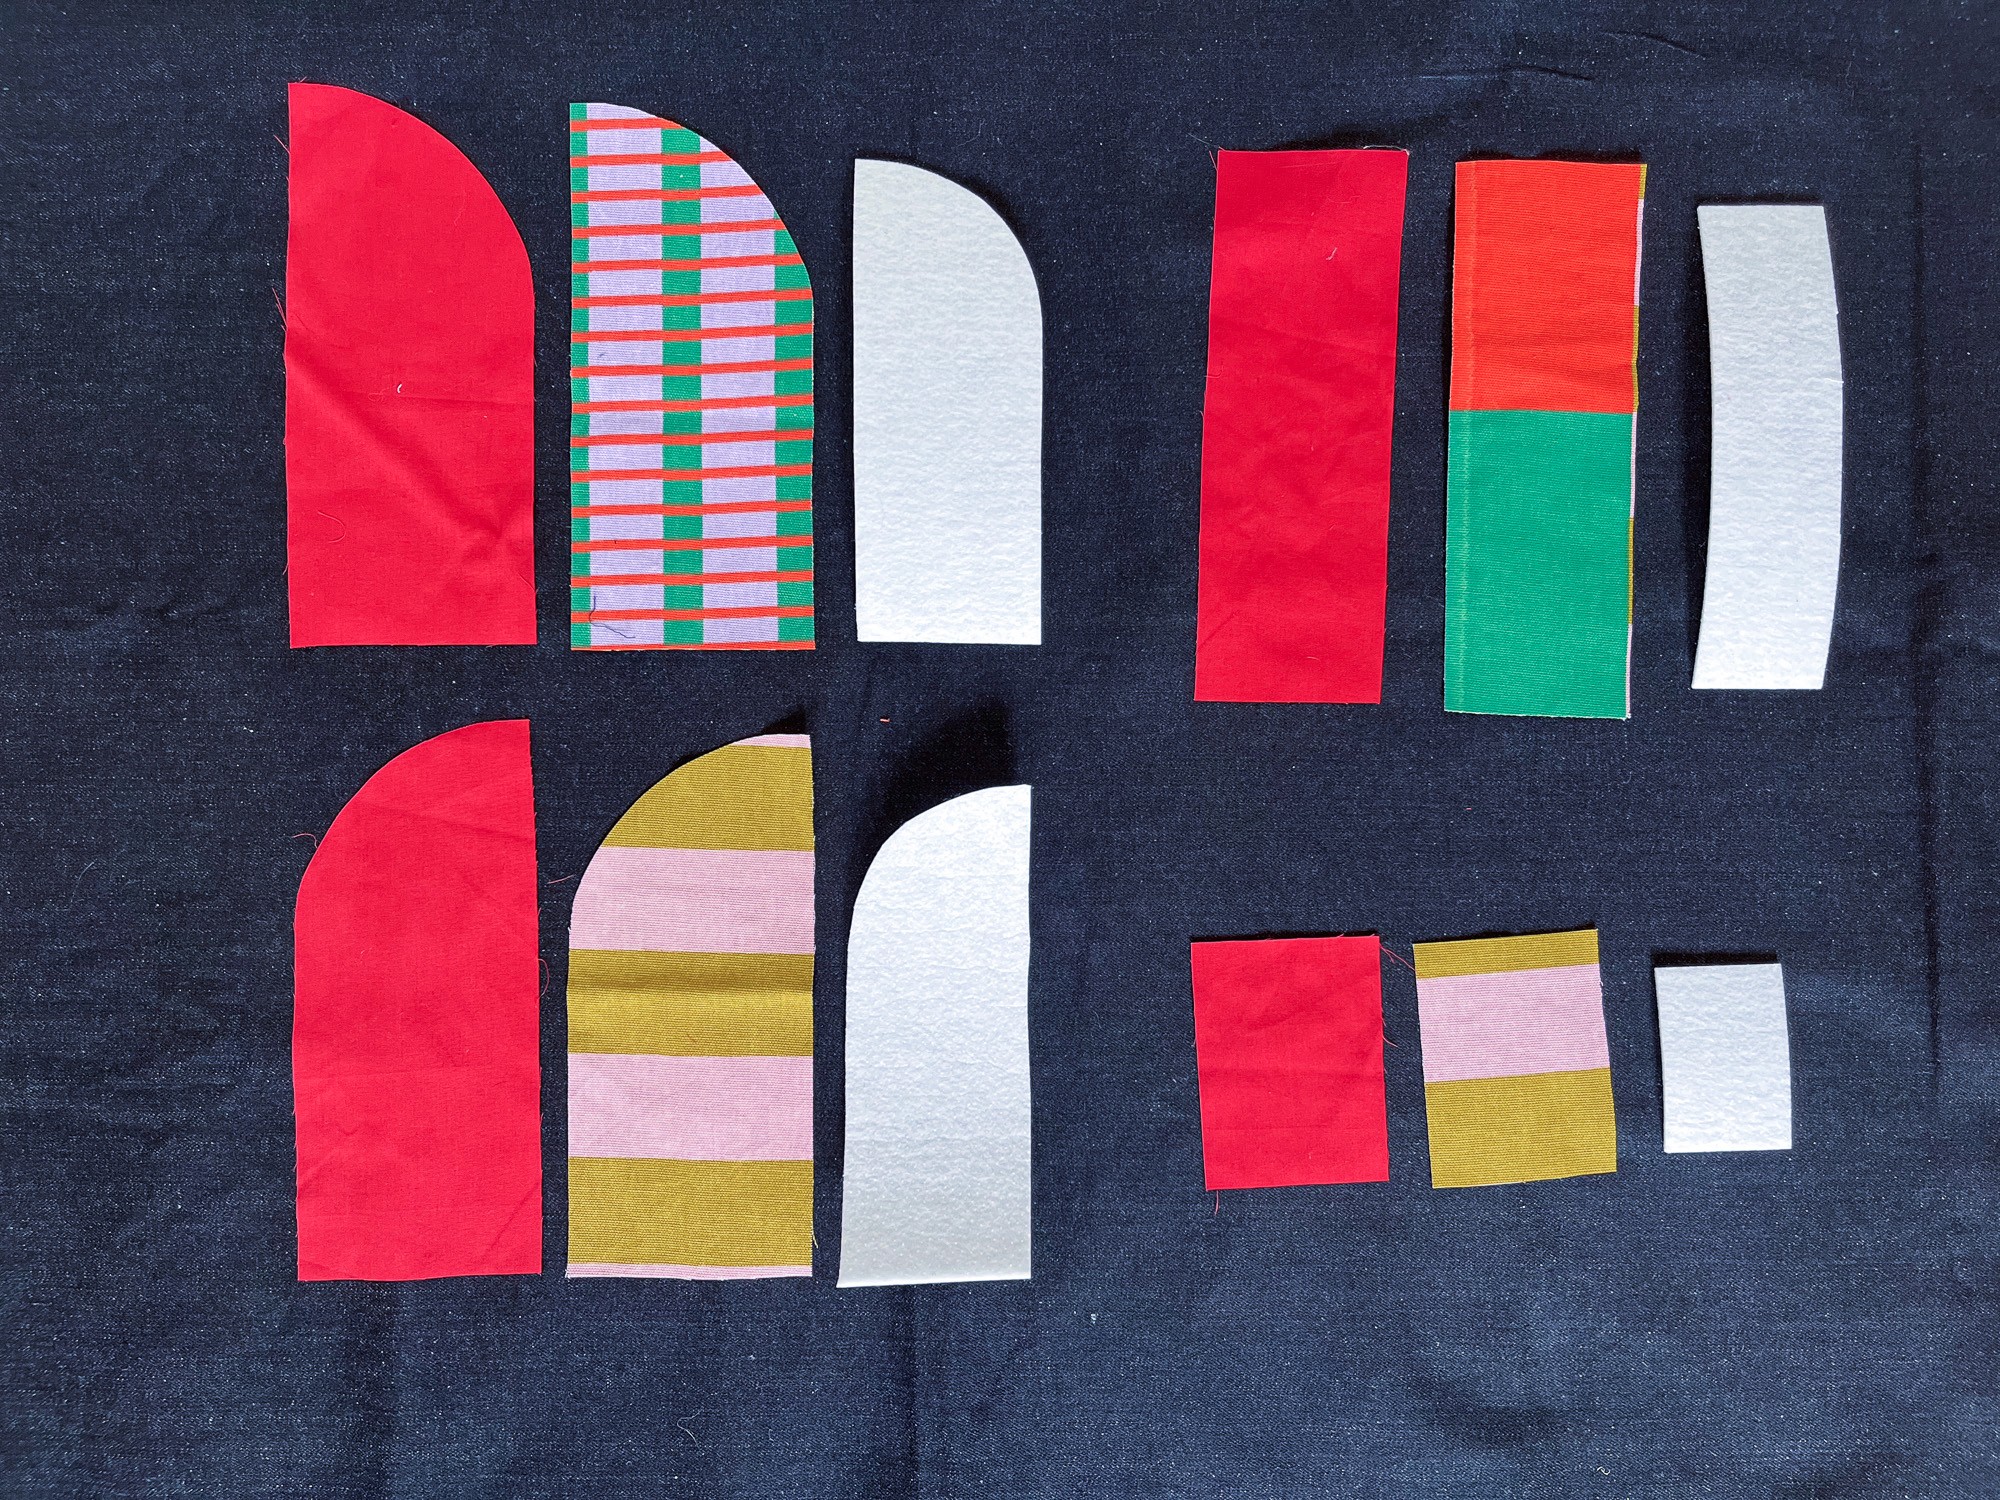
Sew each panel's outer and lining fabric together into a pocket, then slide the insert between the two layers. Sew the open sides closed to fully enclose the inserts in the fabric.
Zipper
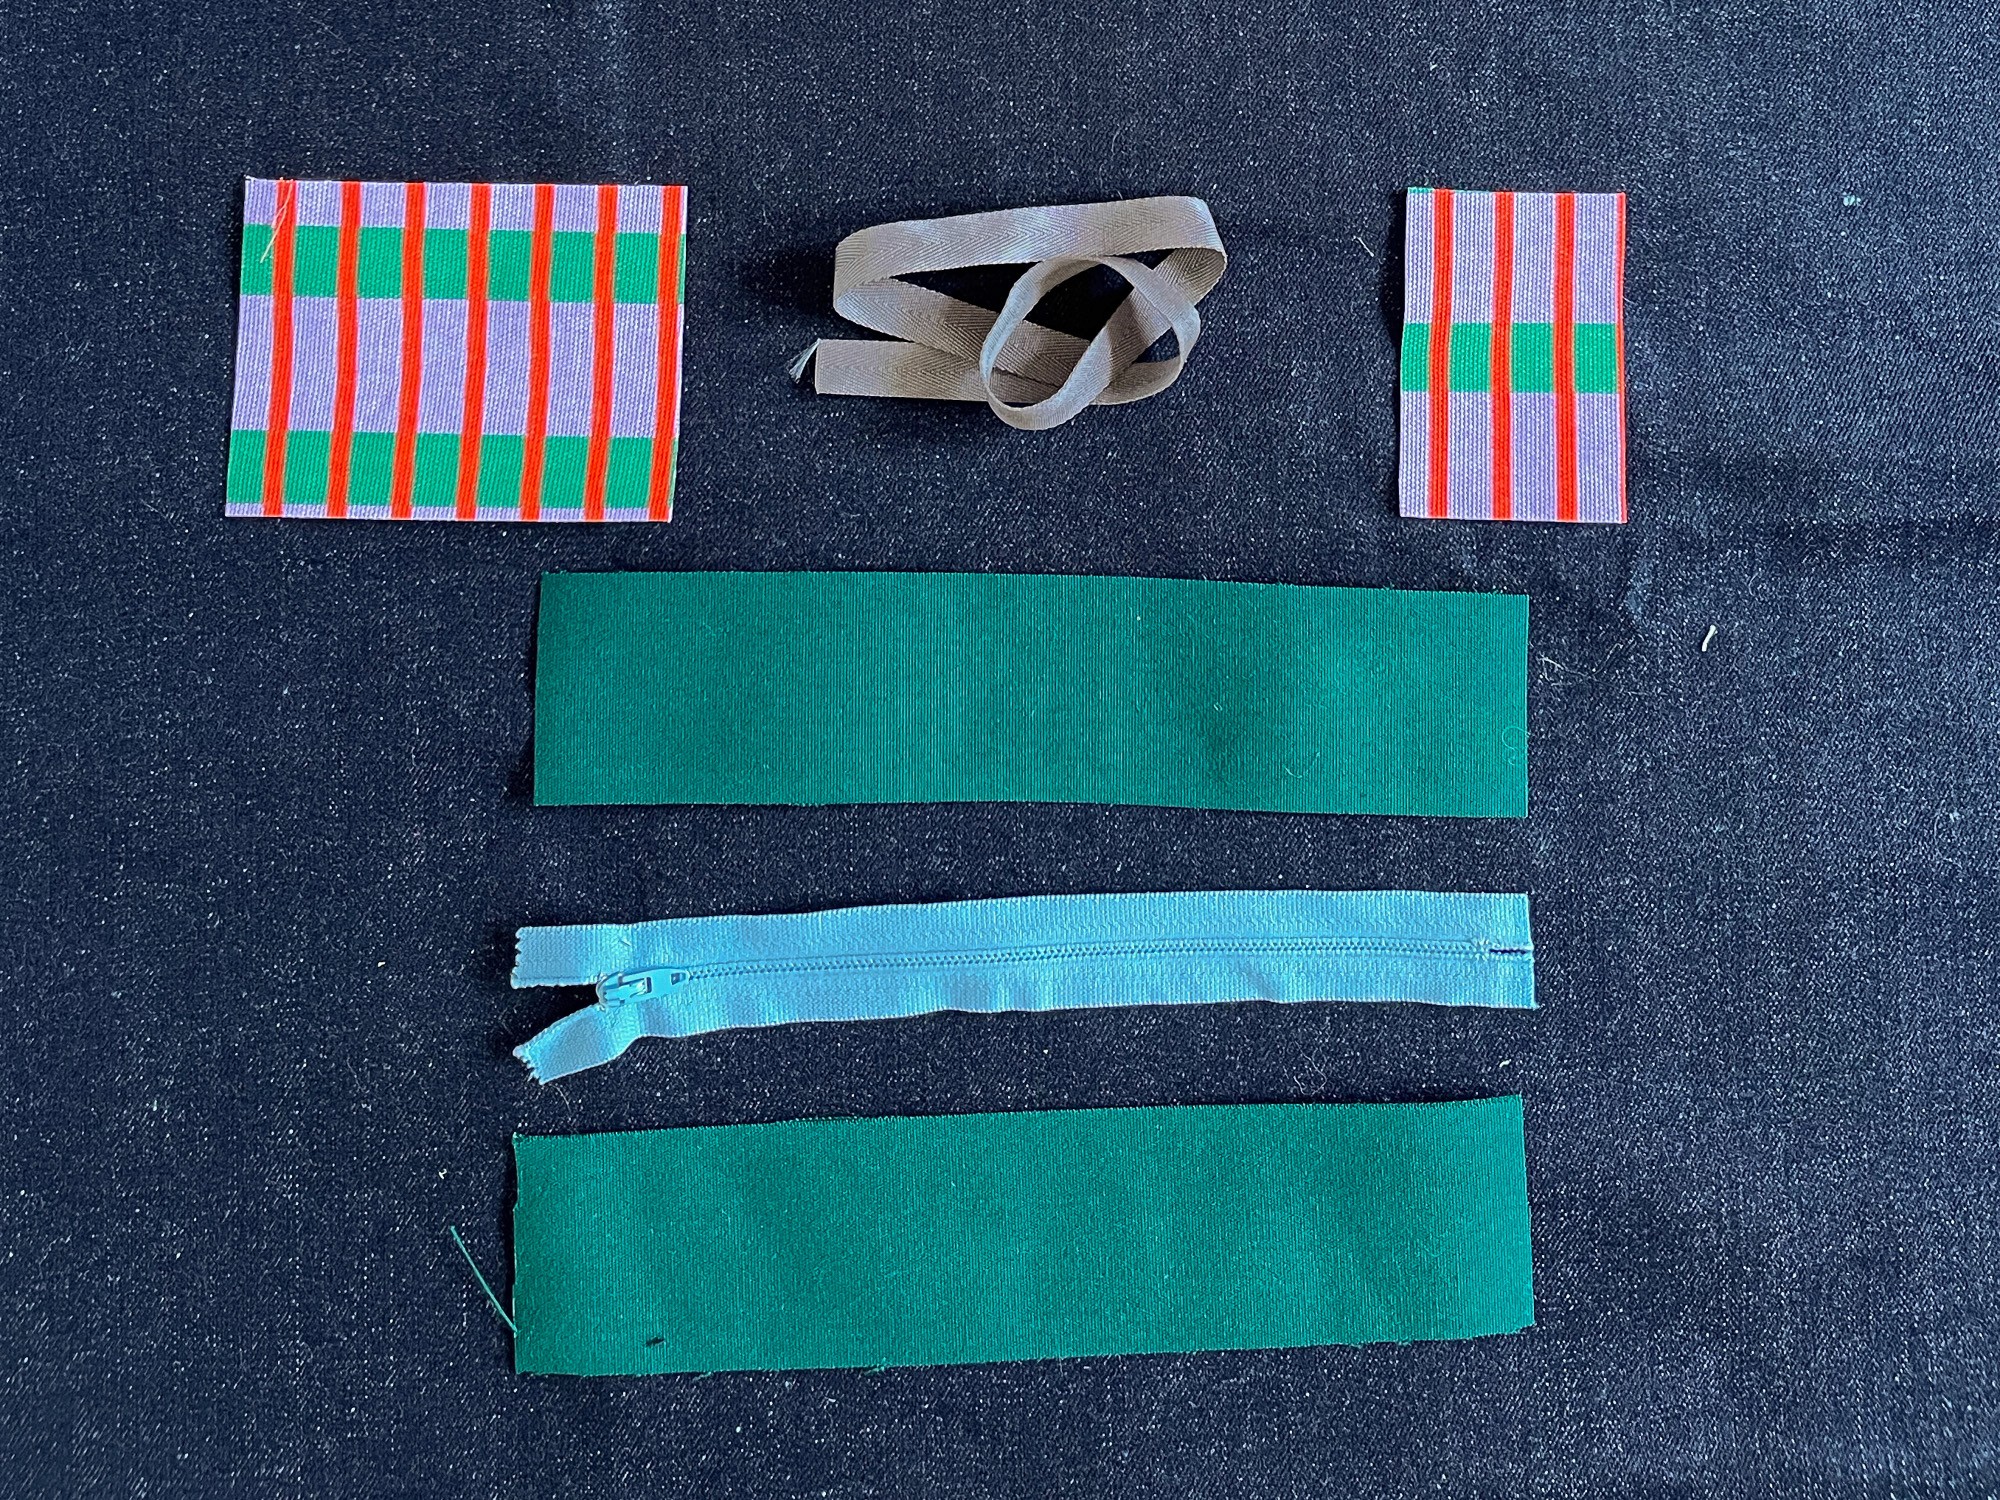
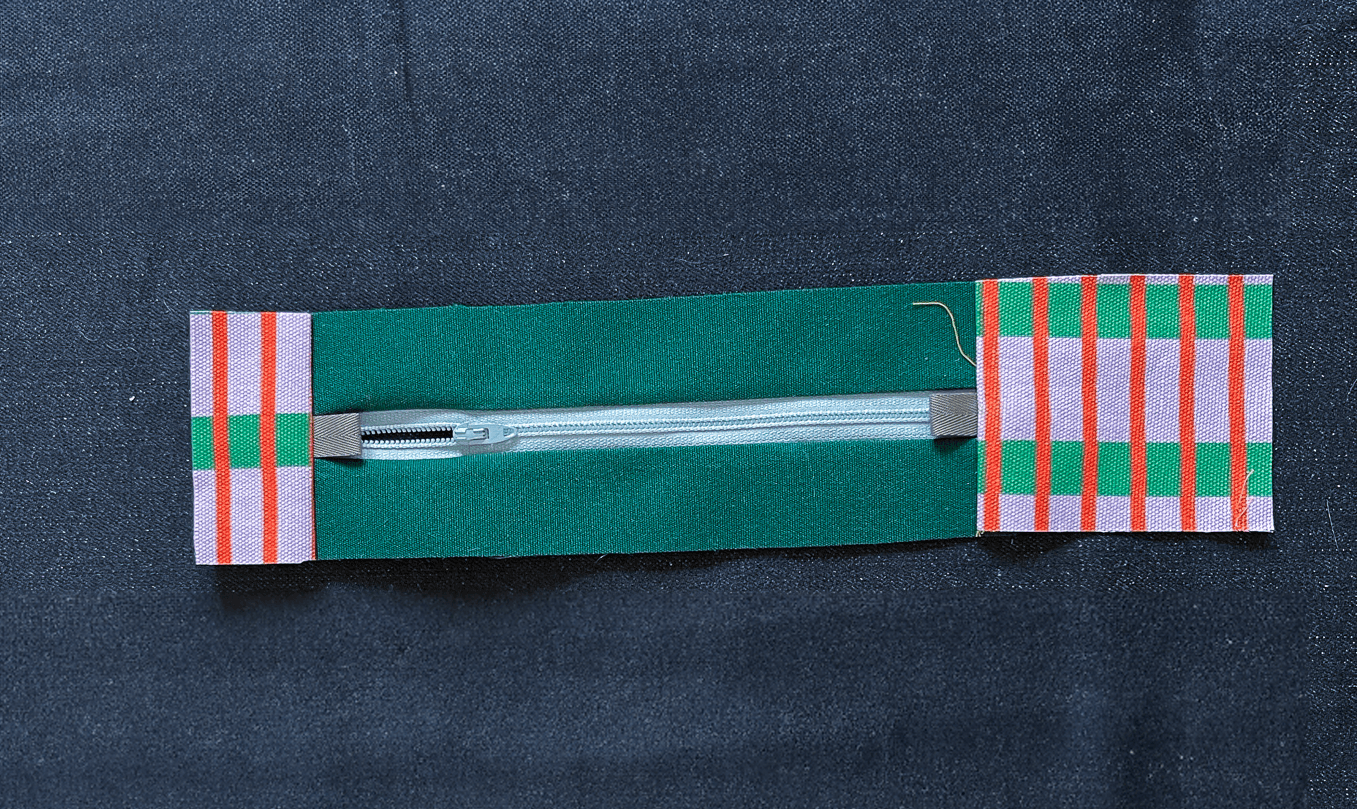
The zipper gusset does have a few pieces to keep track of. There is a strip of fabric on each side of the zipper, and then another rectangle on each end.
The good news is you don't need to sew or measure it too exactly. Once you put it together, you can trim it down to size.
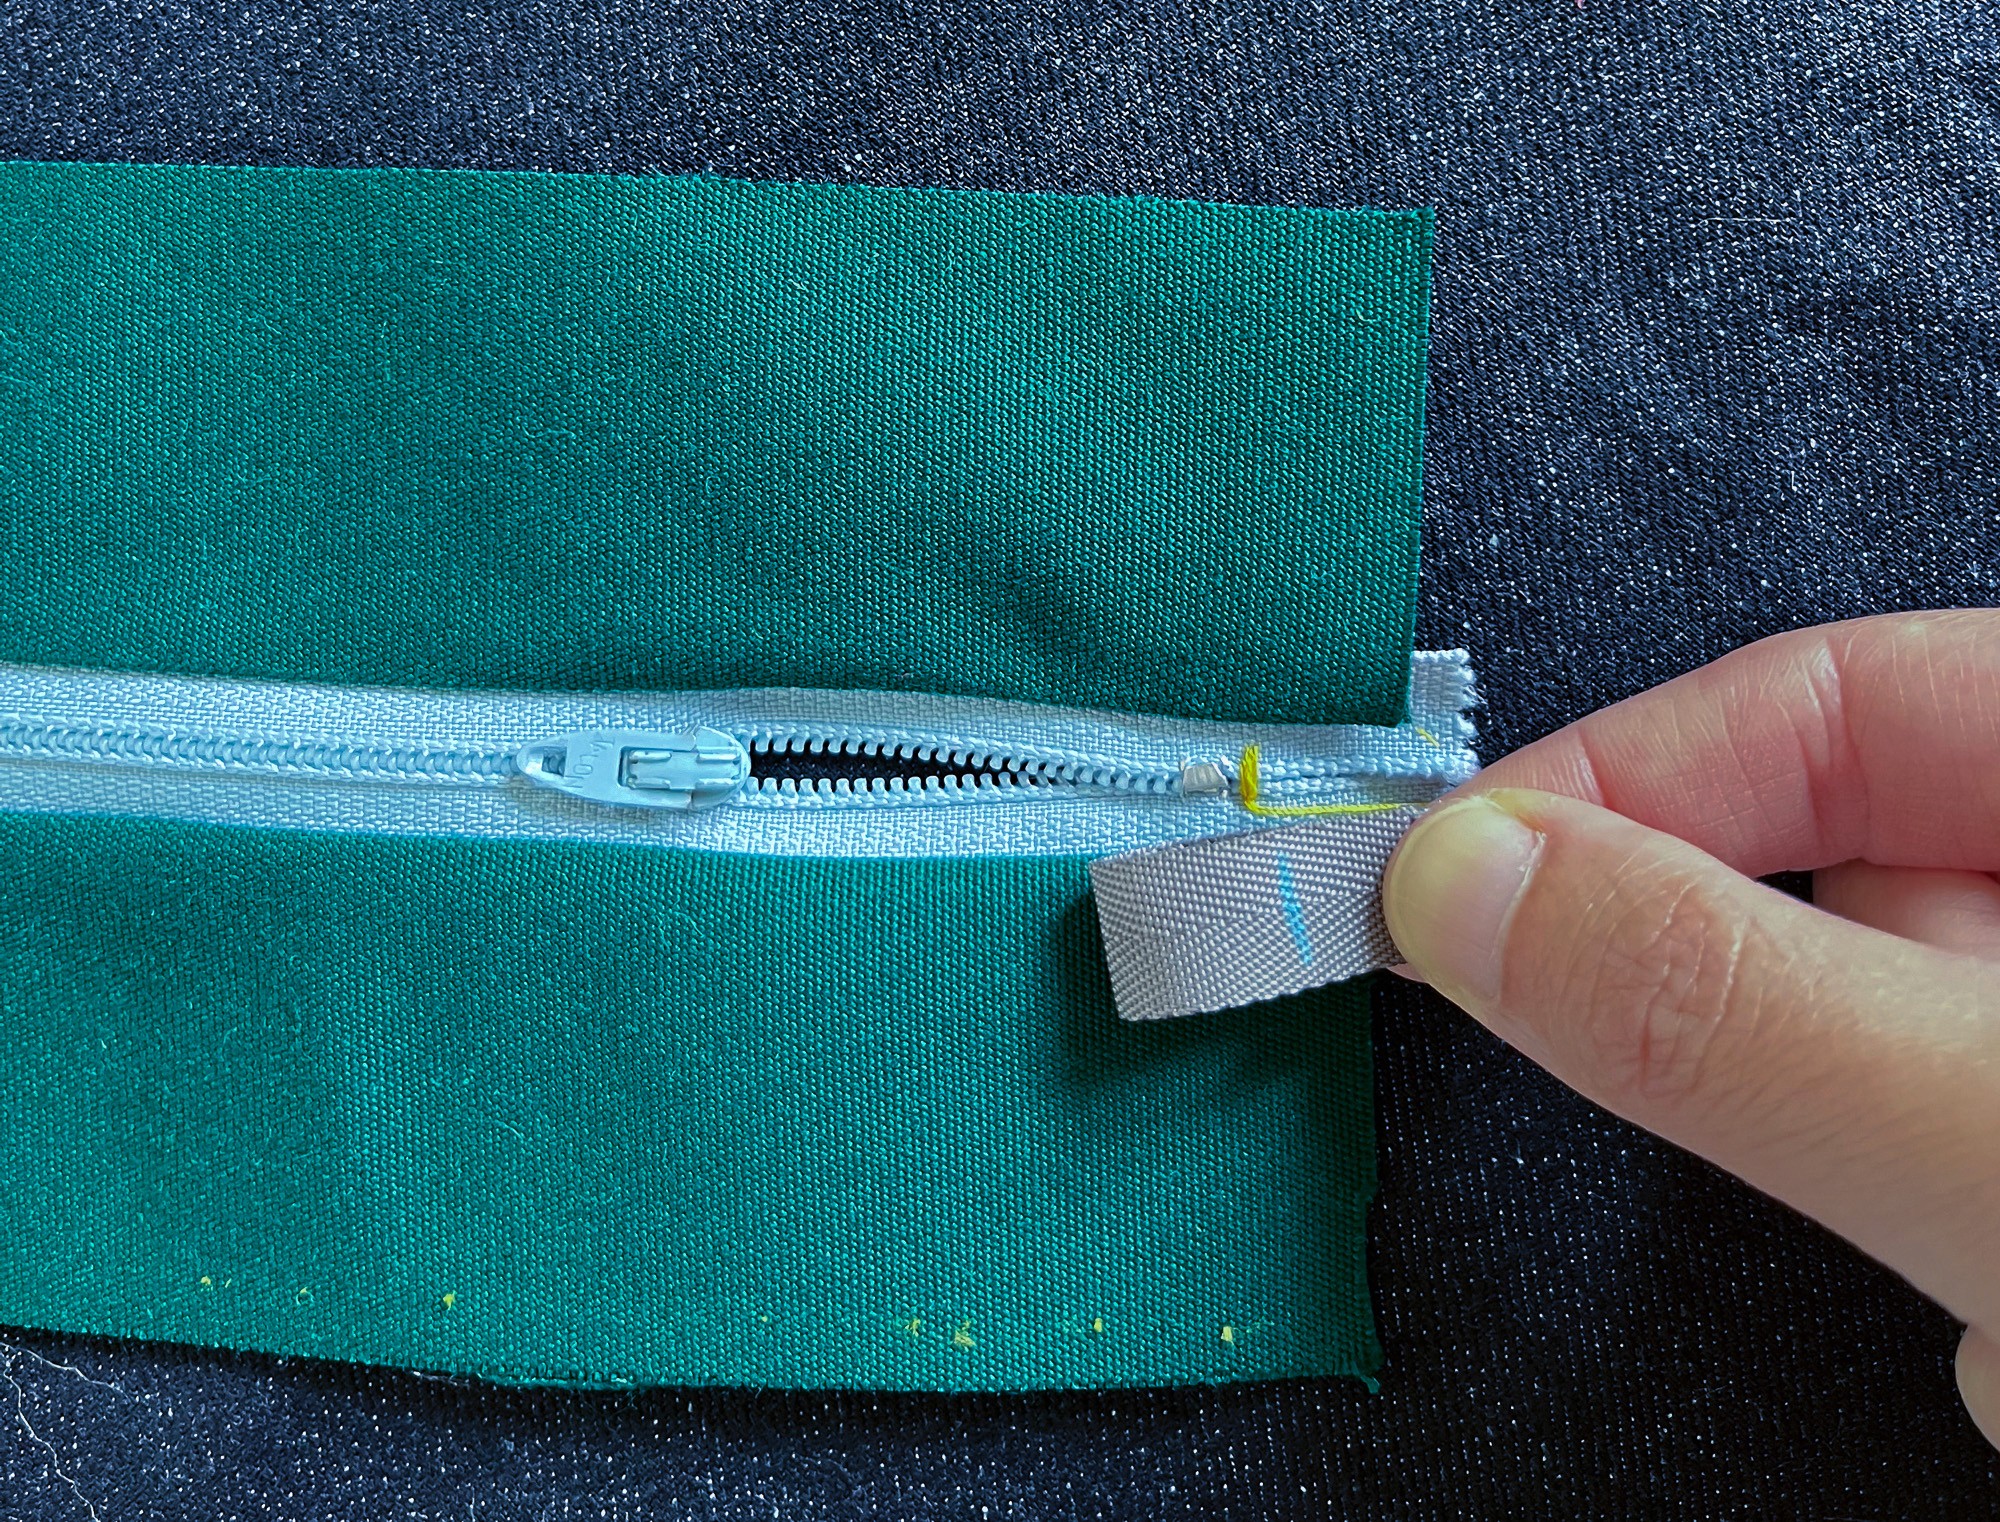
The key part of the zipper gusset is adding the zipper pull tab, because it doubles as the attachment for the cross-body strap. Sew a small loop of ribbon or lightweight webbing at each end of the zipper before you add on the end pieces.
At this stage, I intentionally leave the zipper gusset too long, and trim the excess once the bag is assembled. This puts less pressure on you getting everything to line up perfectly when you attach it to the curved sides.
Assembly
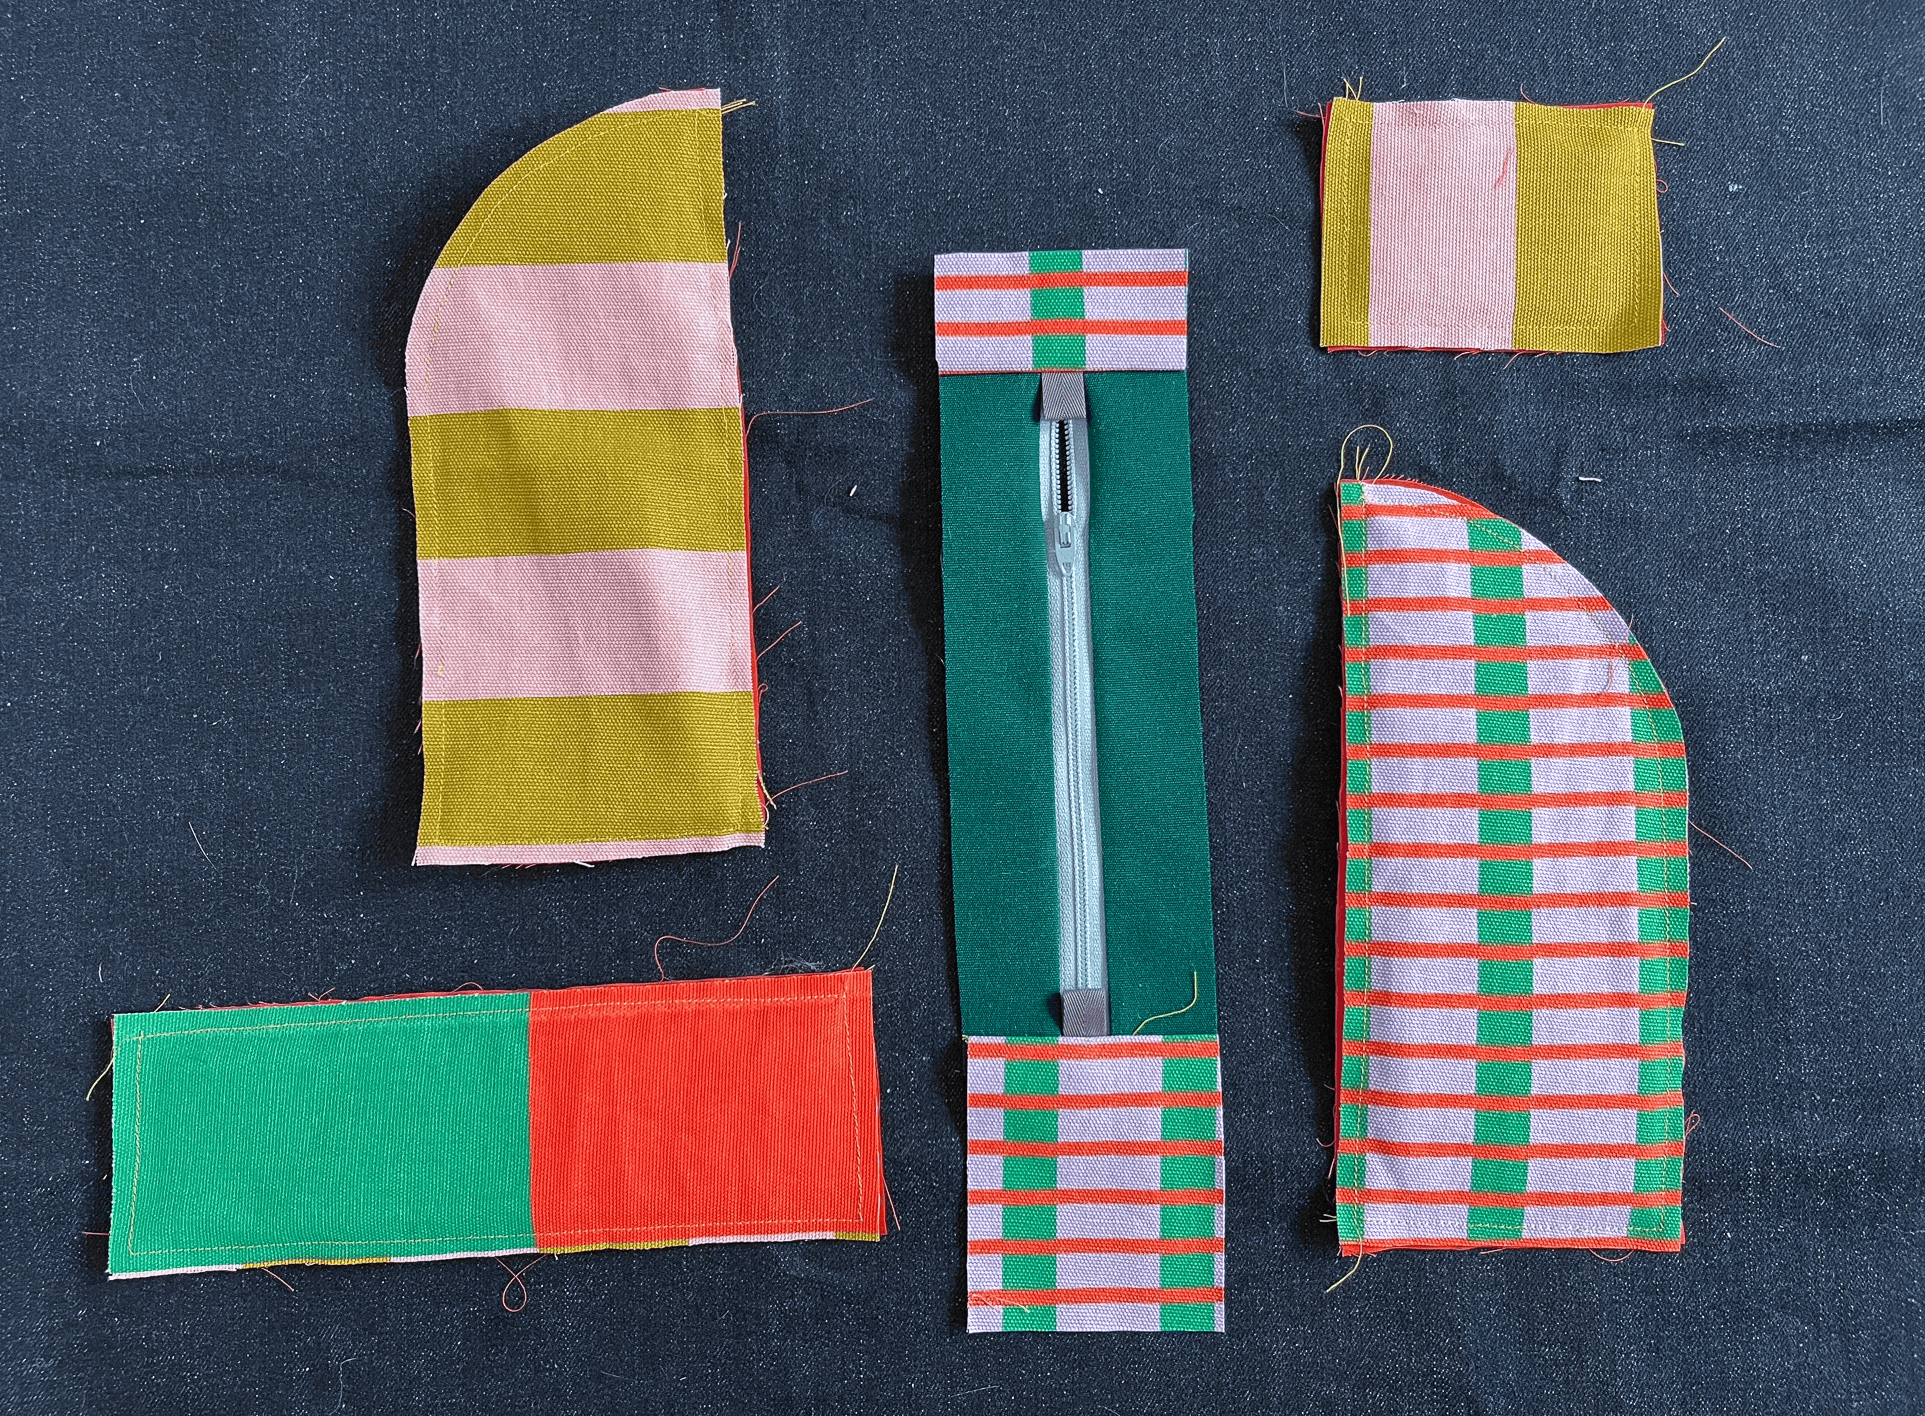
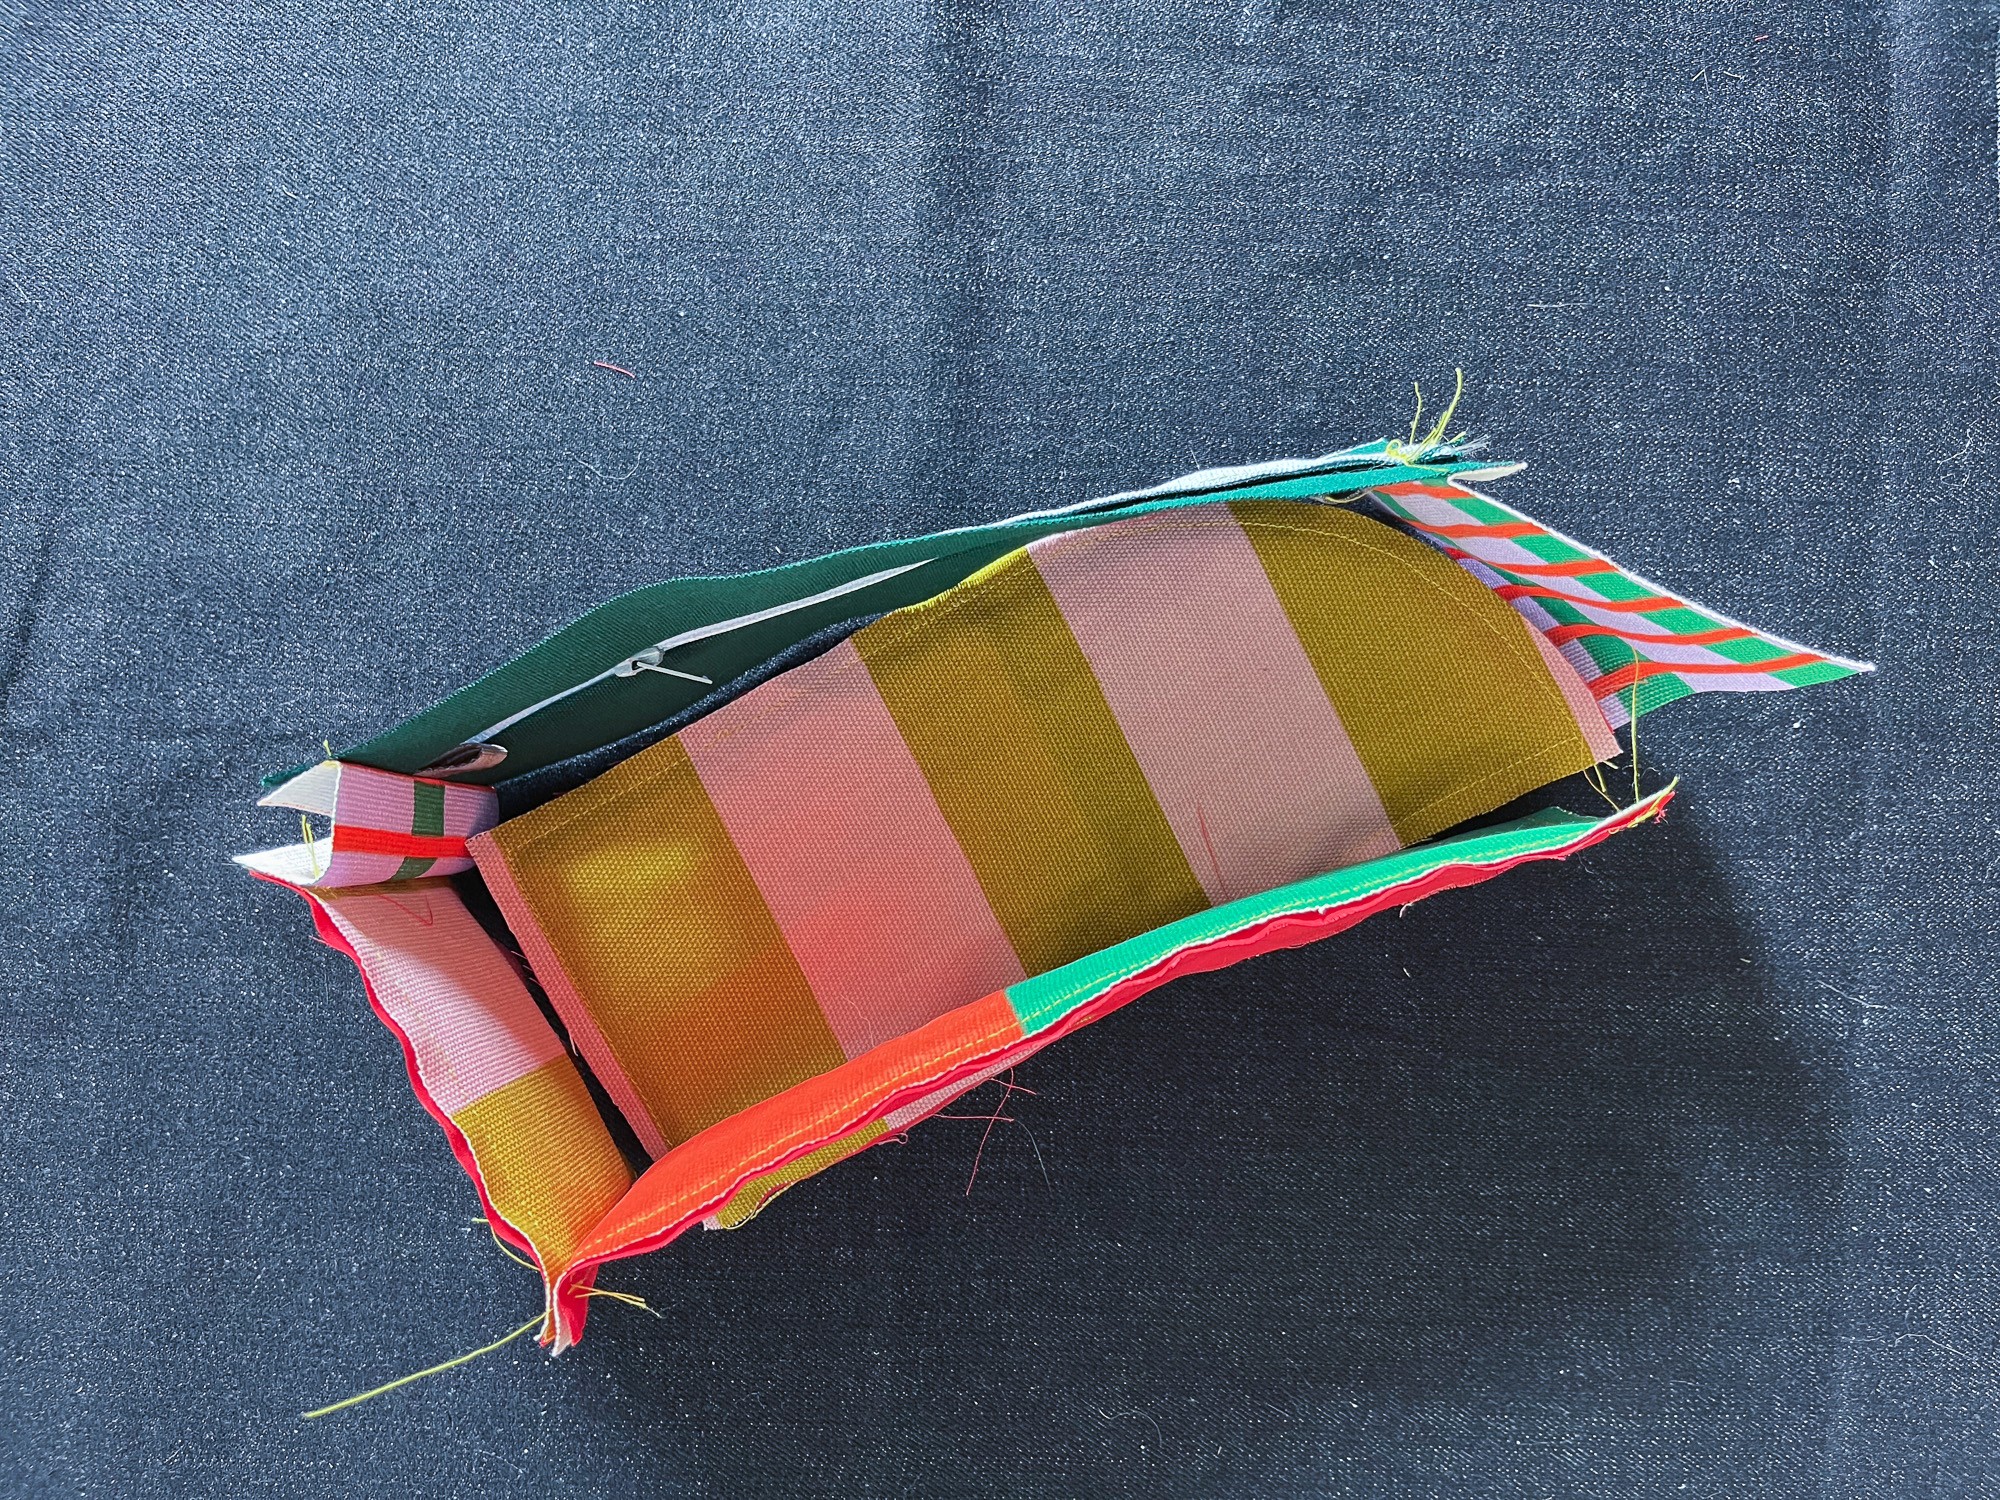
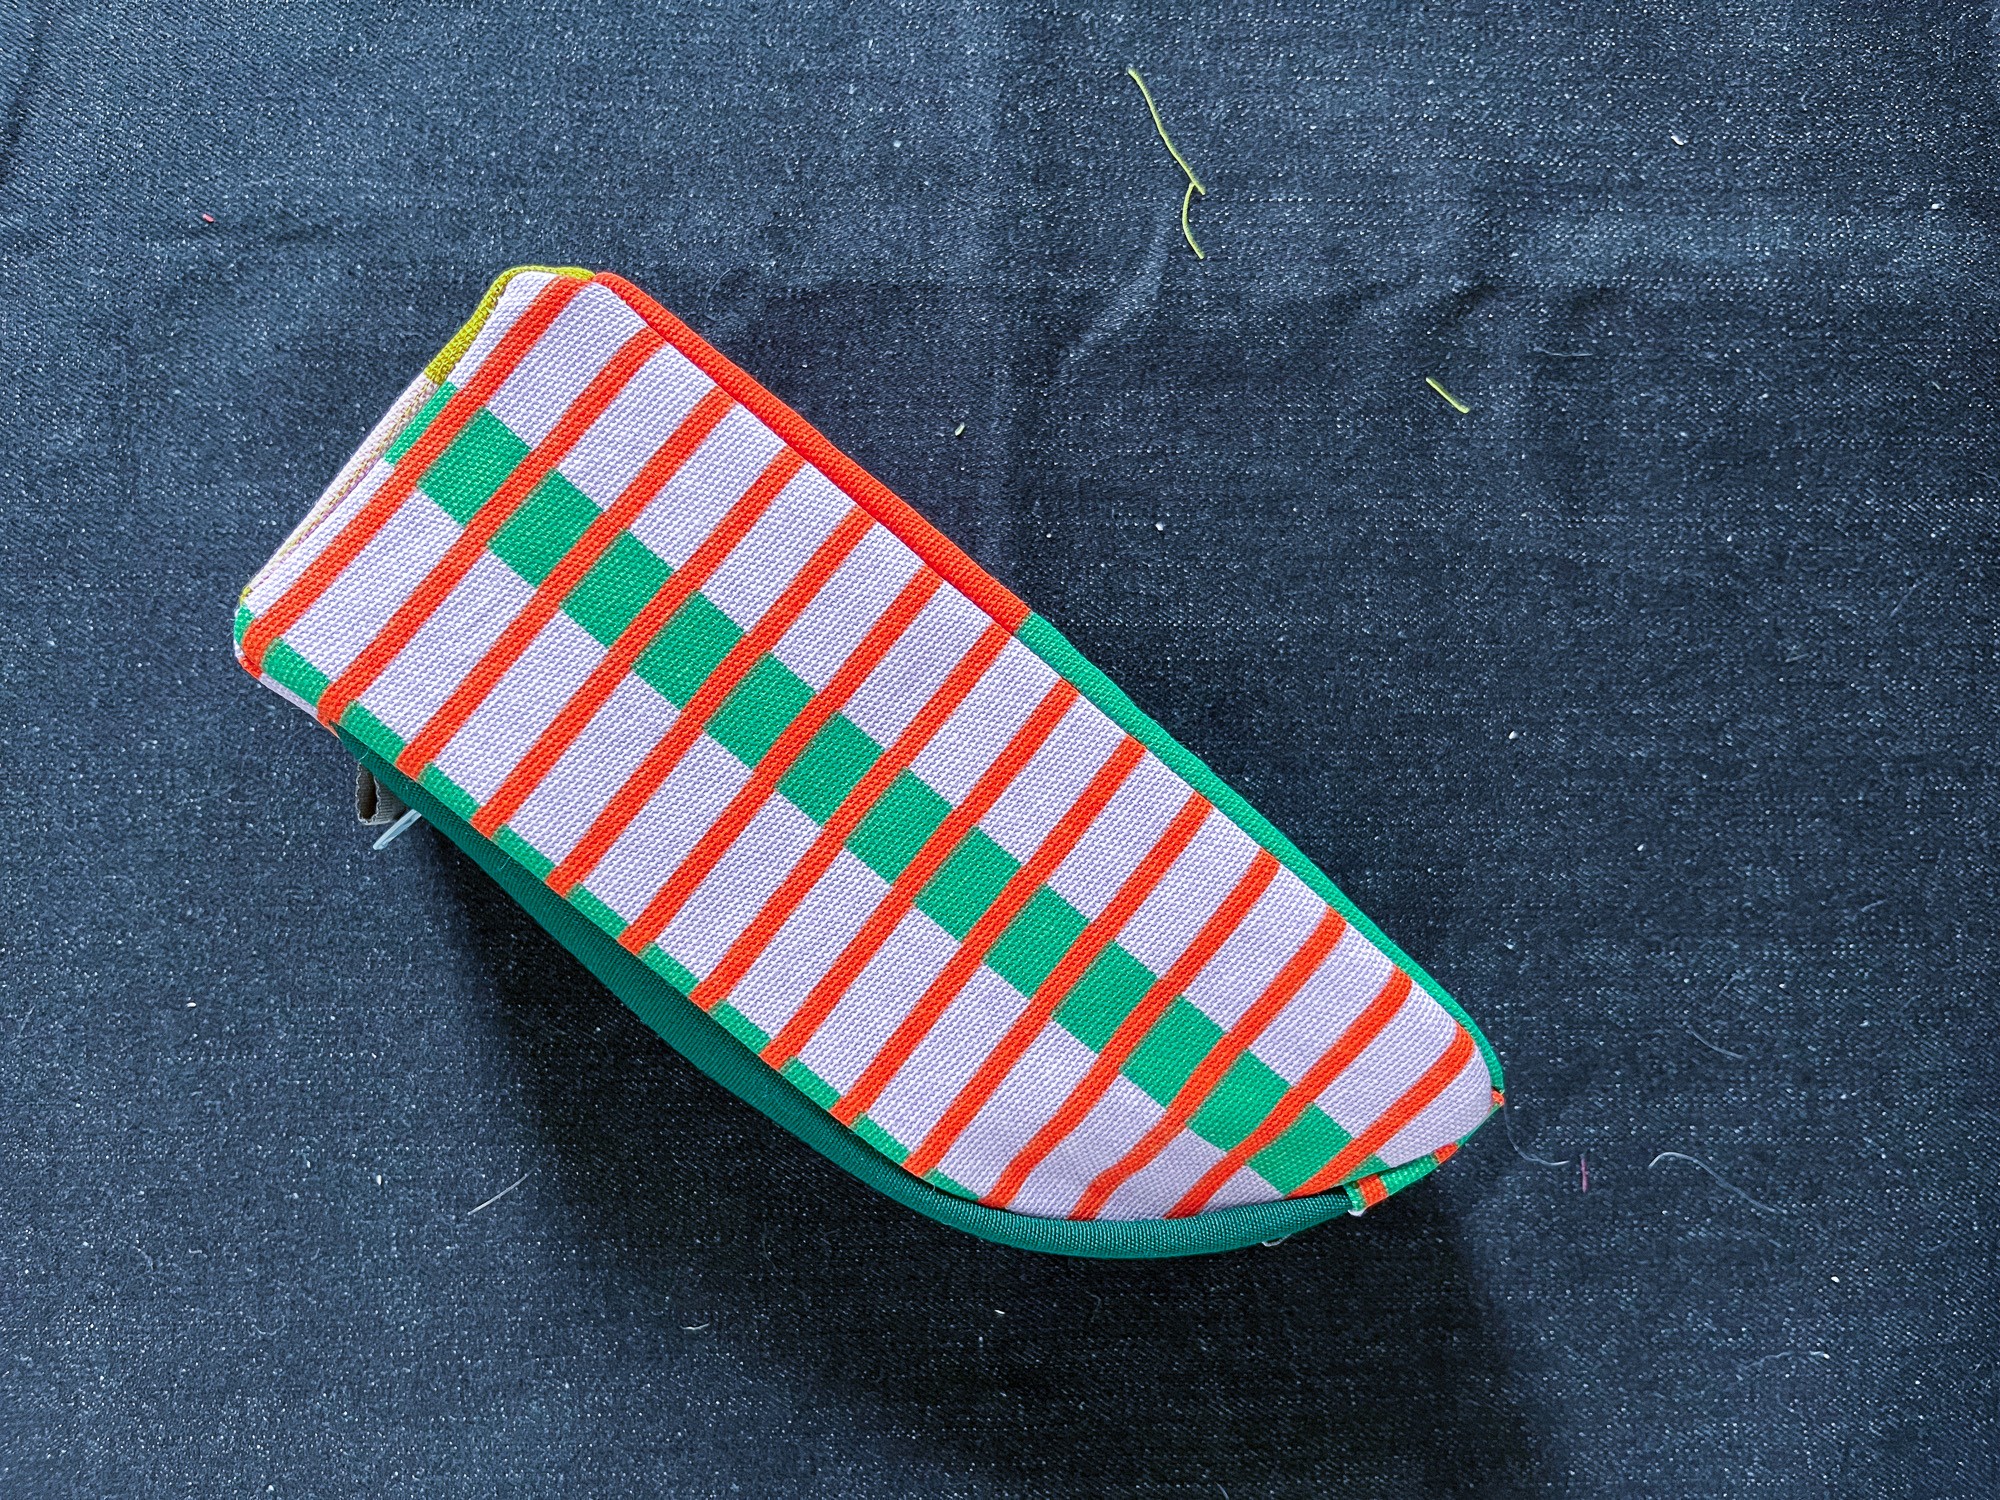
After you create all the interfacing sandwiches, you should have pieces for all the sides that look like this:
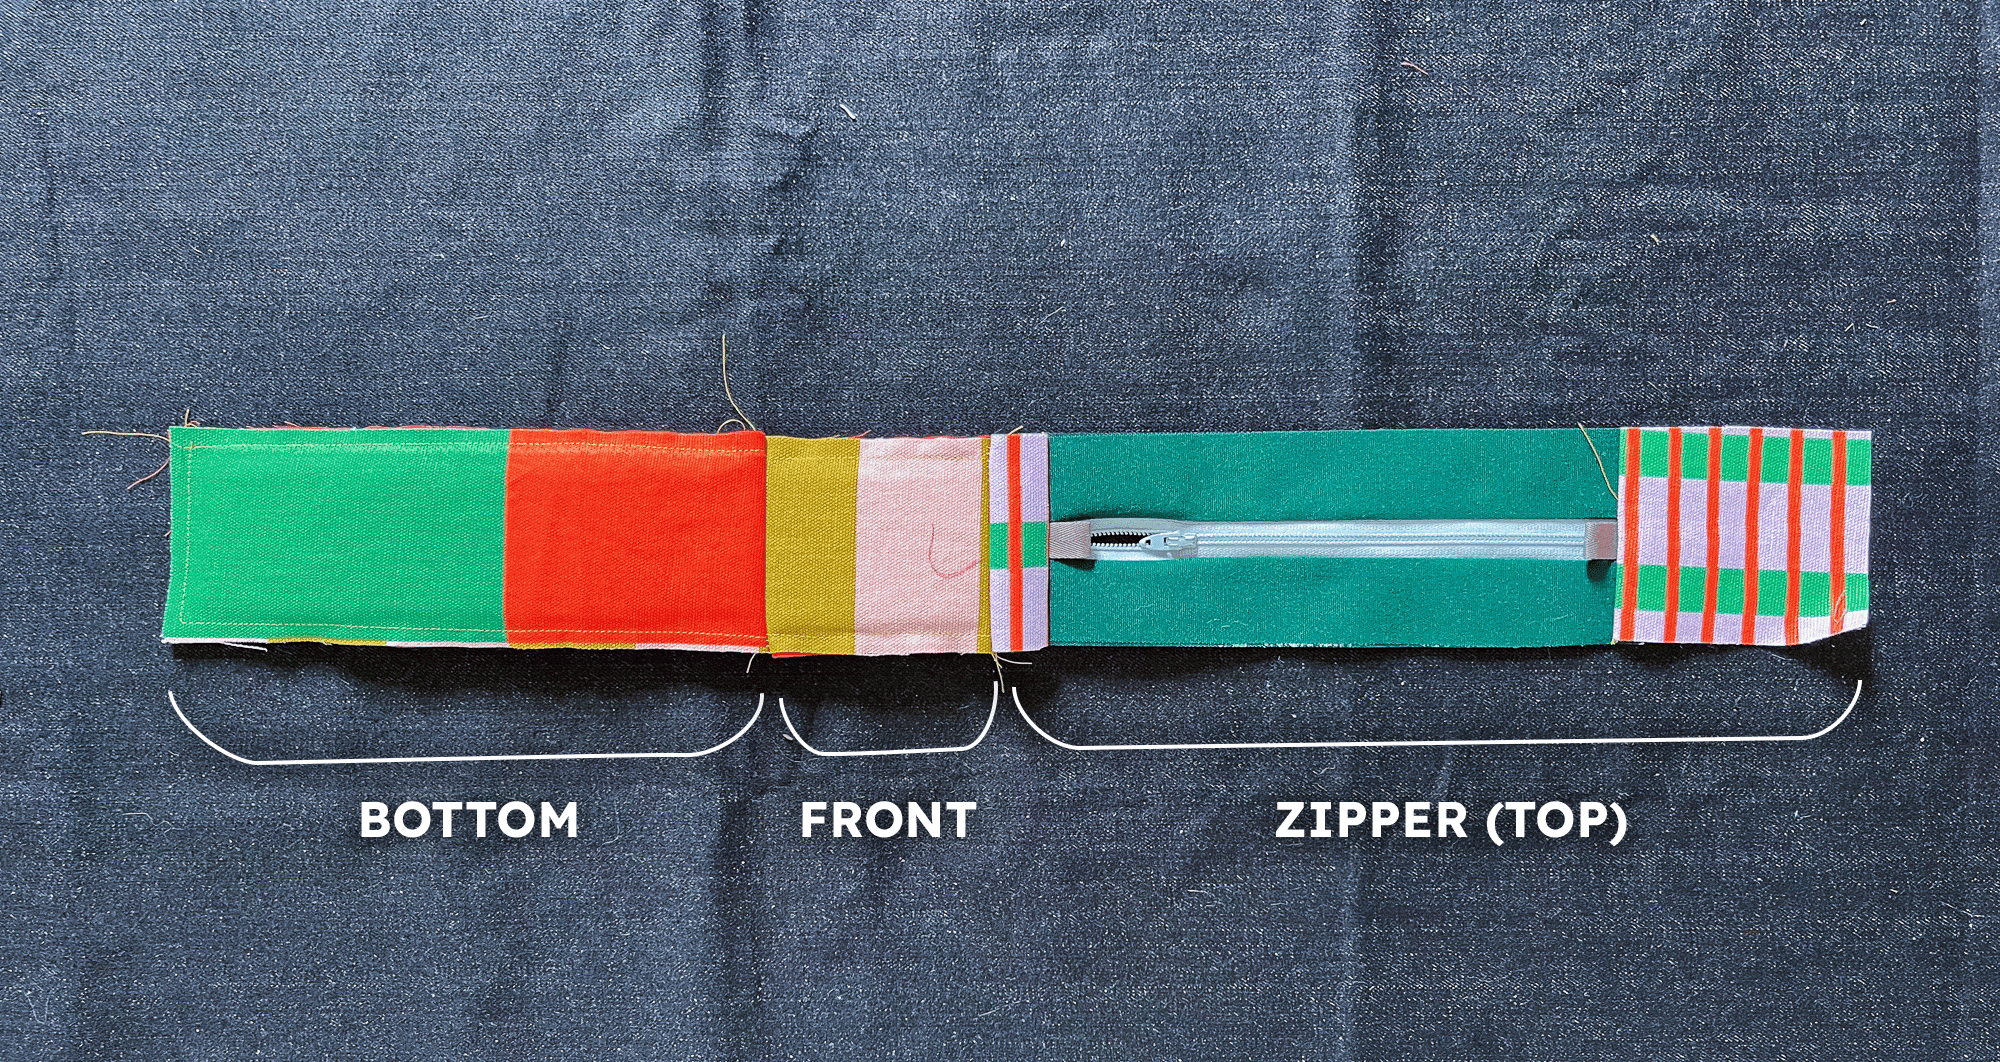
The basic assembly is now sewing a long strip of the bottom, front, and top of the bag. Then, attaching that to each side panel.
For assembling the panels, you'll sew through the outer and lining fabric layers, but not through the interfacing.
It helps to use a zipper foot and push the inserts away from your stitch line. The inserts have a little wiggle room inside the enclosure so you can push it toward the opposite side.
Before you start sewing, it's a good idea to wrap the long strip of panels around the side, just to verify you are attaching them correctly.
At each corner of the side panel, you pivot to the next section from the long strip.
For me, sewing the side panels is definitely the trickiest part of this project. It's tricky to get everything to line up around the curve while working with the thick inserts.
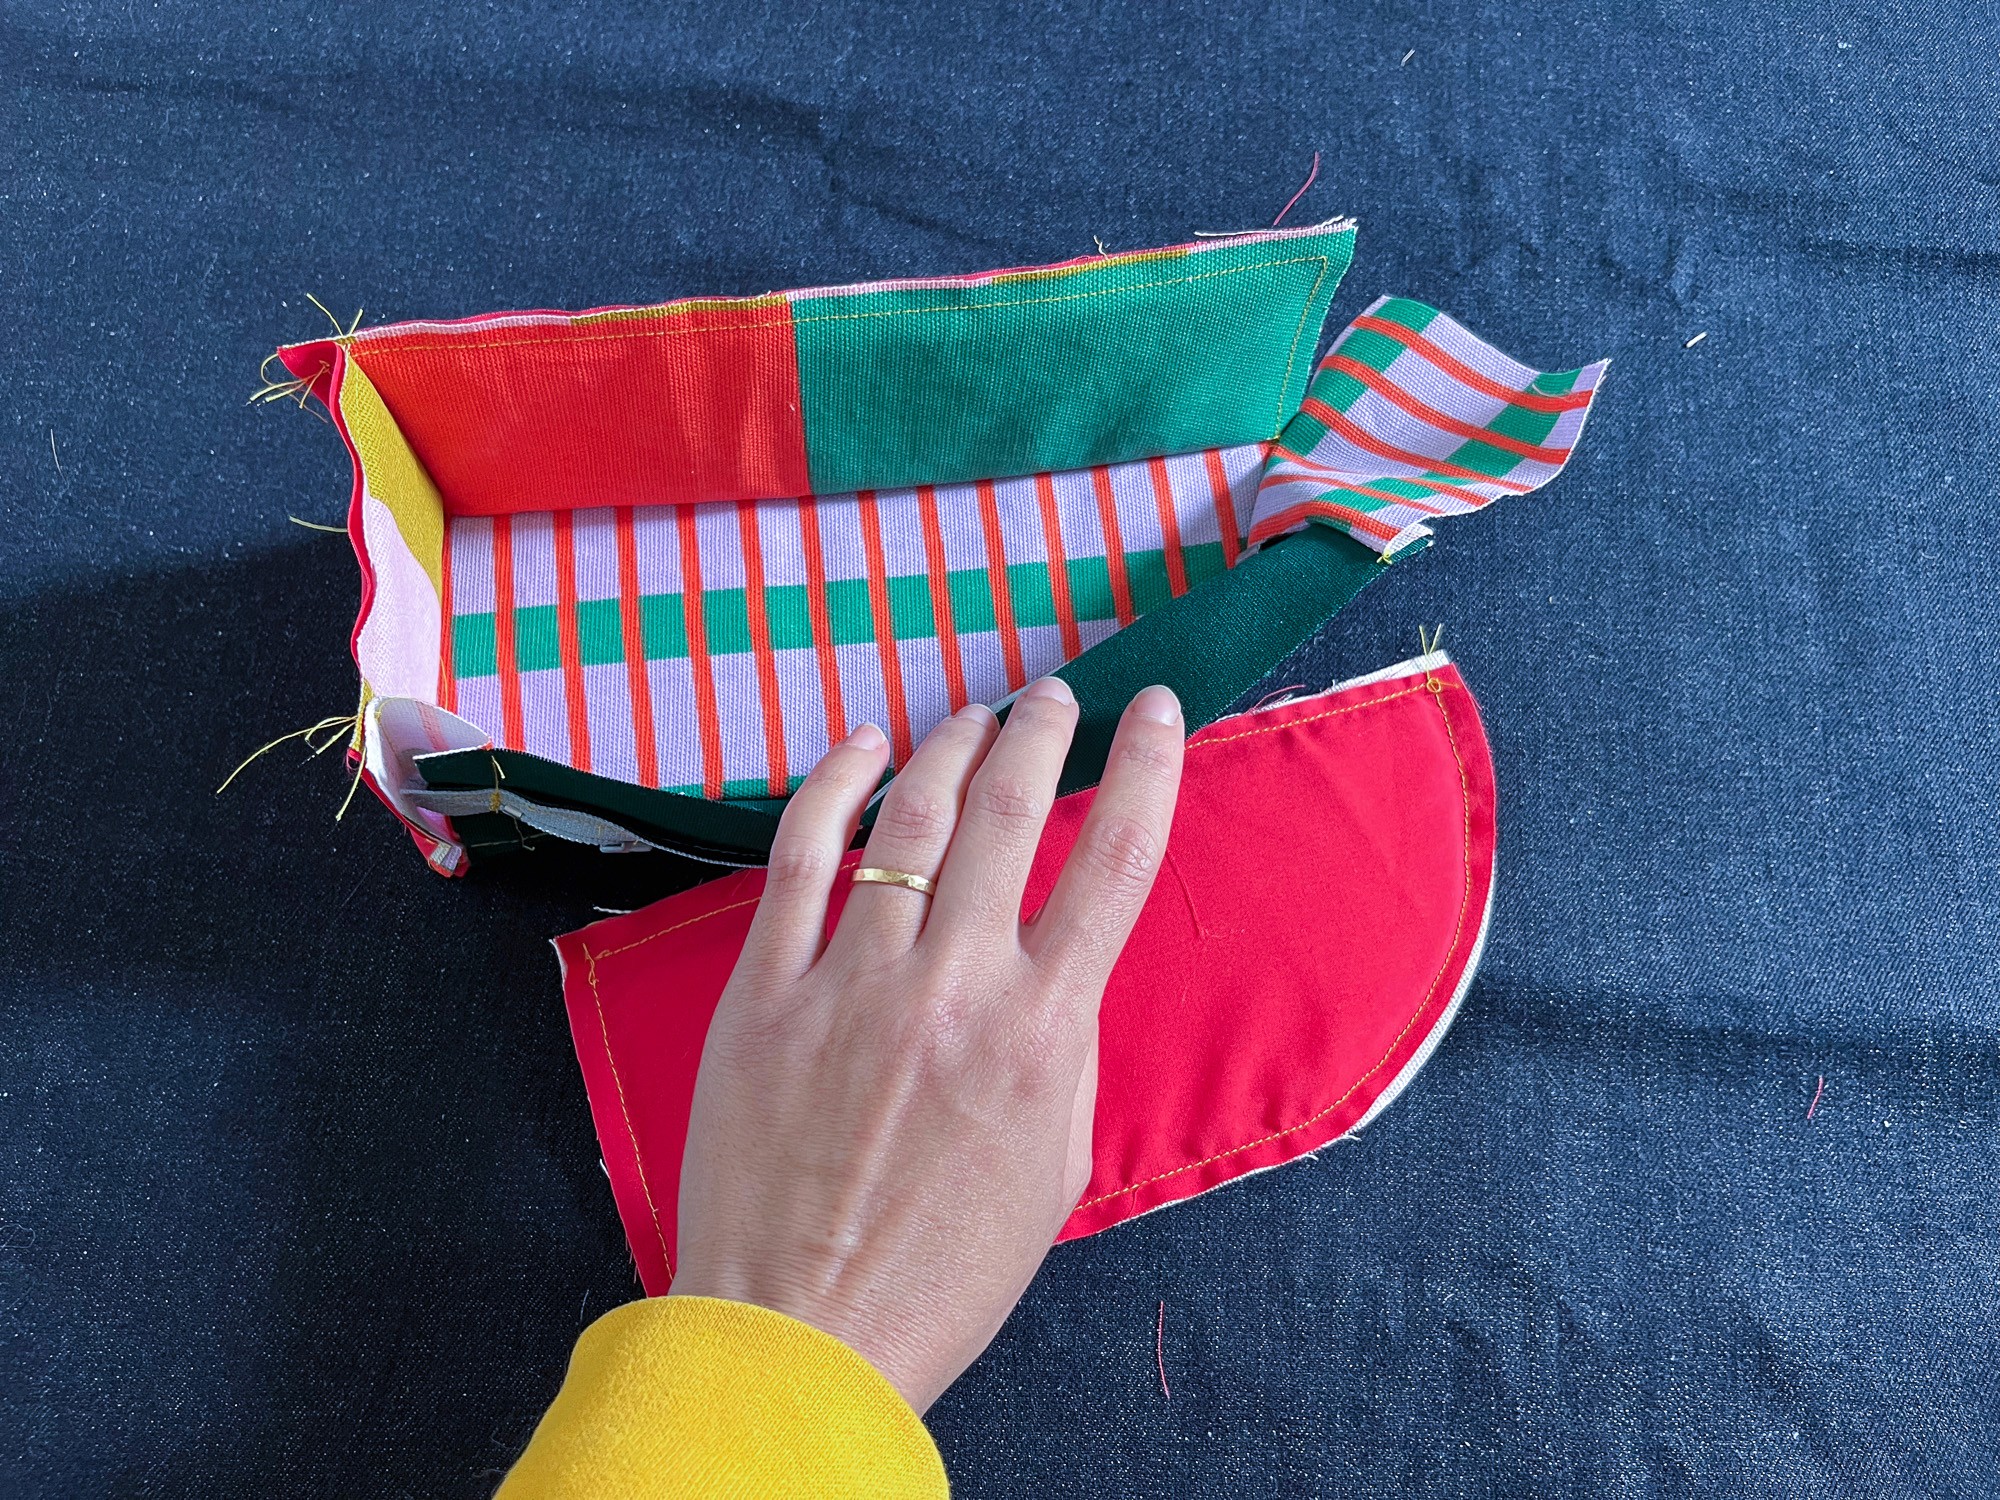
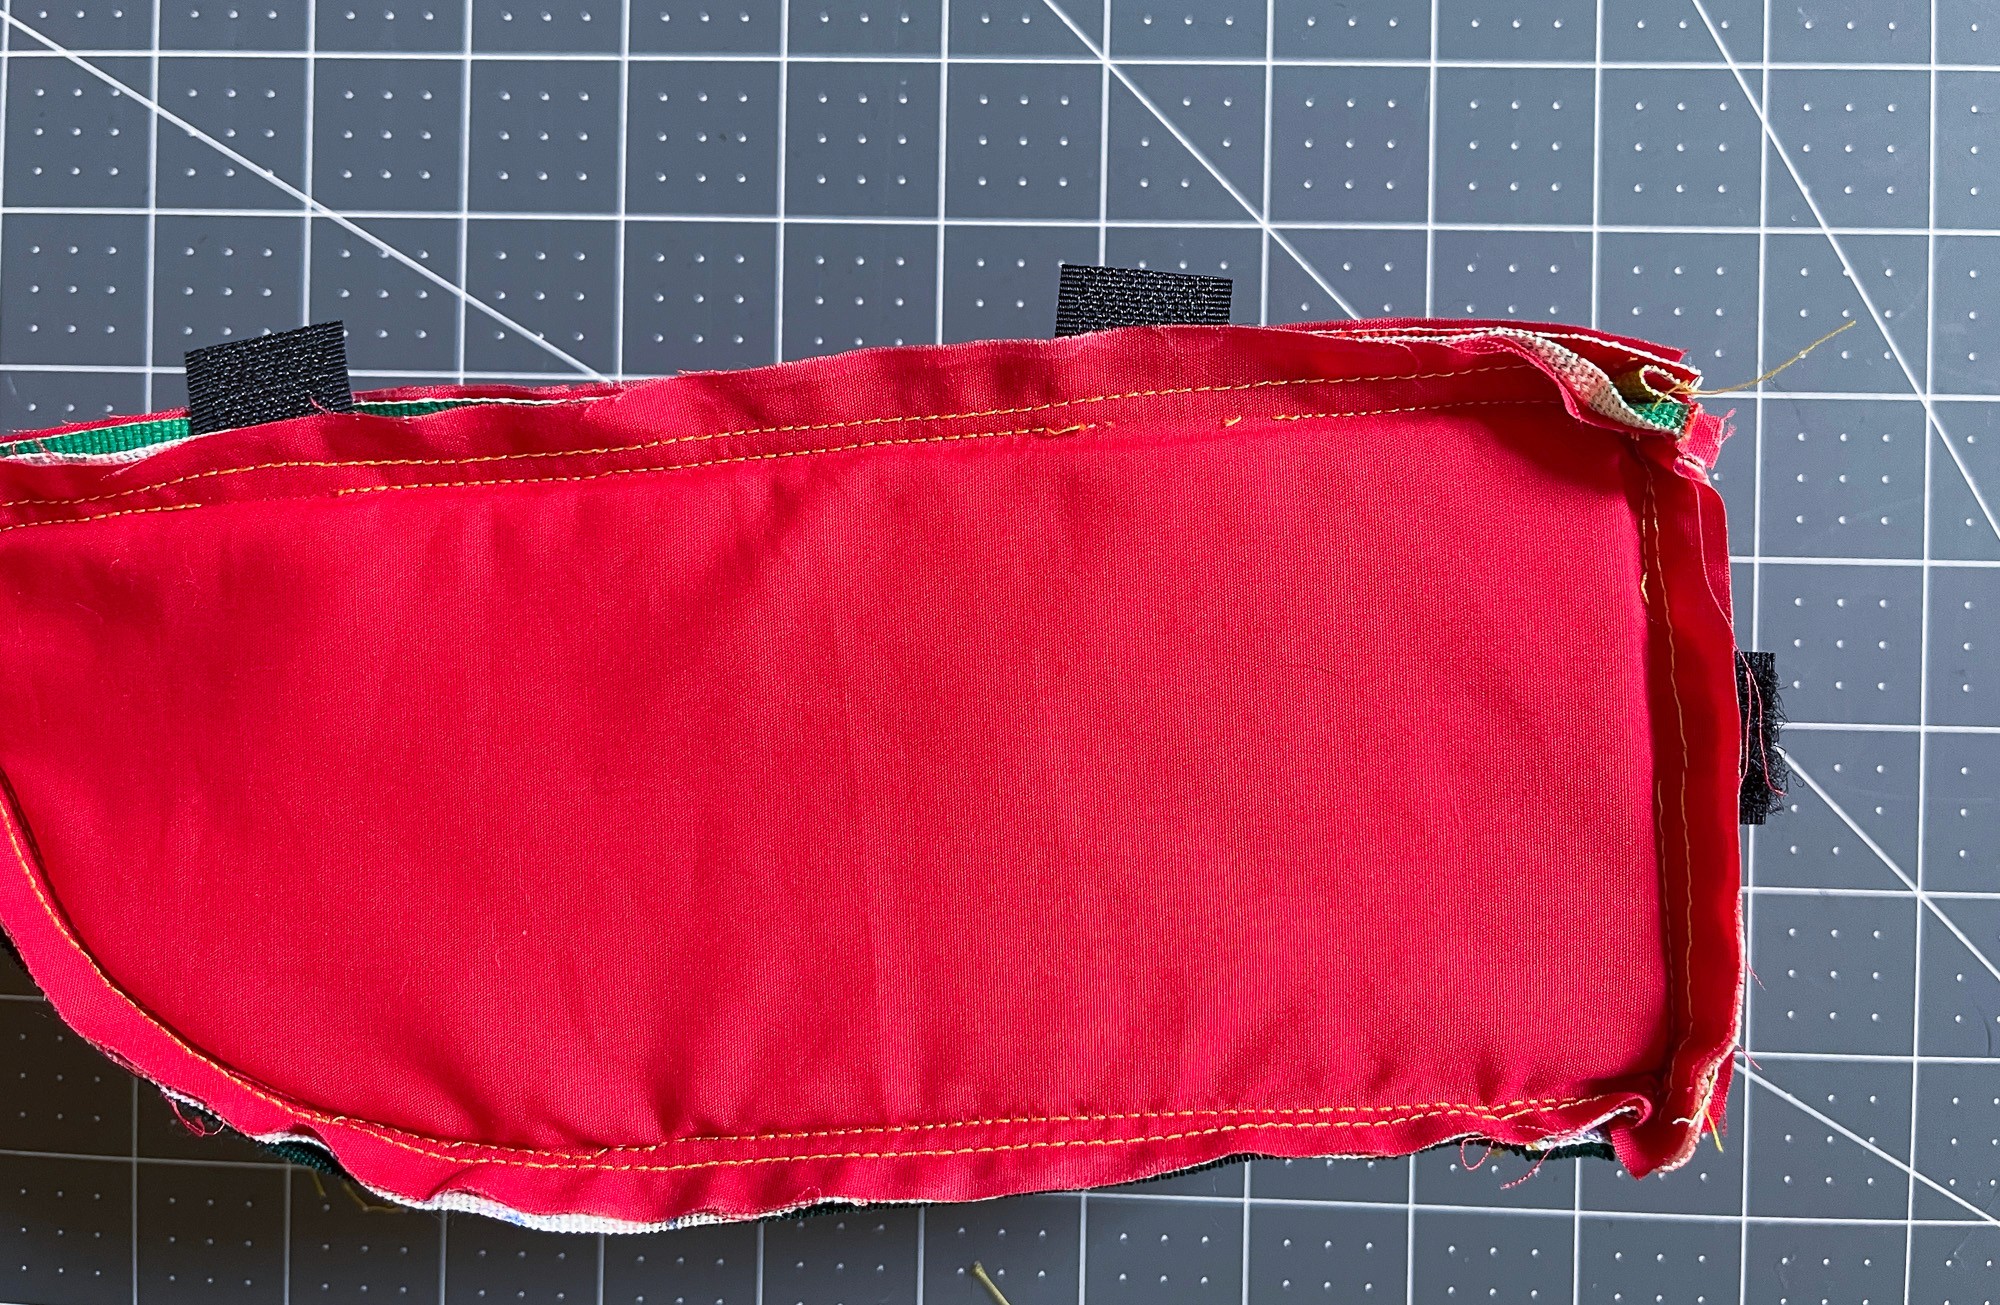
Once you've sewn all the way around, the side panel should be attached on all sides, with an open flap where the zipper gusset will connect to the bottom panel.
After you sew the second side panel, it should look like this. There should still be an opening at the back bottom edge of the bag, with the flap of excess zipper gusset fabric.
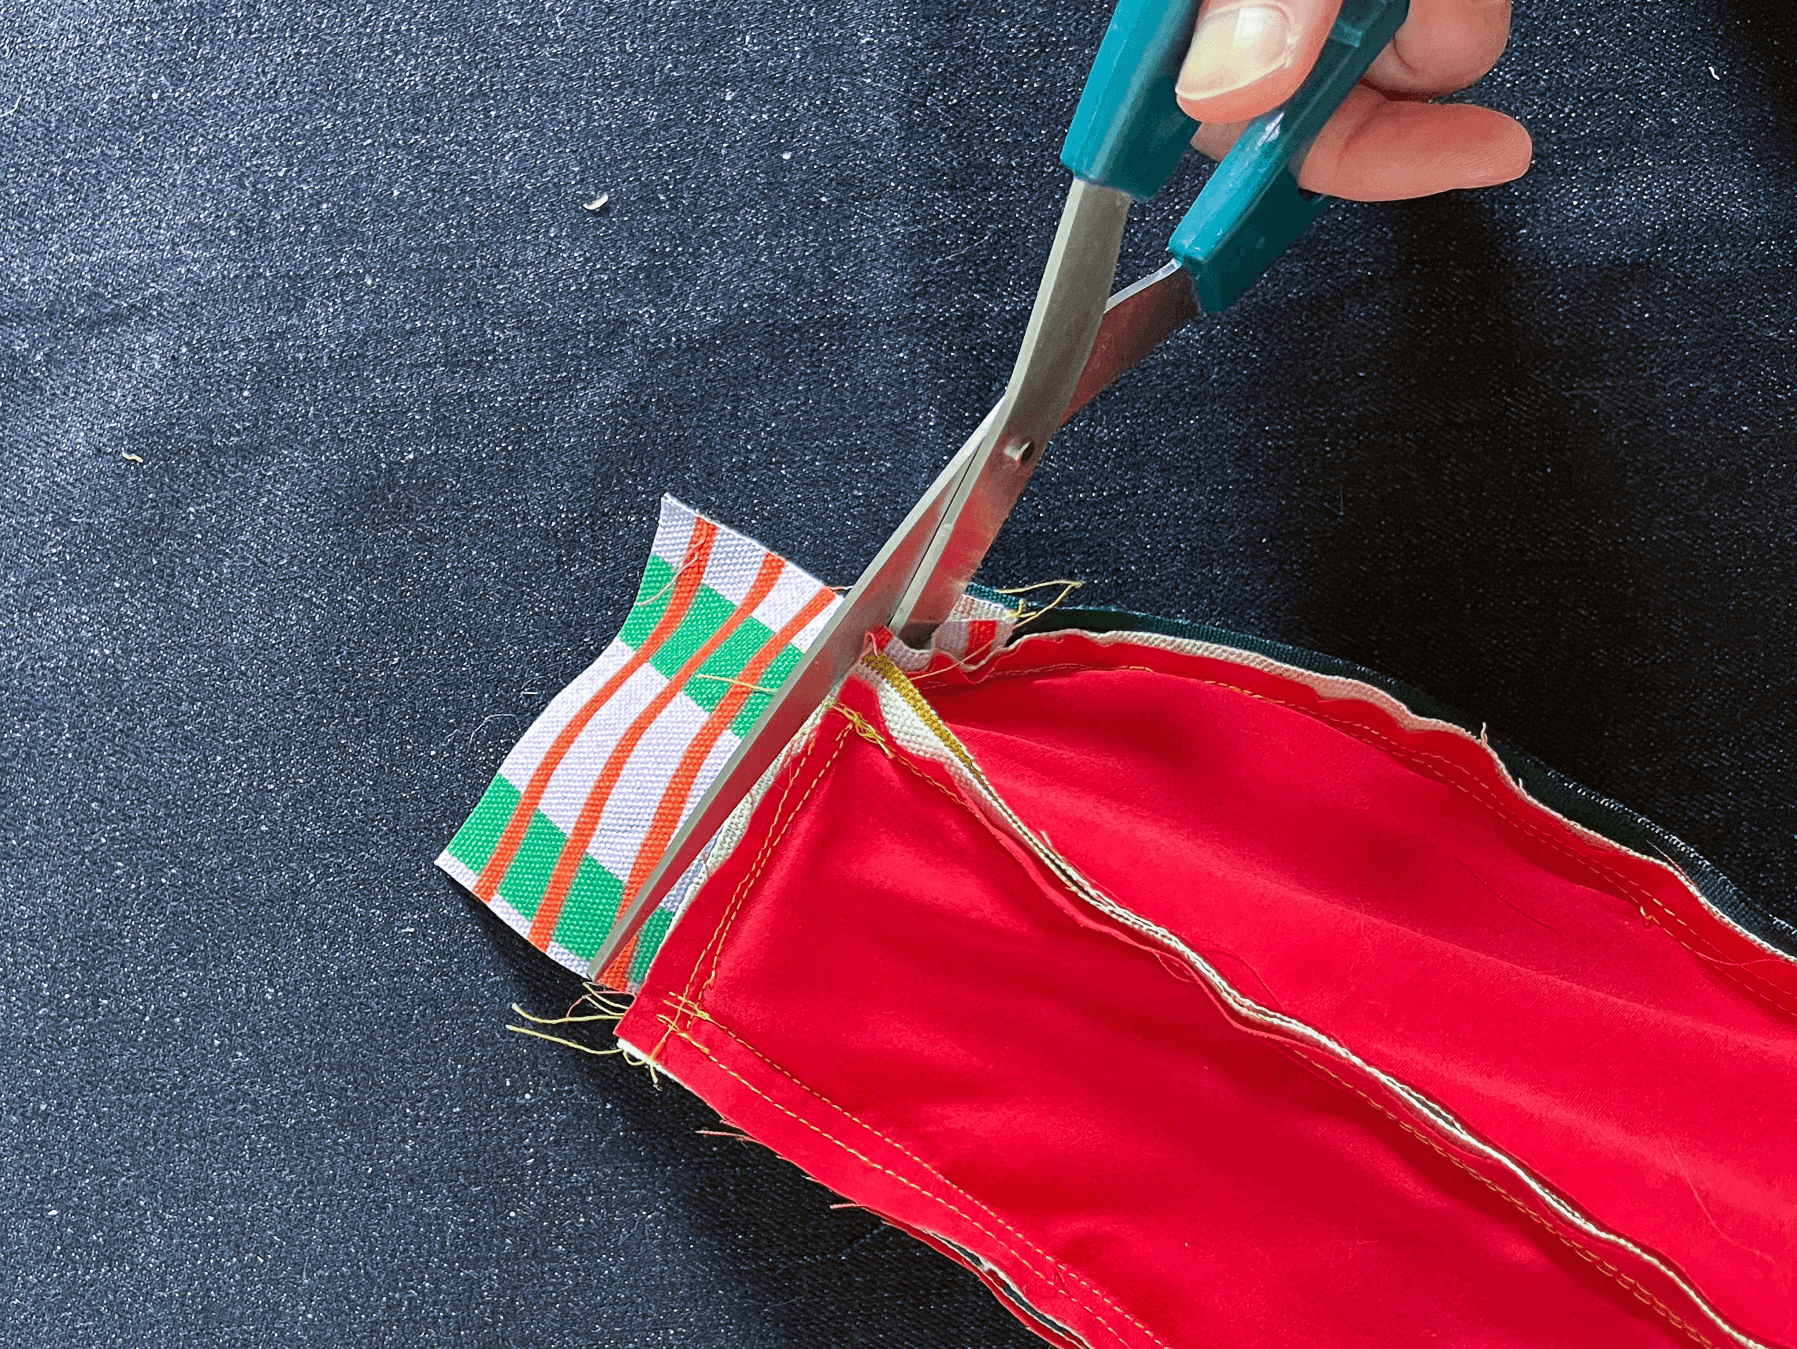
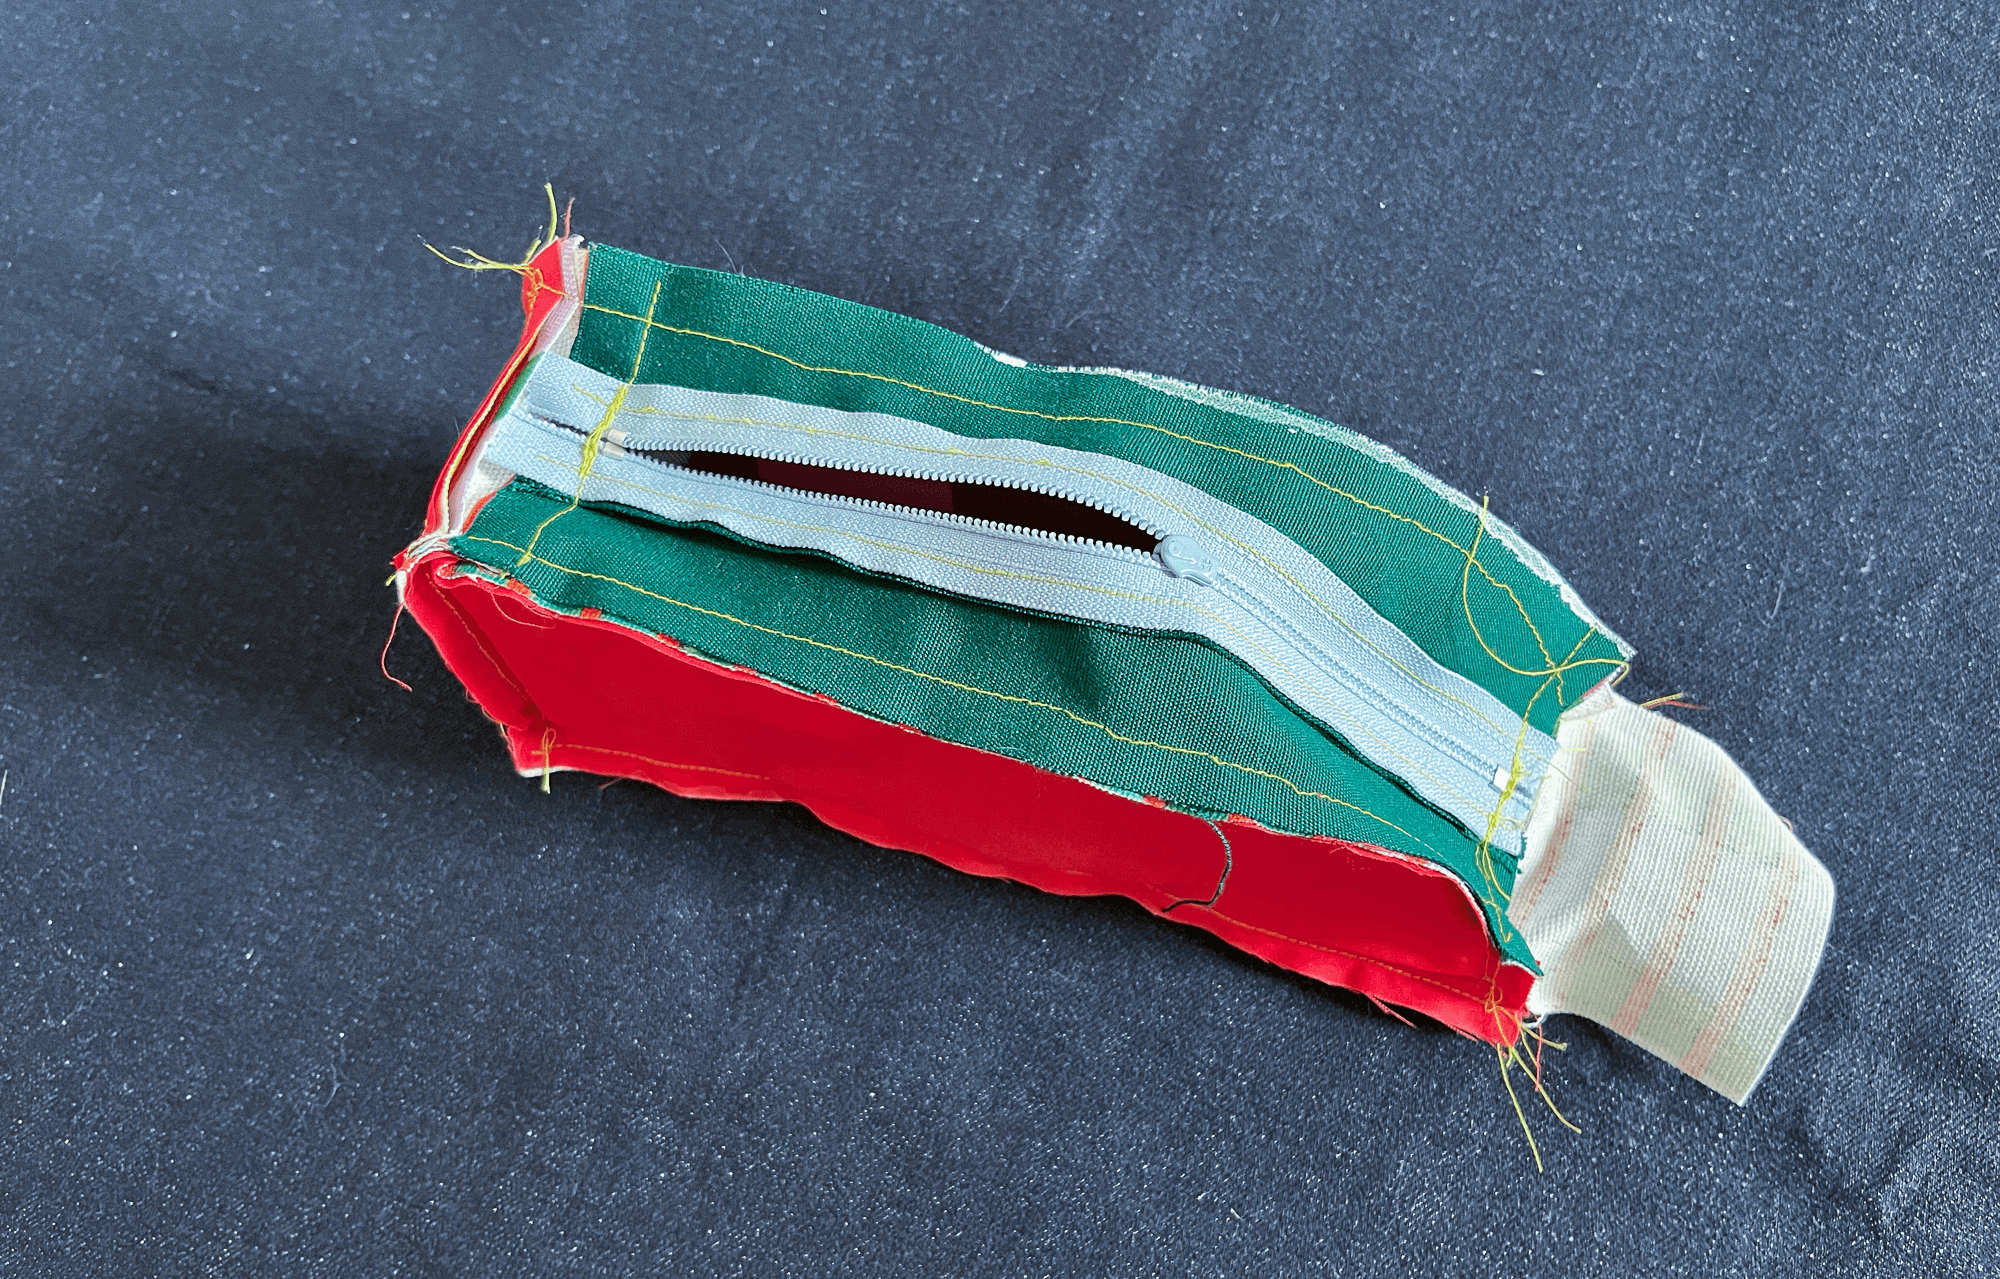
Sew across this final bottom edge to fully enclose the bag, and then you can trim the excess fabric.
Now you can turn it right side out and examine your handiwork!
Velcro
For this step, you will rip out the seams where you want to attach the velcro, insert the velcro, and sew it back together.
You may be wondering why do this extra step — and rip out stitches that you literally just sewed in. Well, it's much easier to add the velcro when the bag is already stable and constructed. It's less effort than trying to keep everything in place while you are struggling with those initial seams.
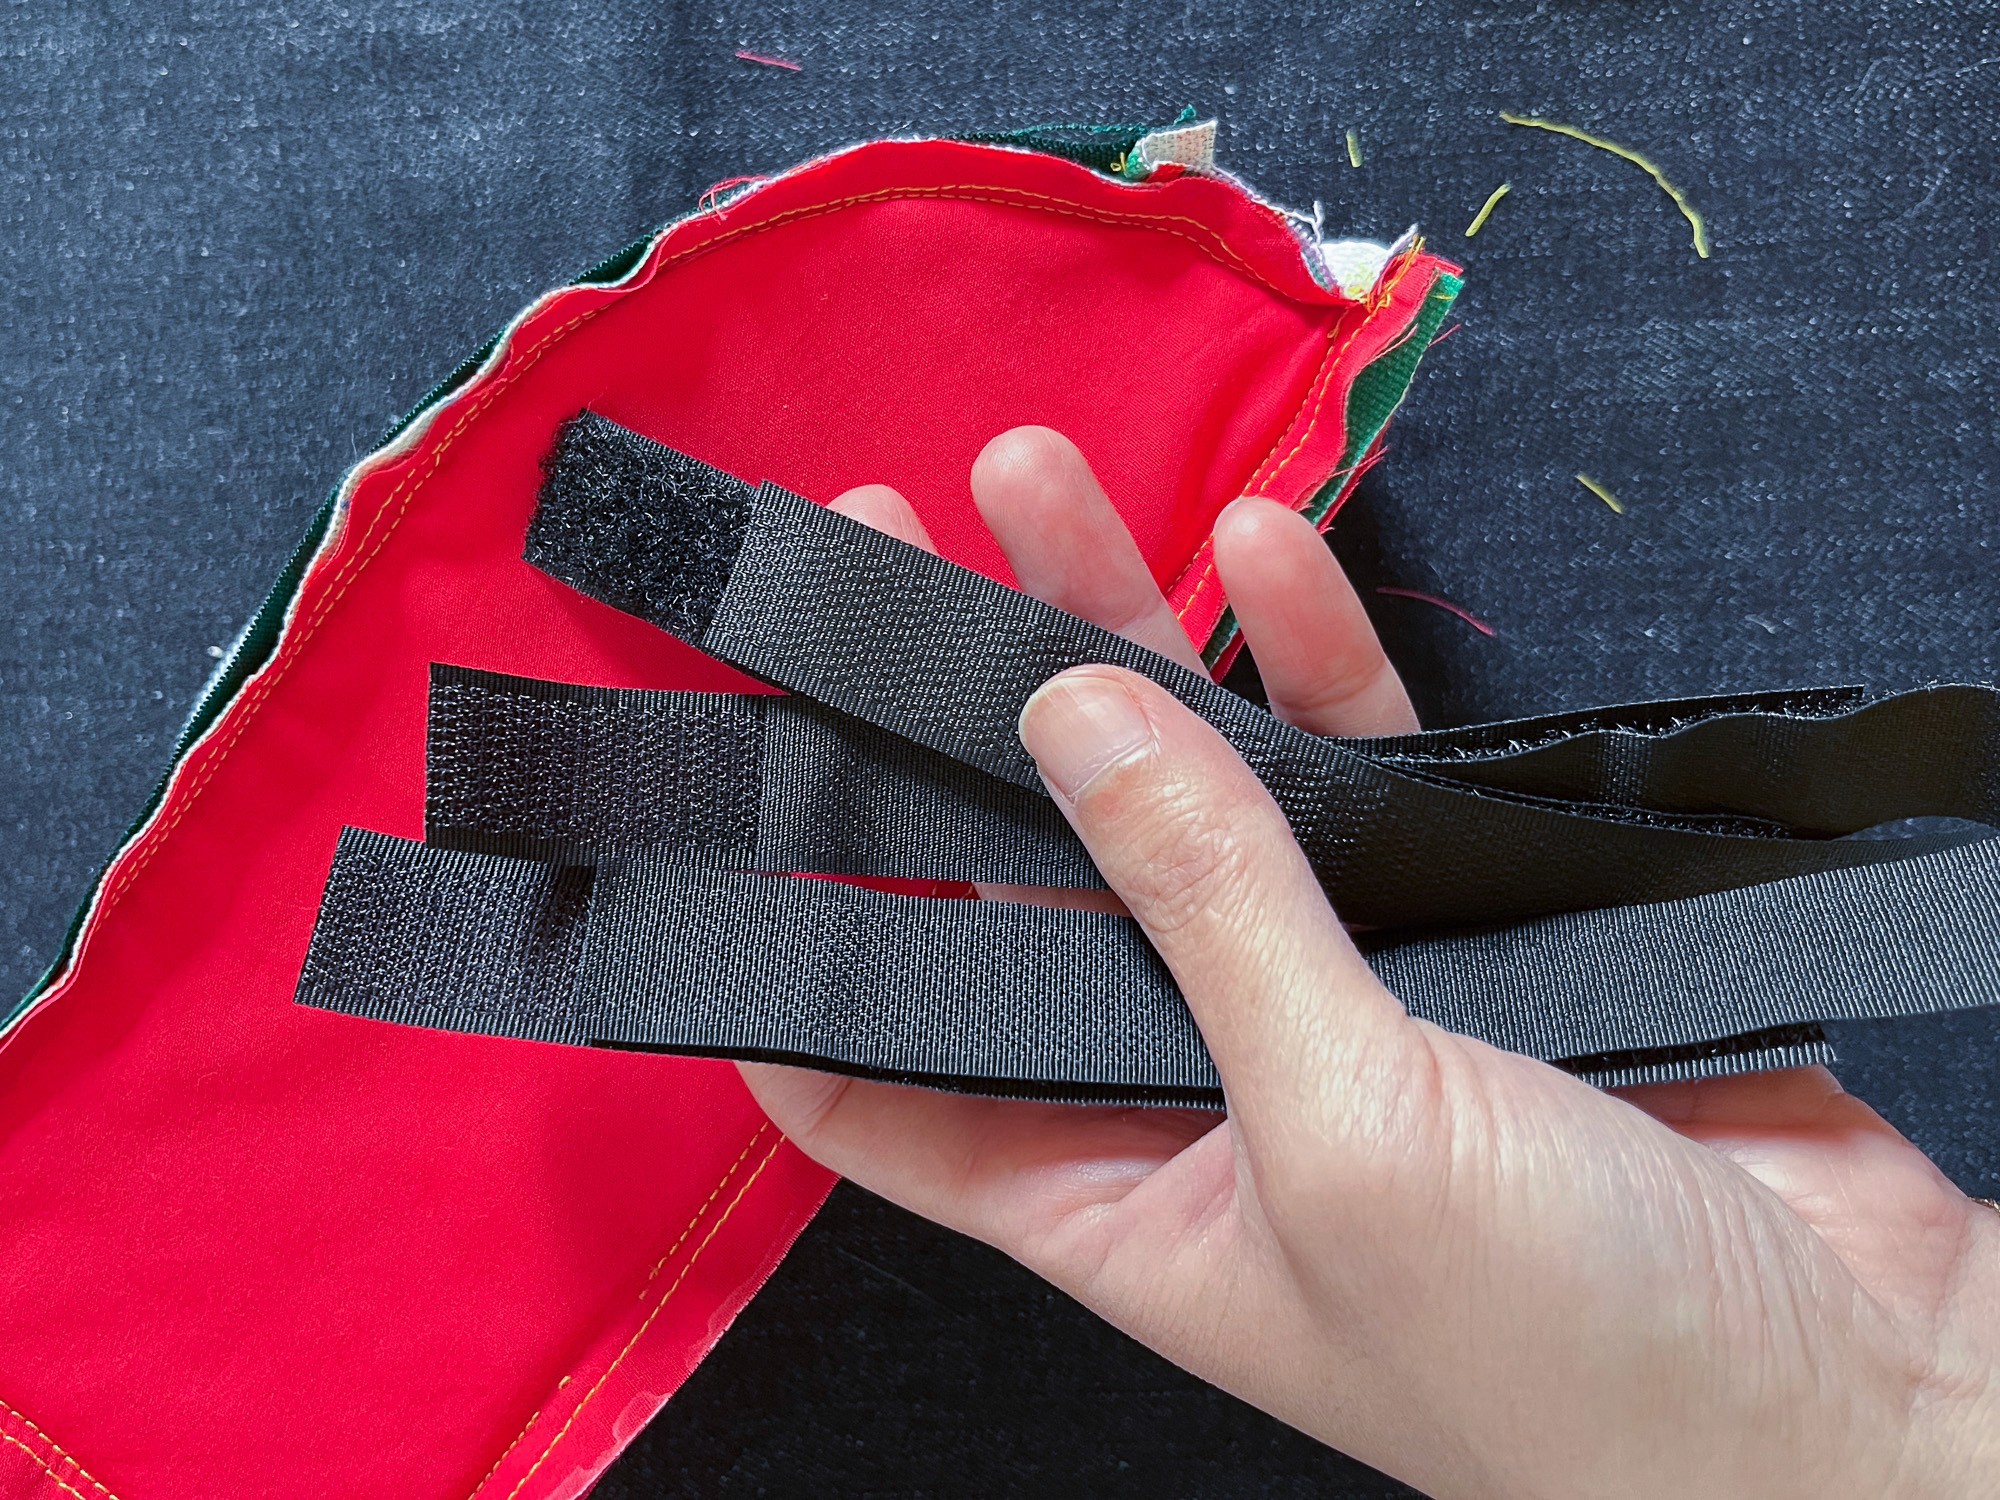
If you know the thickness of your bike frame posts, you can cut these more exactly to size. However it's easy to trim these later, so it is safer to start with pieces that are too long.
Just poke the velcro through the seam-ripped holes, and re-sew the seams to secure in place. It's a good idea to have the two sides of the velcro stuck together while you do this, to ensure that they are facing the right way and are not twisted. But be careful to only sew through one layer of velcro.
Finishing
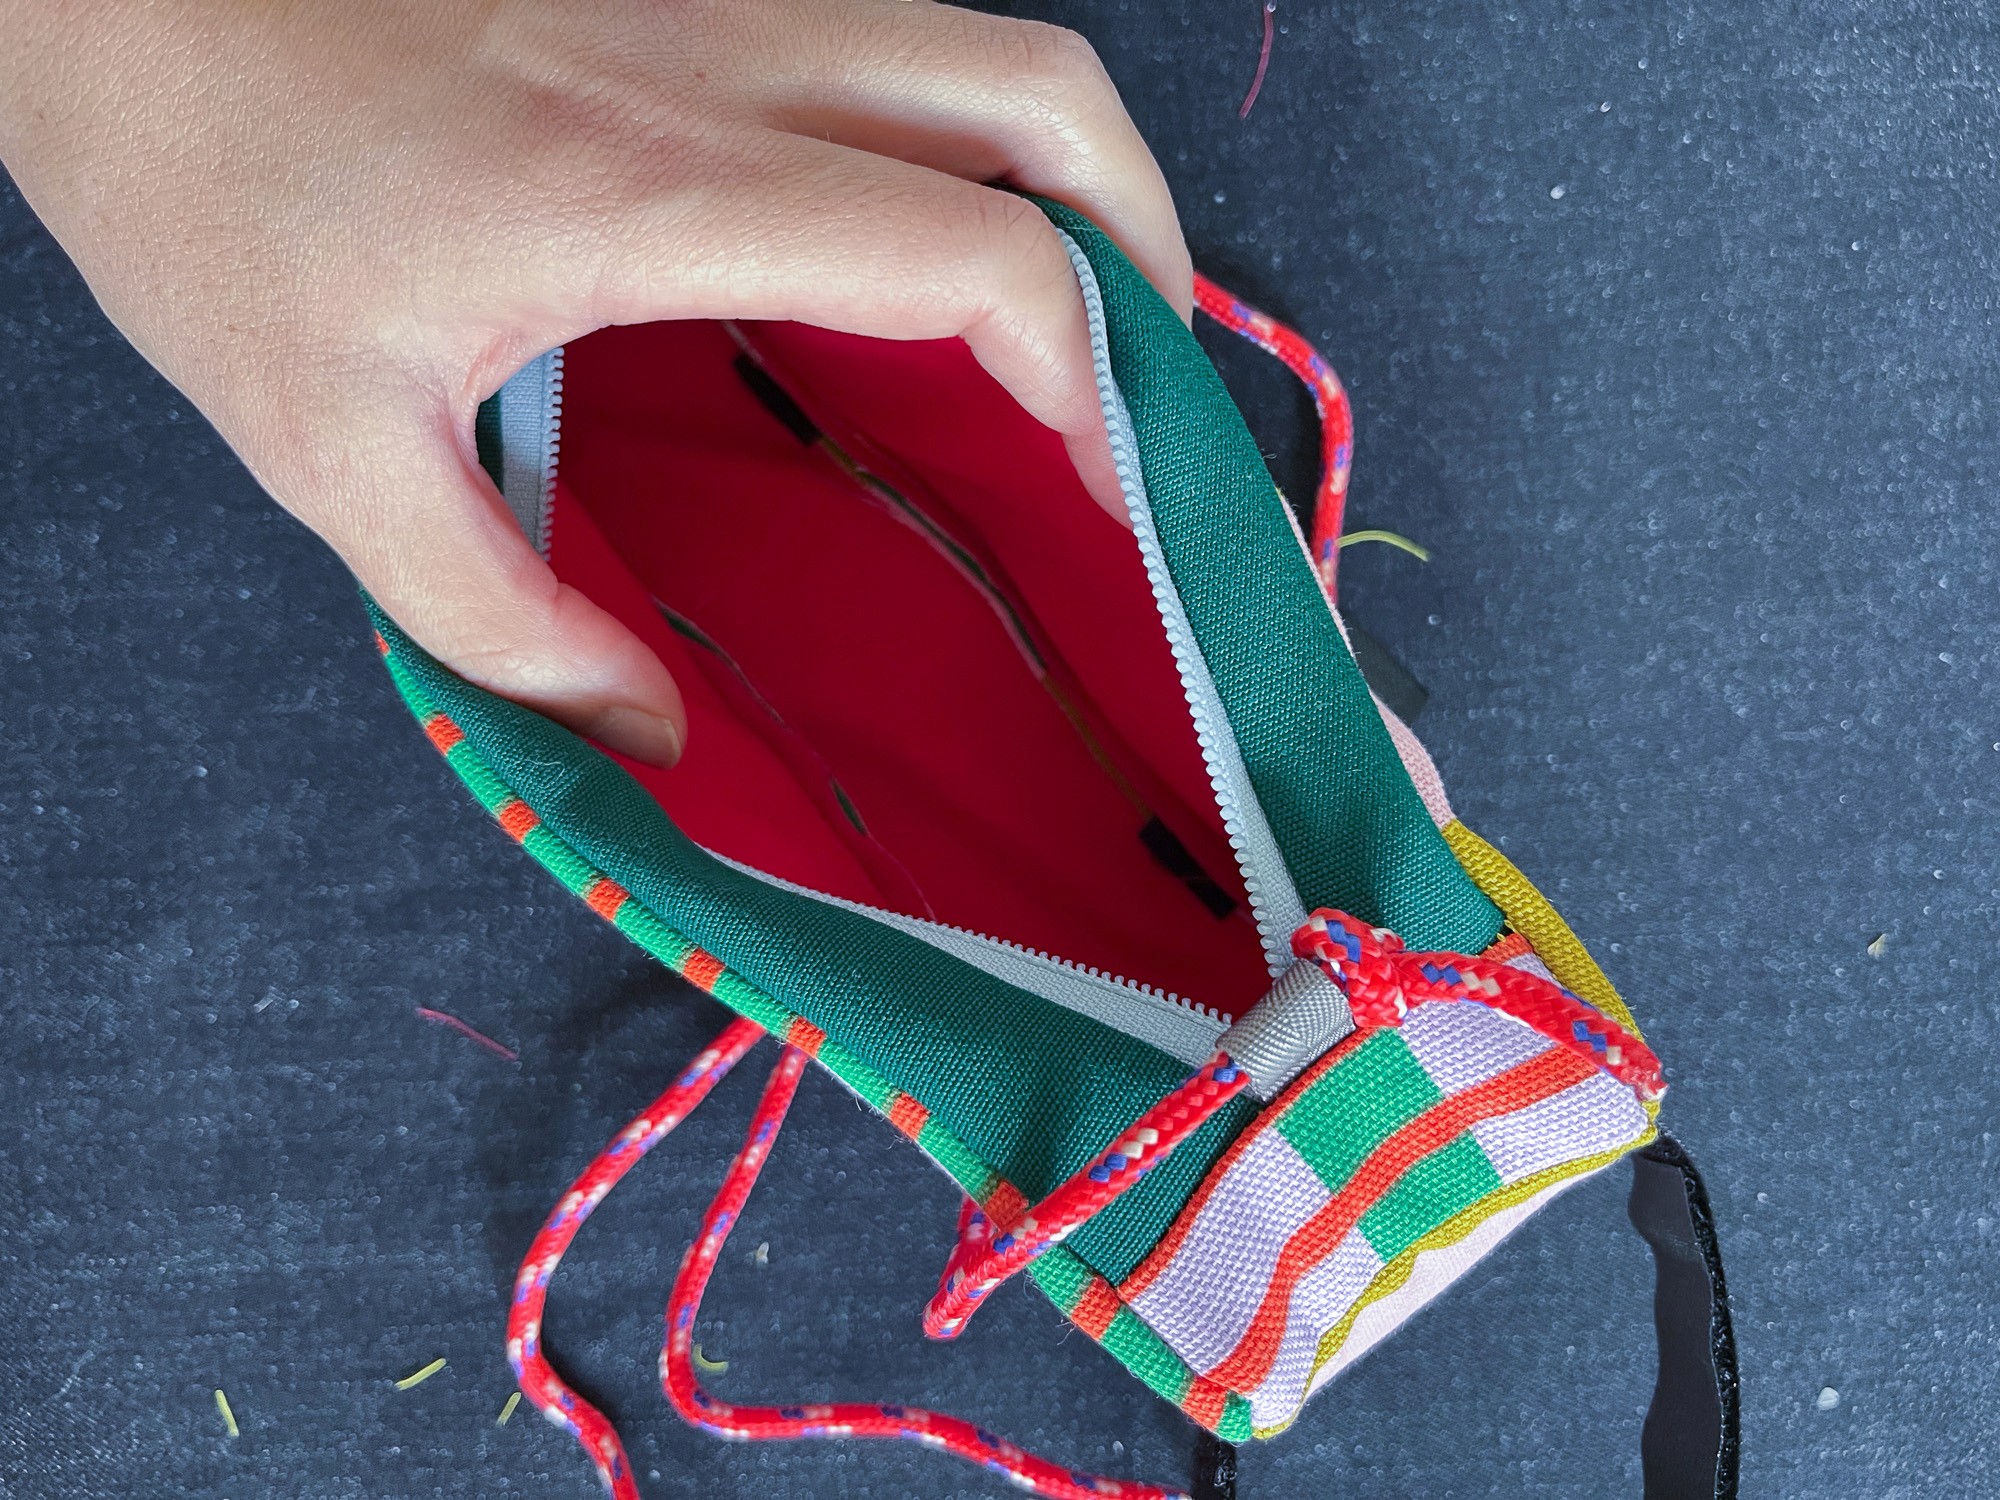
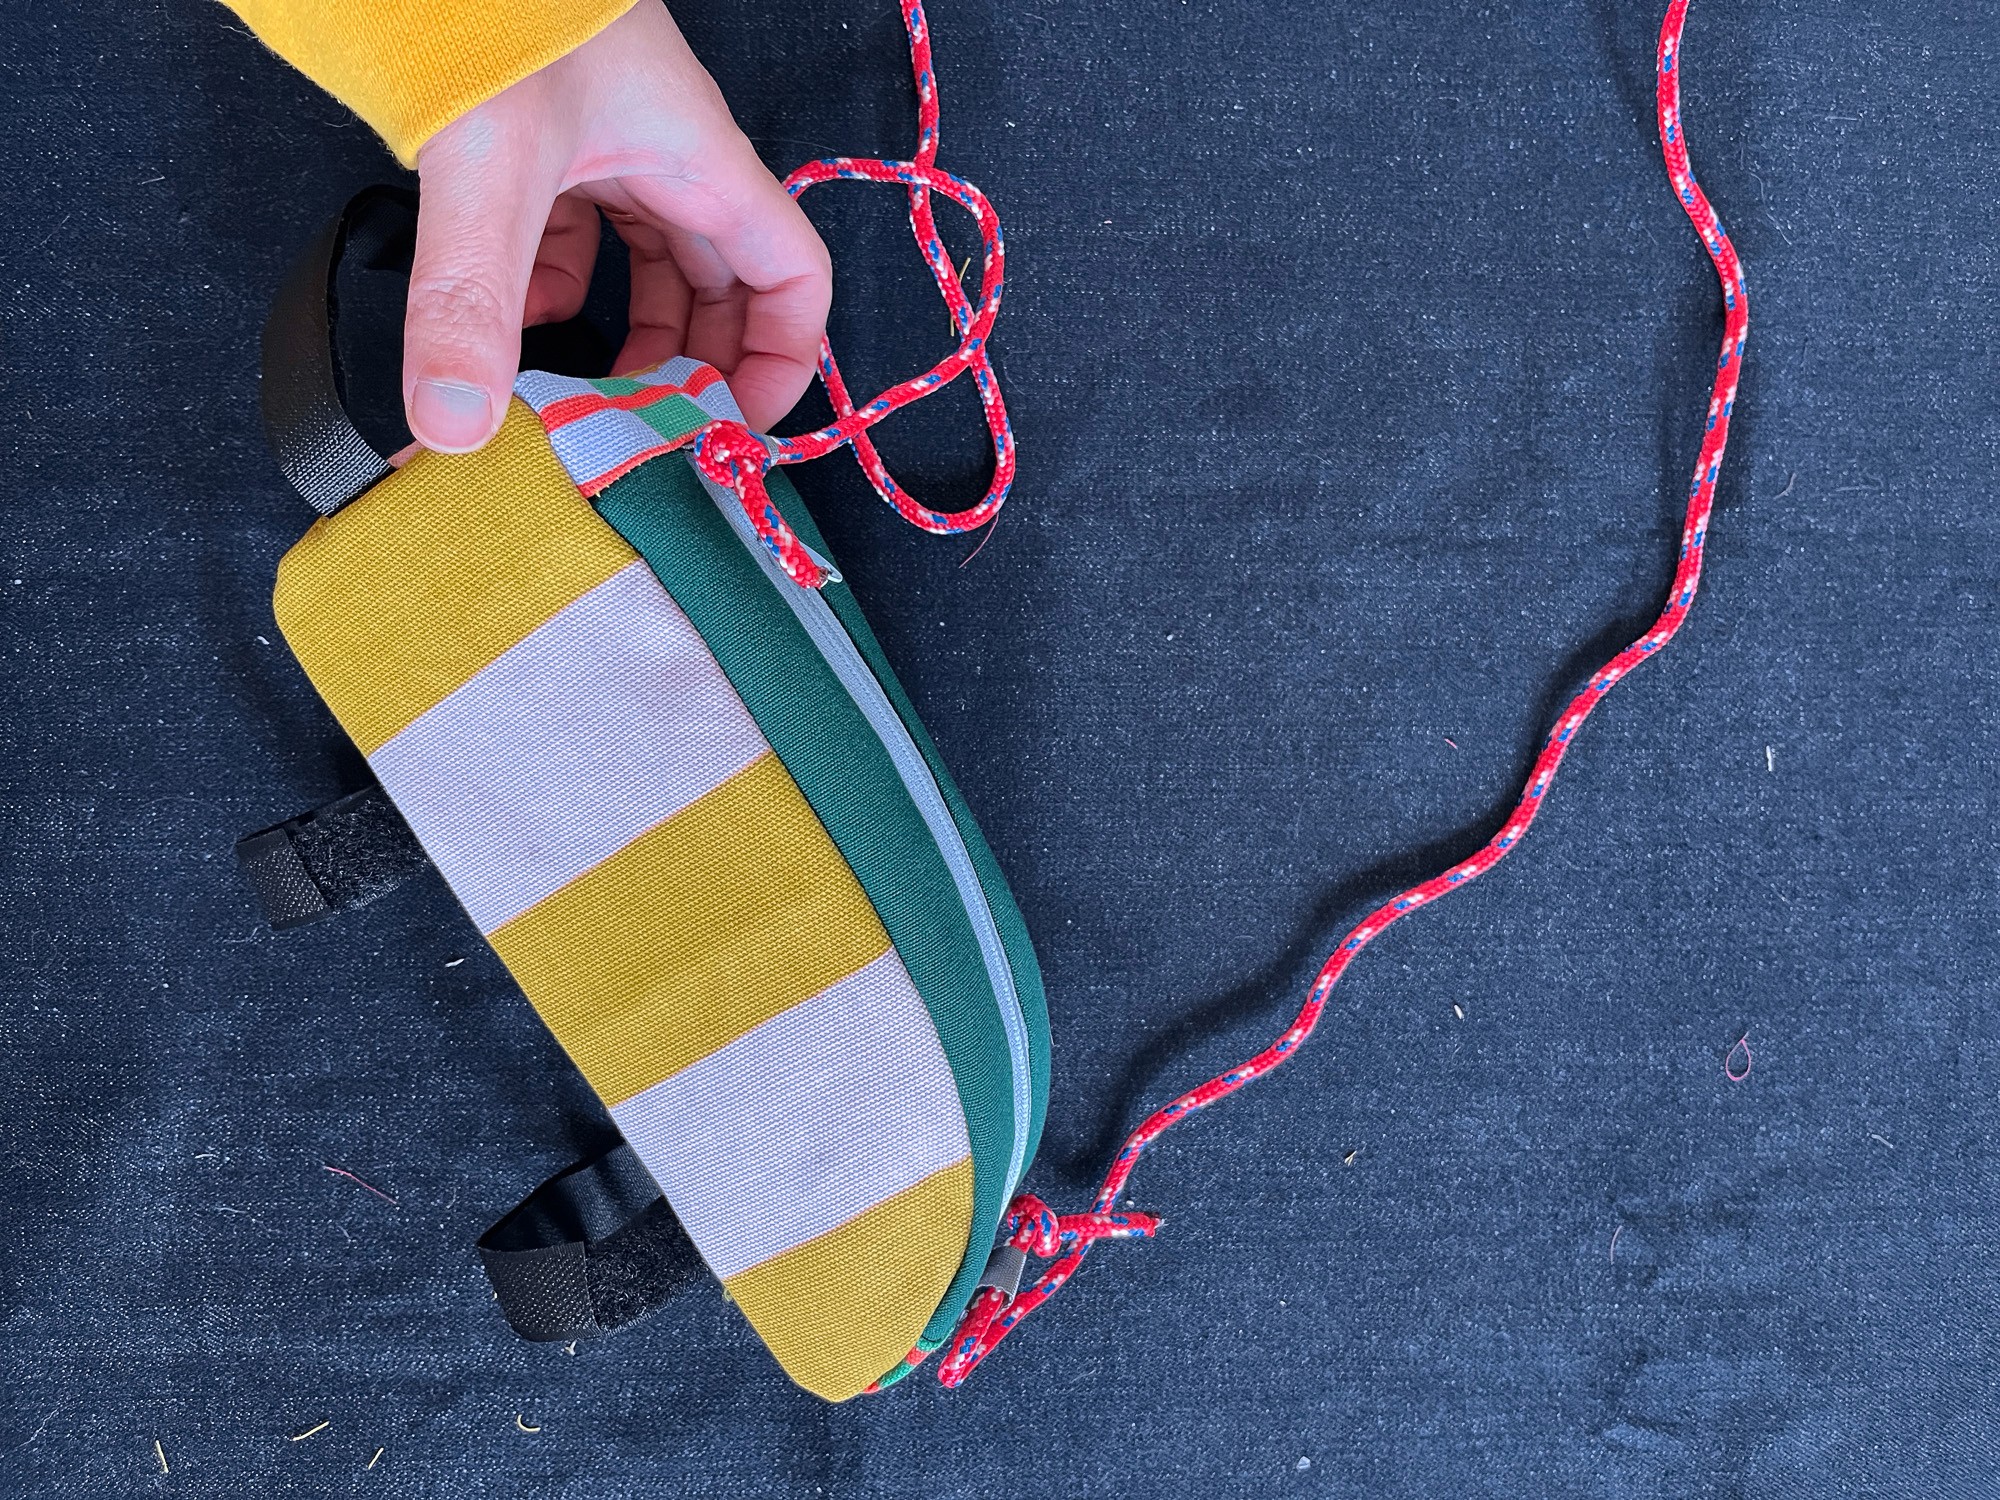
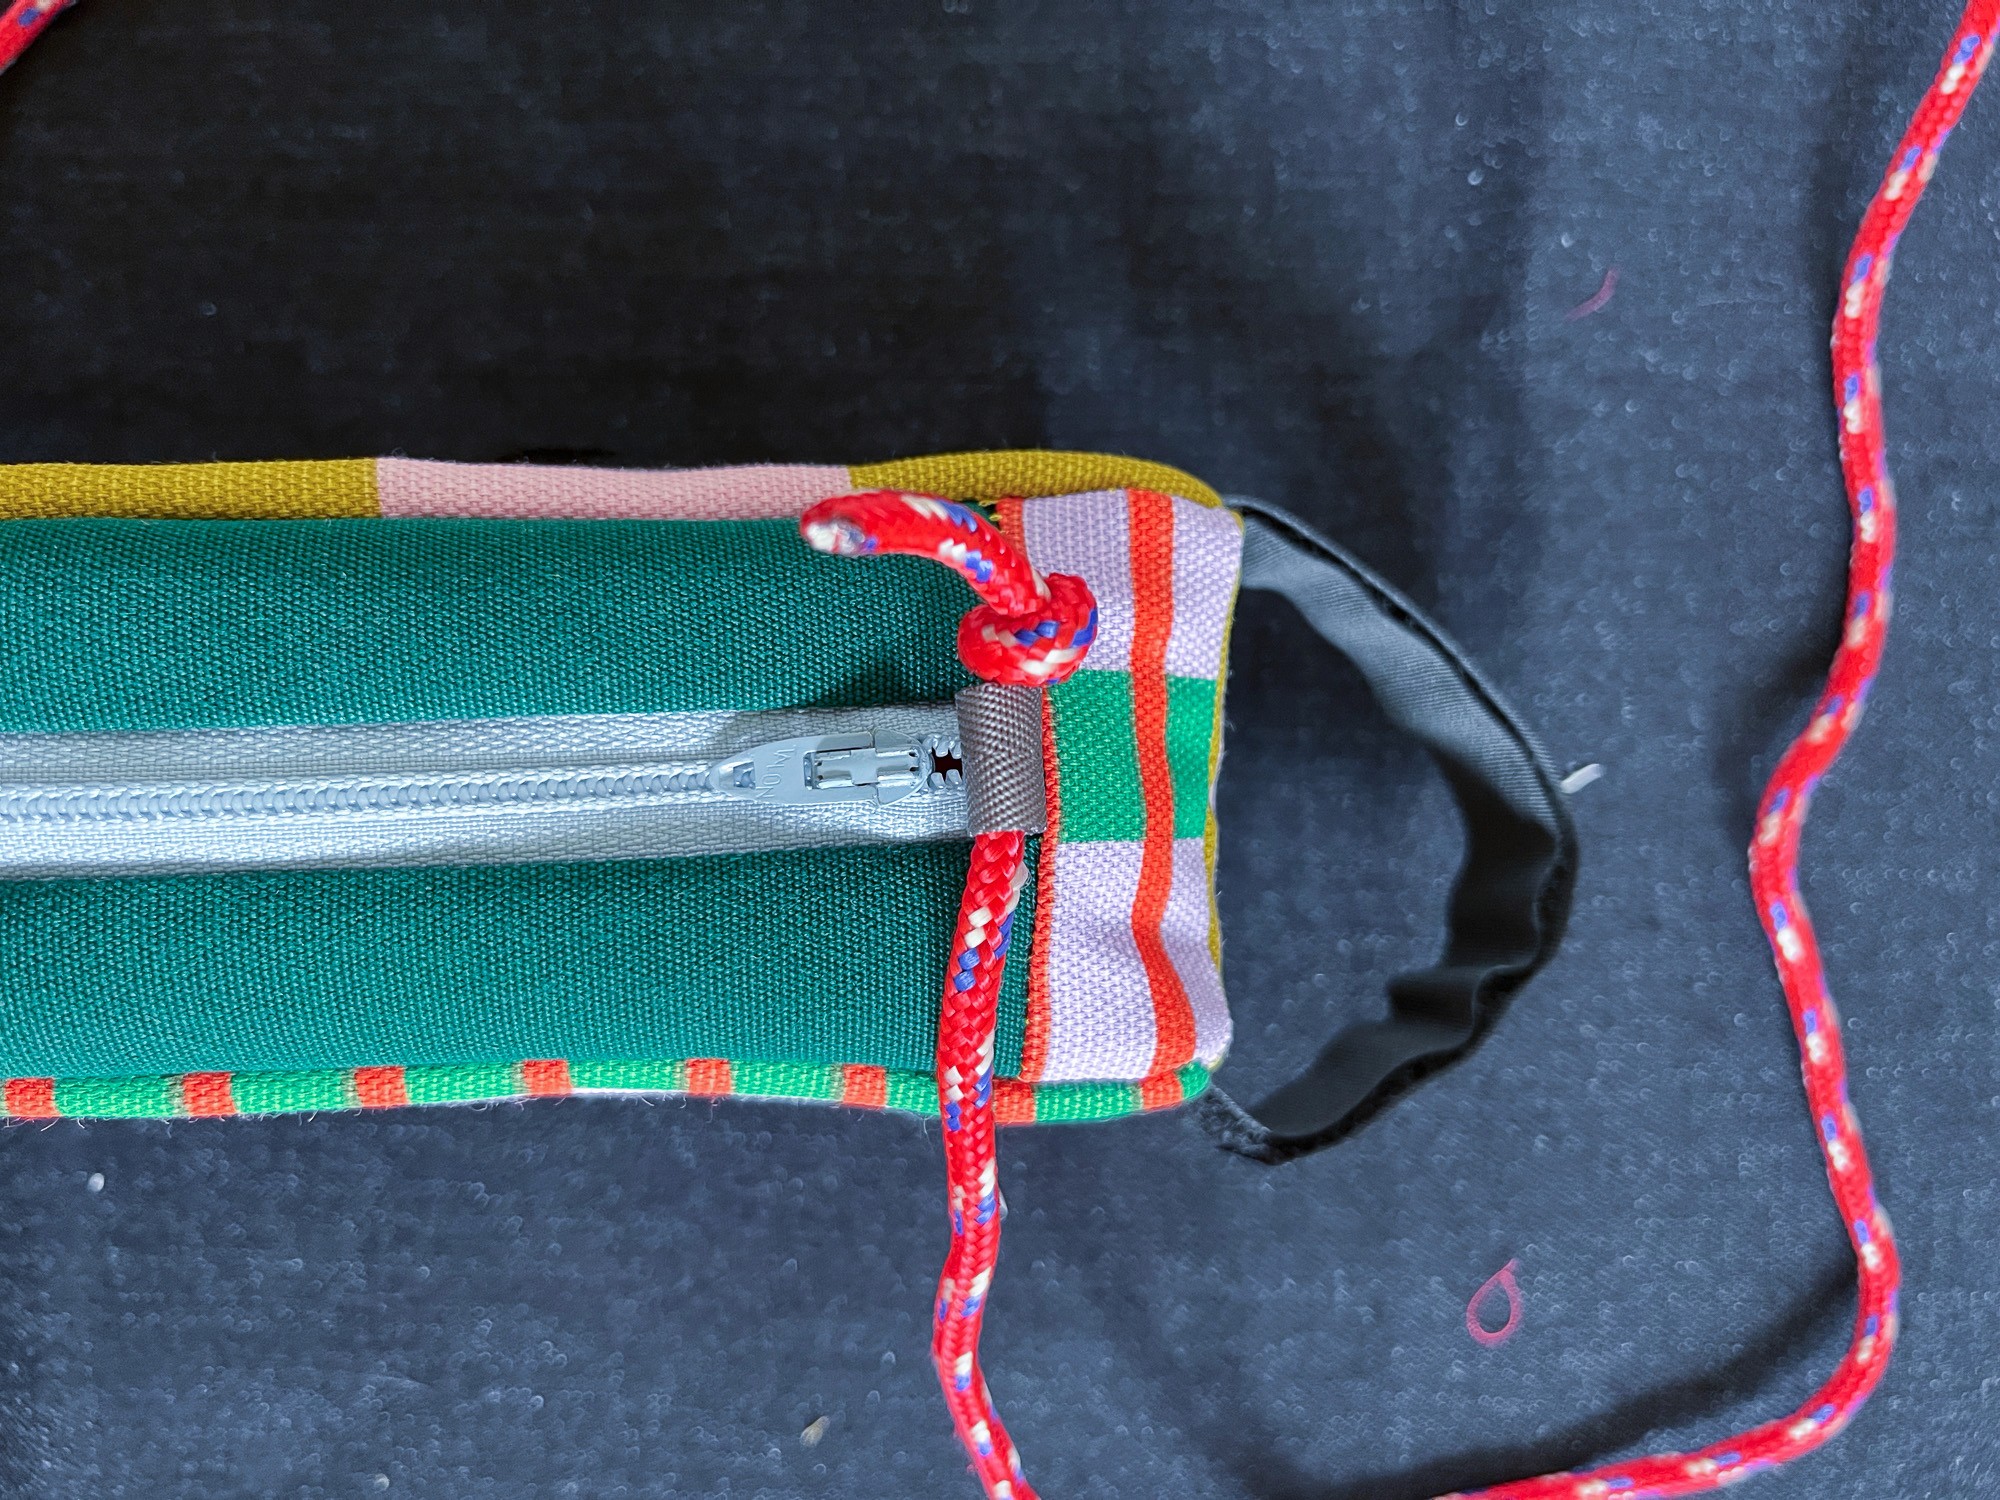
For the cross-body purse conversion, all you need is a length of paracord. Using a lighter, melt the ends so they don't fray. (Read tips for this from Paracord Planet.)
The paracord can be slipped through the zipper tabs and tied to create a lightweight strap.
Again, if you want a complete pattern with detailed instructions, diagrams, and pattern pieces, you can get the pattern on my Etsy!
Notes
Admittedly, the velcro looks a bit silly on a purse. One option would be to sew a strip of webbing along the bottom and front of the bag. Stitch it horizontally every couple inches. Then, you can loop your velcro through the webbing and around the bike frame, and remove it when you don't need it. Definitely an option if you want to try it!
Also note that this bag does not have finished seams on the inside. Personally, I didn't have any problems with this. I finished the edges with Fray Check, though you could serge them before assembling. You could also try finishing the seams with bias tape.
If you make this pattern, please let me know how it goes! I welcome any feedback on what was difficult or confusing too. If you get stuck, I would love to help. Tag me or message me @ljonthemend on Instagram.