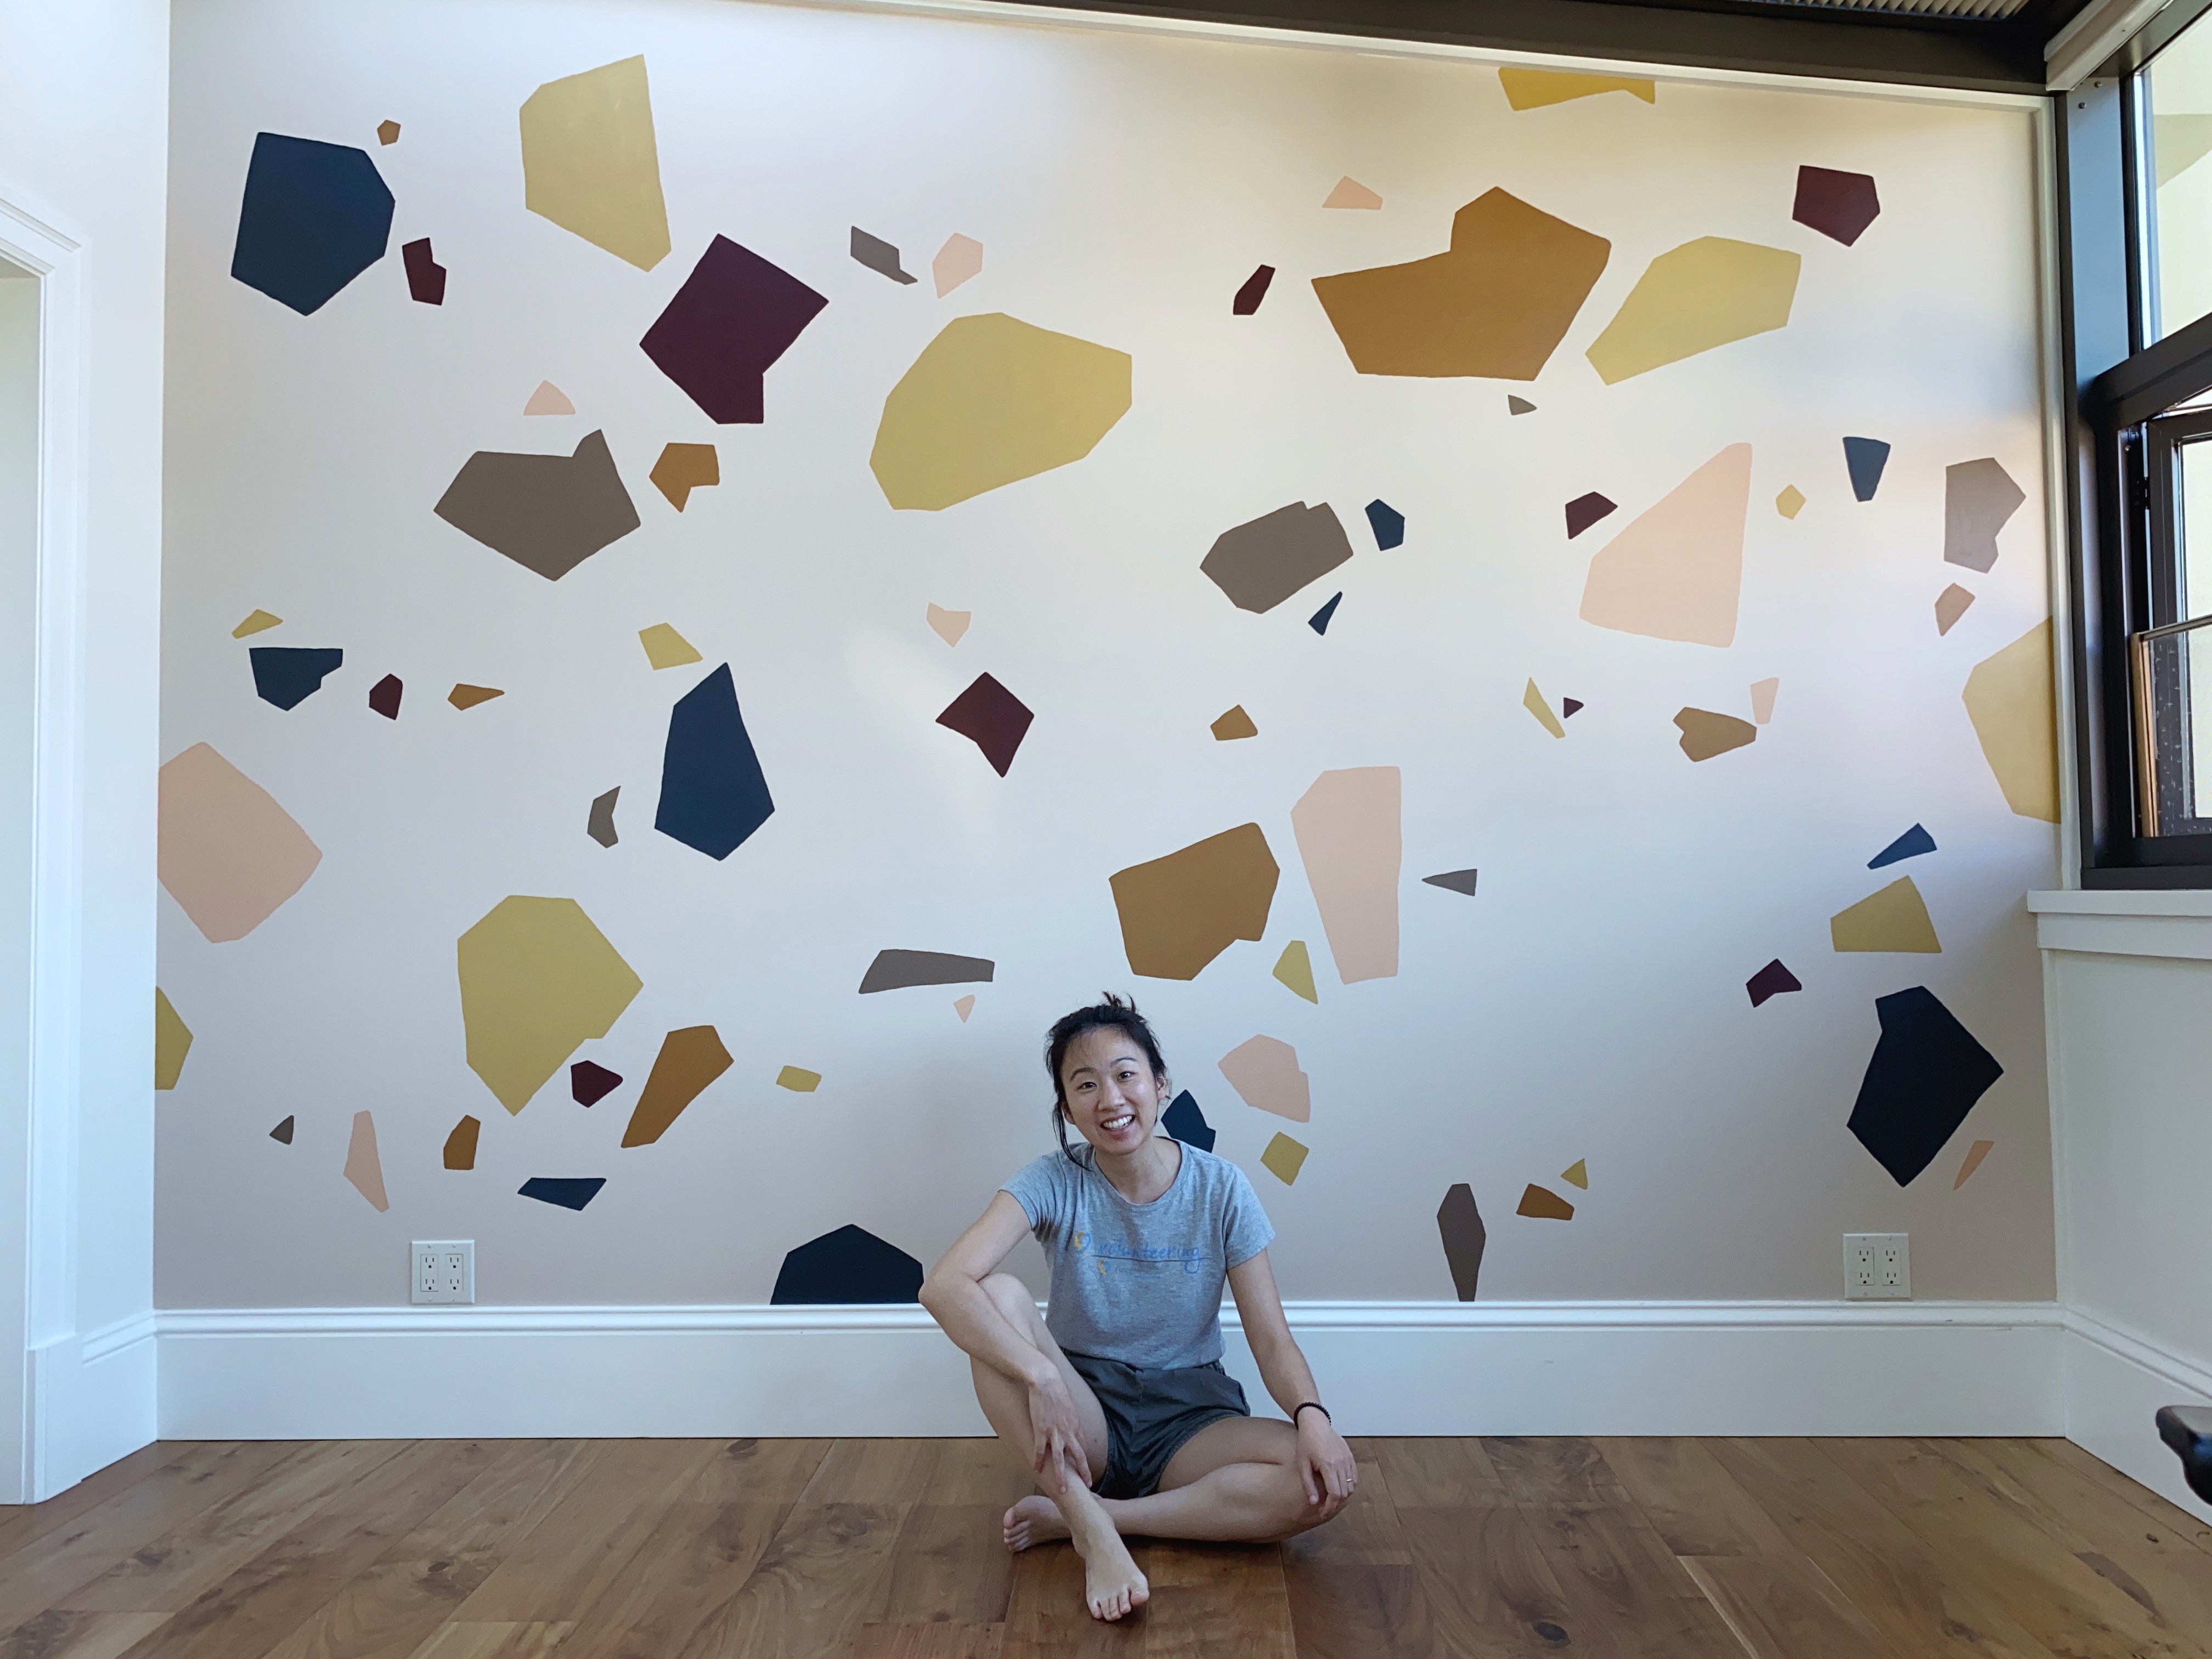
A giant terrazzo patterned accent wall mural

Geometric or blobby shapes create a big, striking texture without too much technical skill. Plus you can use leftover paint or sample jars to create a fun color palette of your choice.
Materials
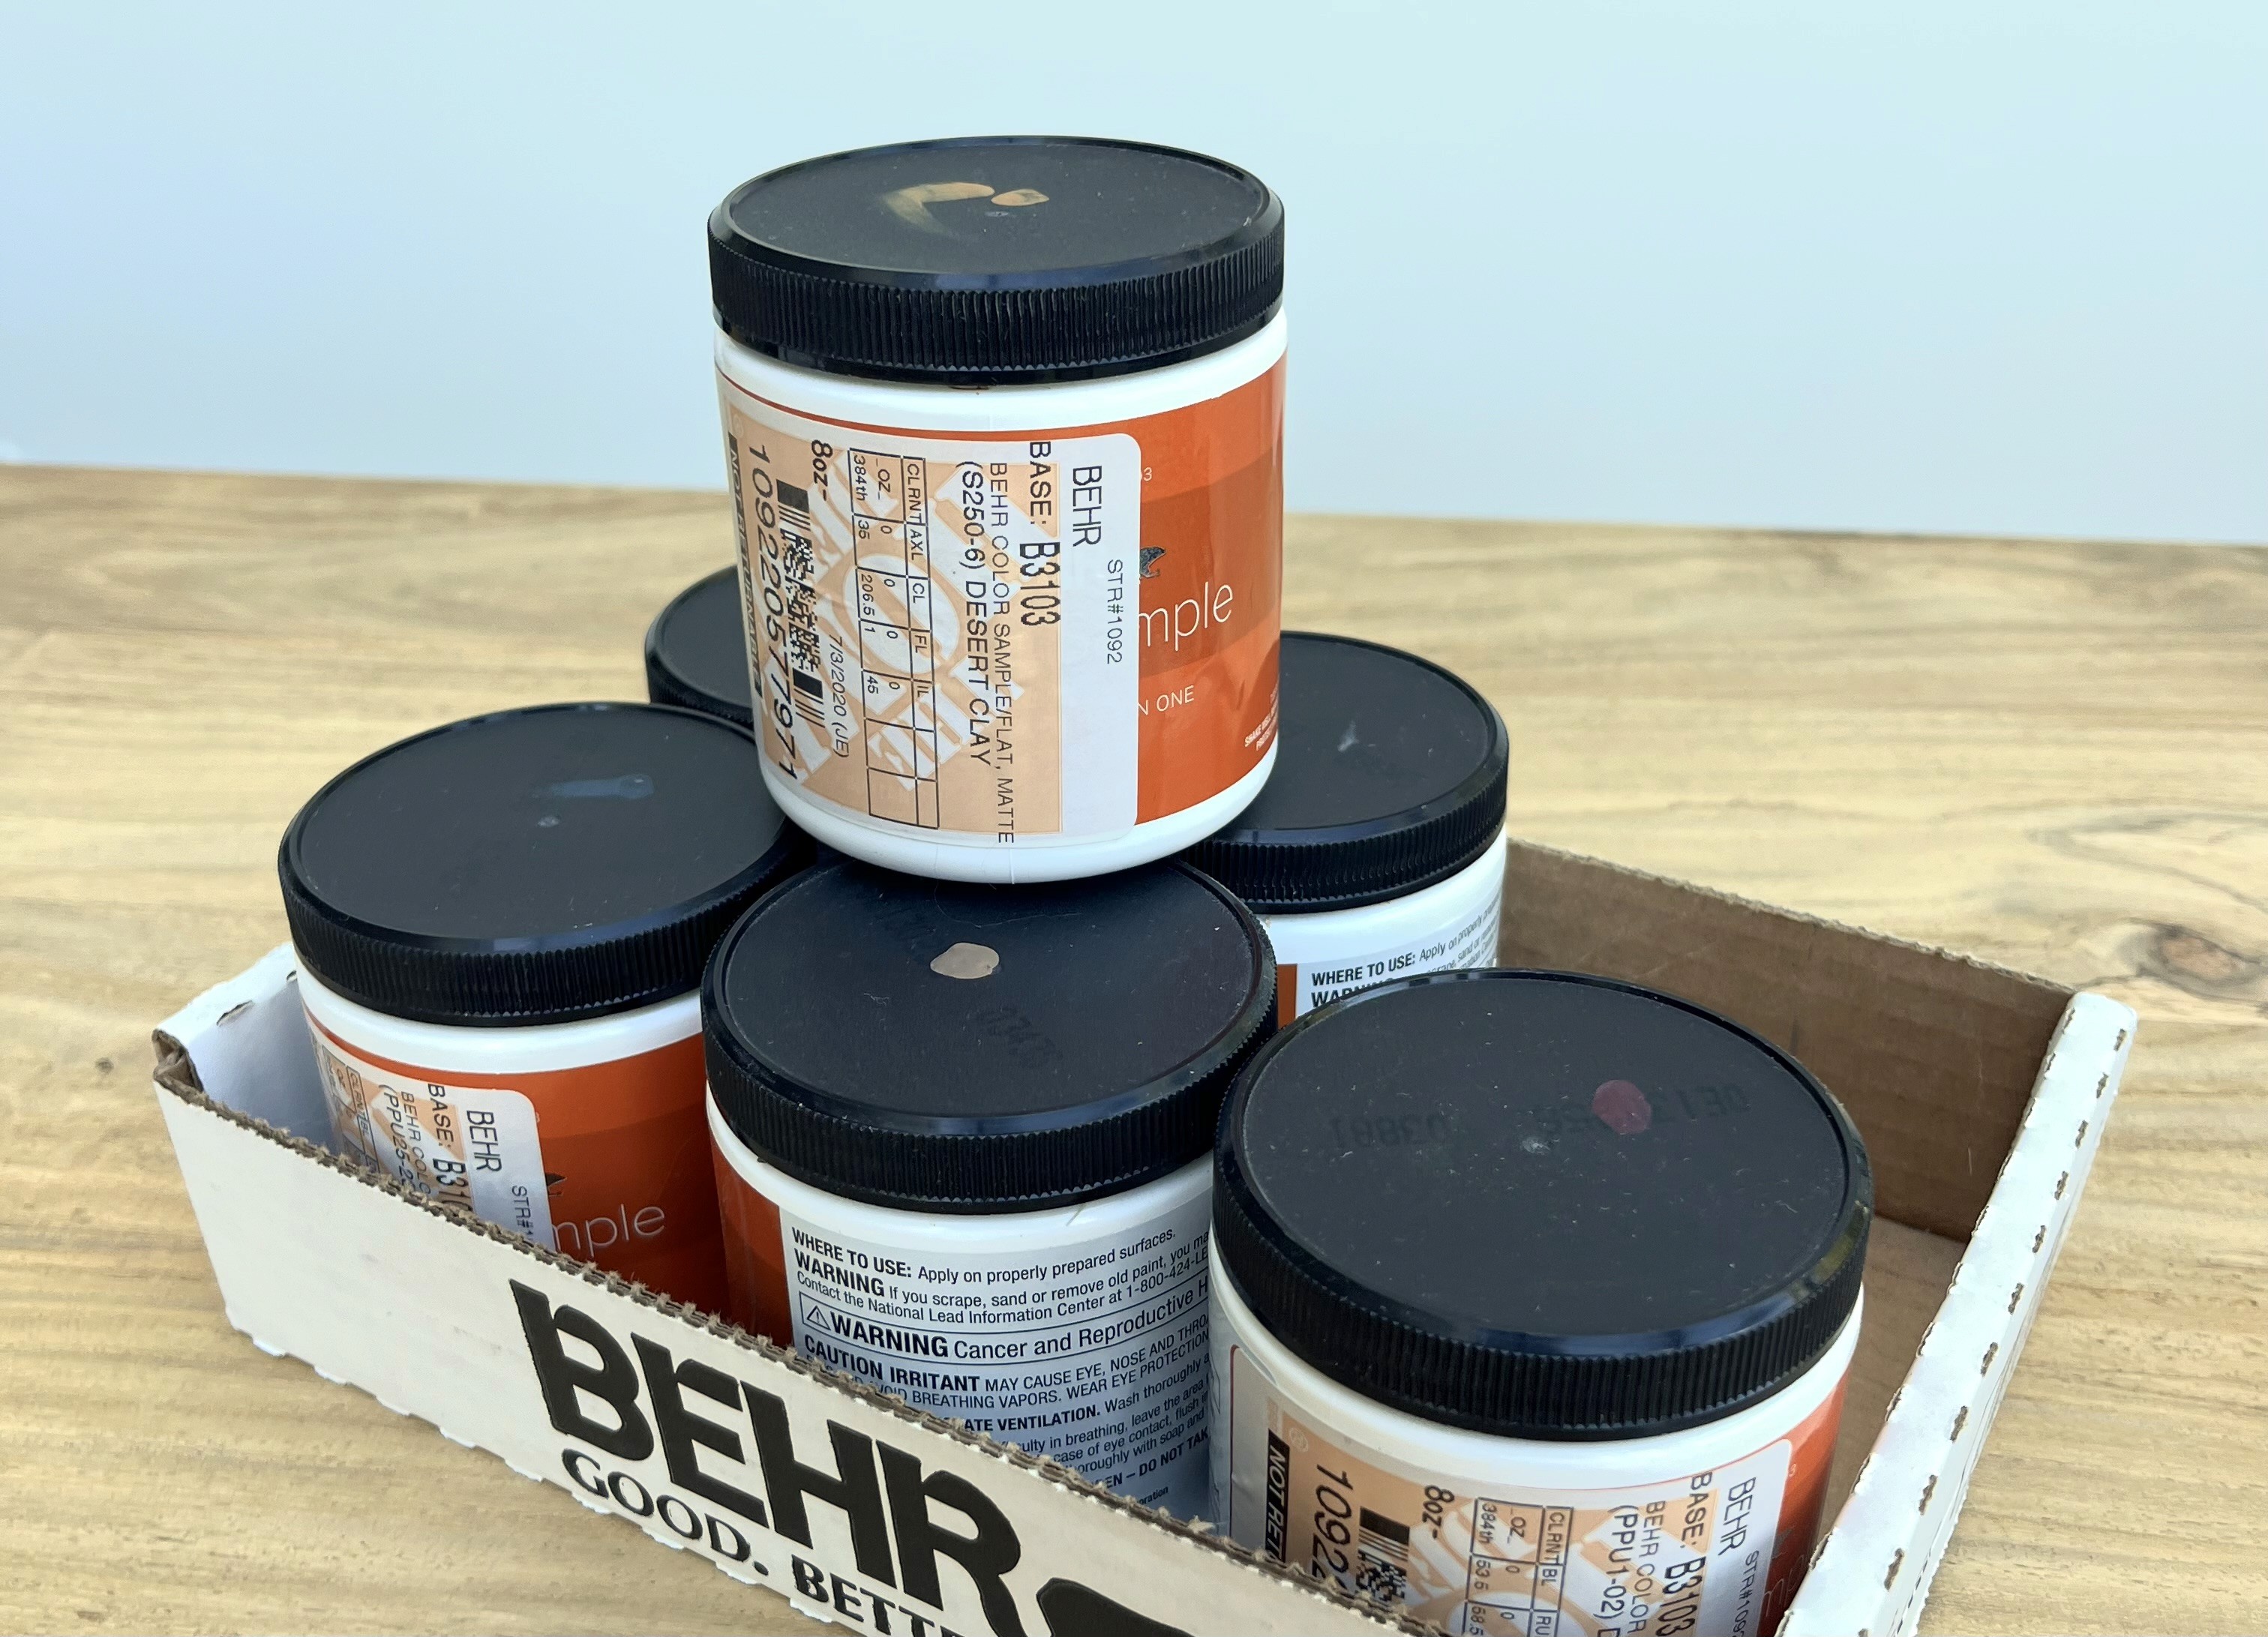
For this mural you will need 3-8 colors of paint, plus a larger amount of one color for the background
This is a great use for leftover paint, but if you don’t like the colors you have, you can get 8oz sample jars at the paint store. These cover about 16 square feet each, so it’s plenty for this project.
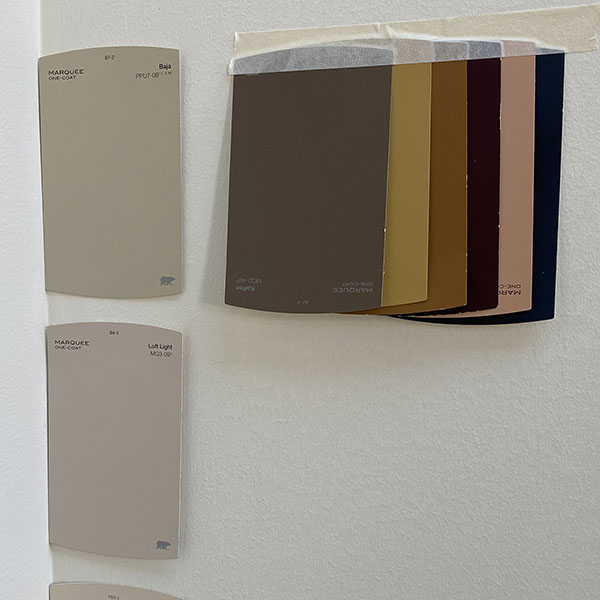
I was buying new paint, so I started by getting a few swatches and taping them up in my room to see how they looked.
Practice
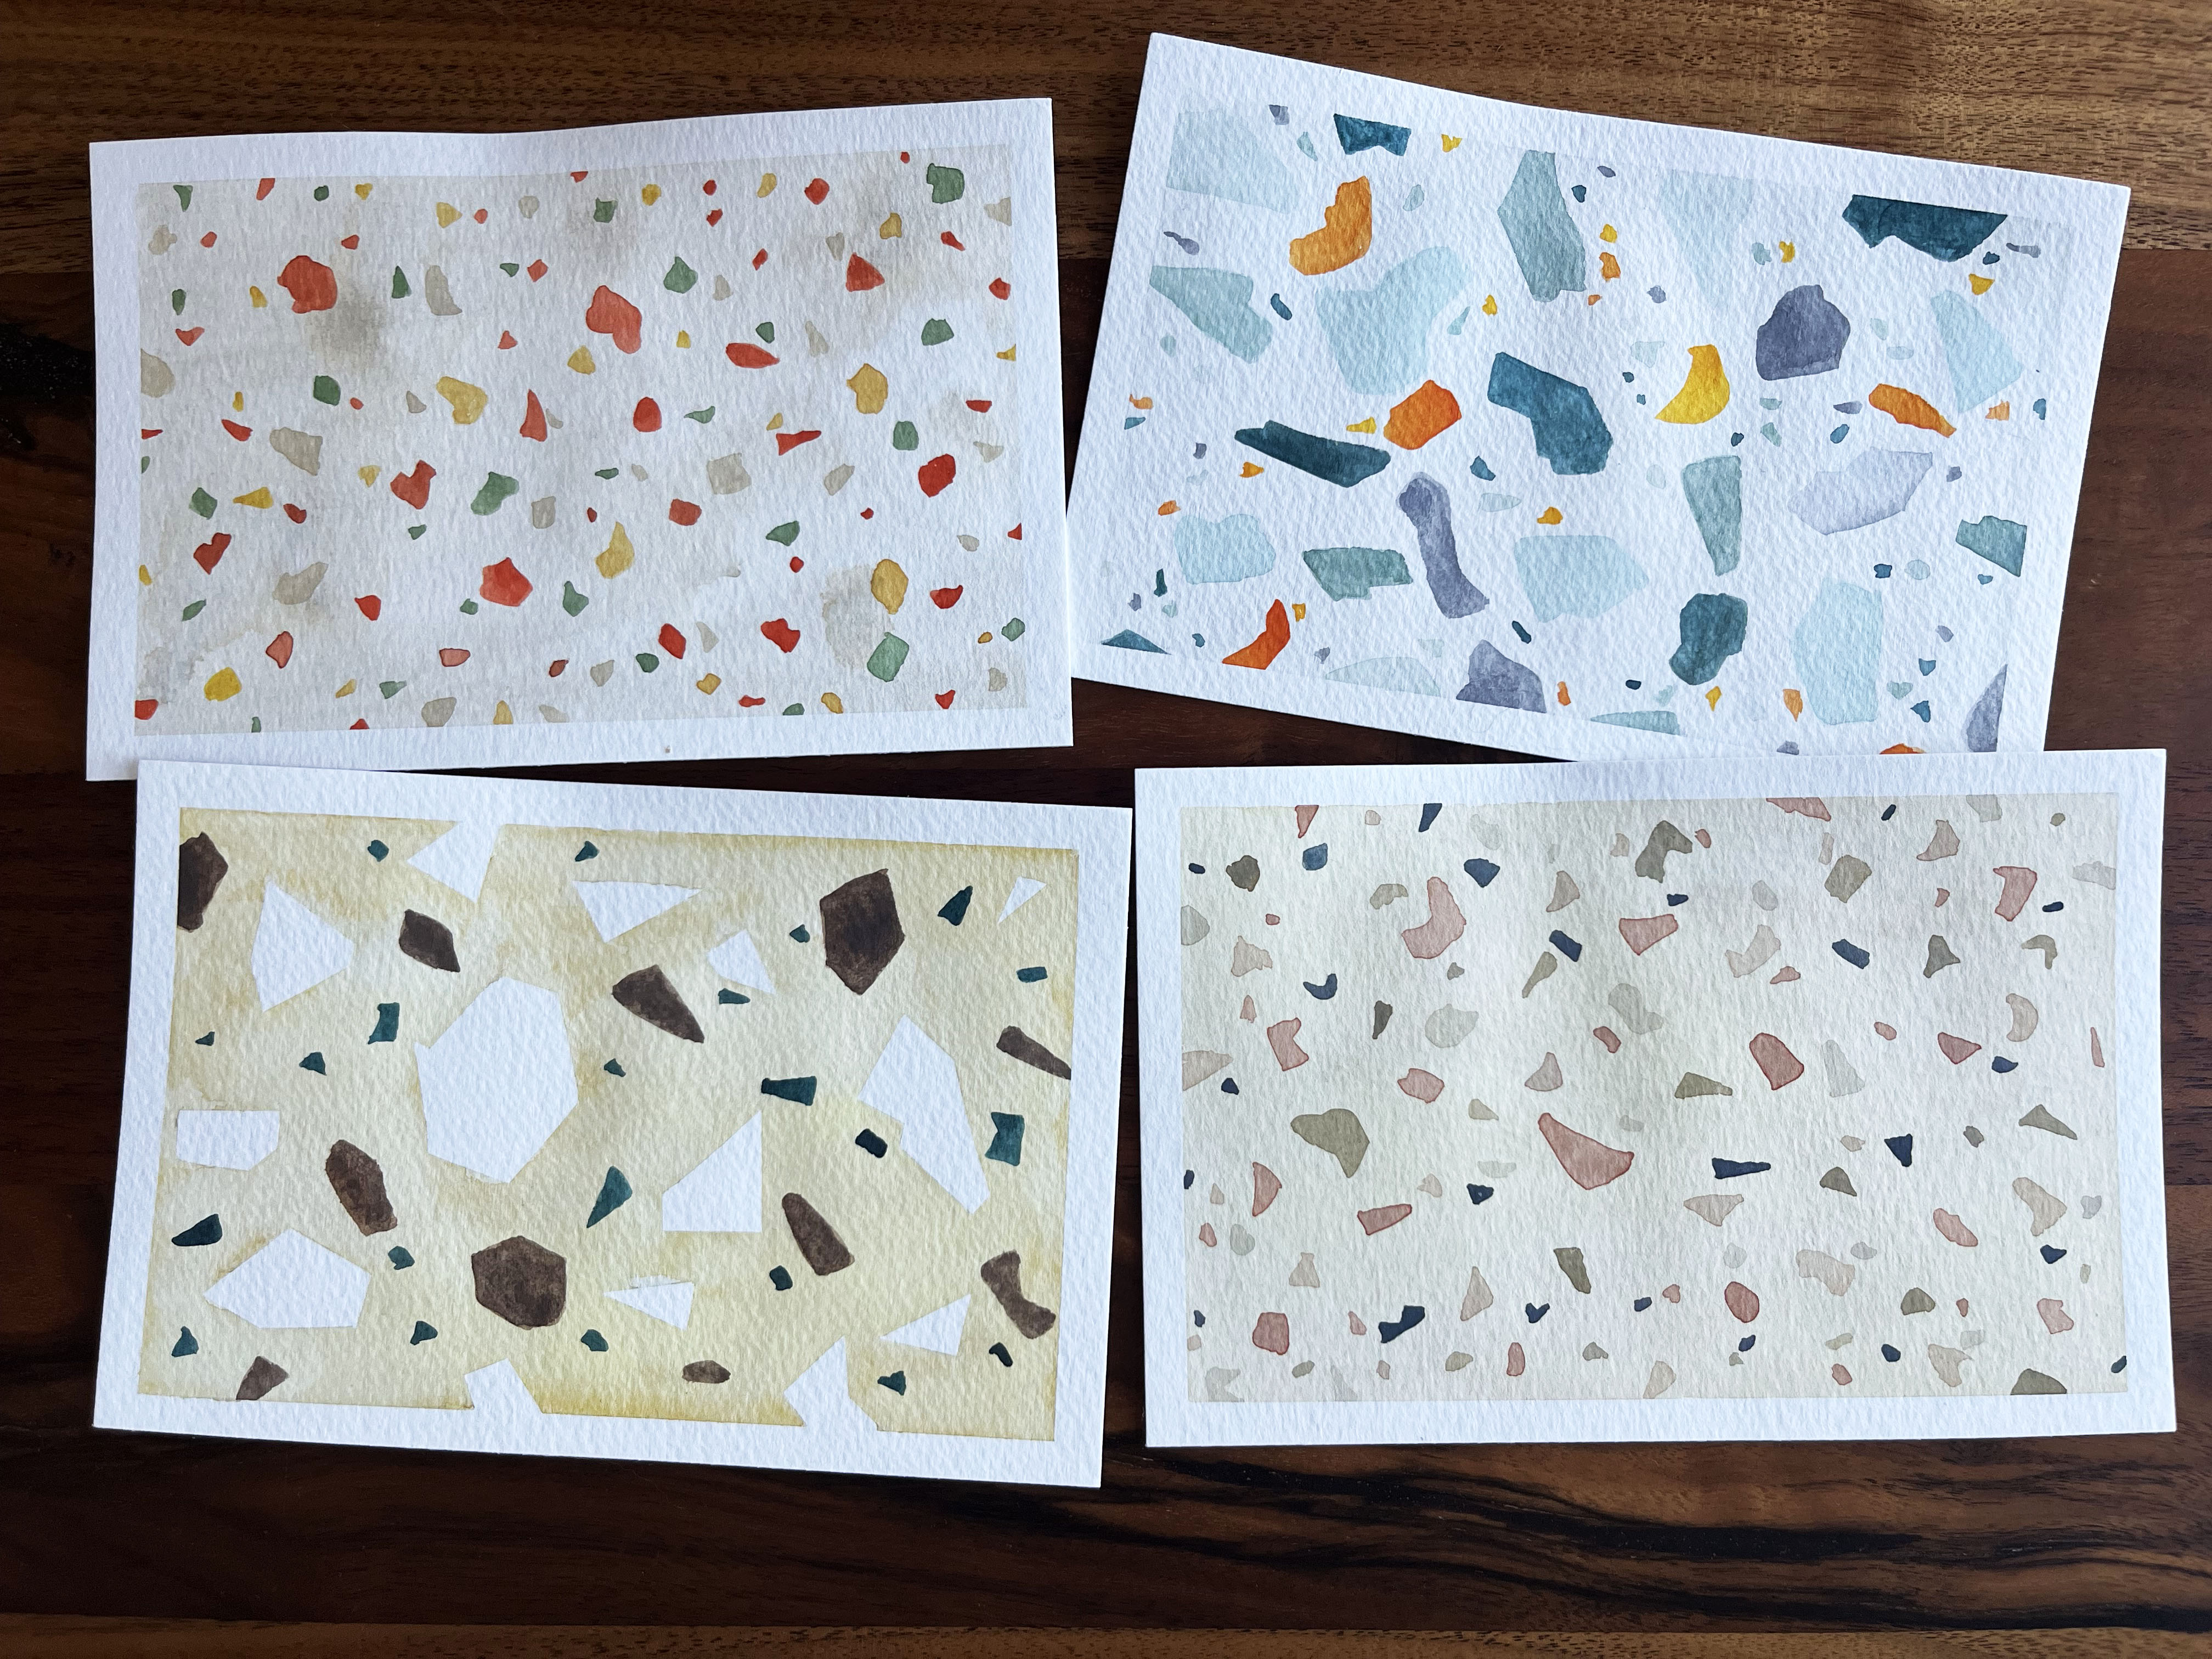
Rather than diving straight onto your wall, take some time to be thoughtful about what kind of shapes you want to create. It sounds silly, but it helps to familiarize yourself with the terrazzo shapes and patterns. Do you like blobby rounded shapes or sharp shards? Small confetti shapes or bigger chunky ones? A dense pattern, or more loose and scattered?
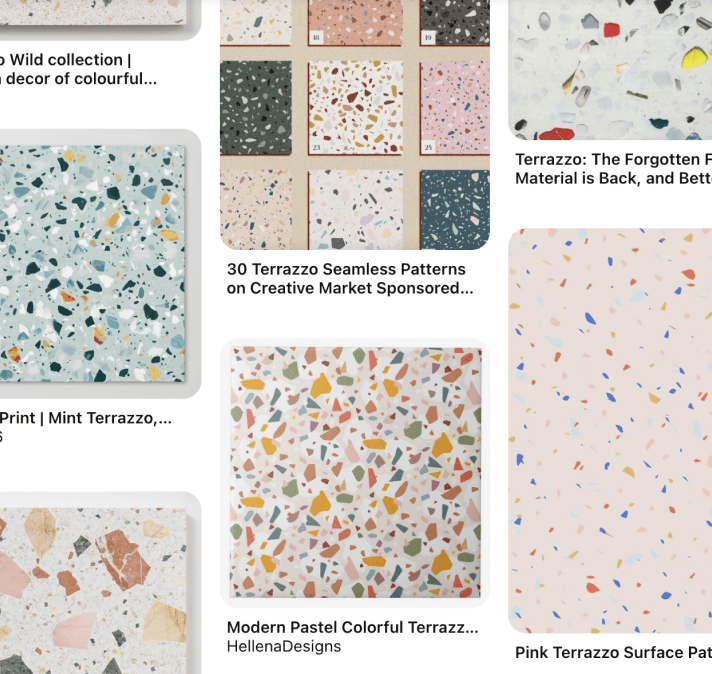
Check out my Terrazzo Pinterest board to find some examples. Practice copying them on paper. You can paint on old pieces of cardboard if you want to try full size. I found it helpful to even practice in miniature with watercolors. This kind of prep is what made me able to freehand on the actual wall.
Painting
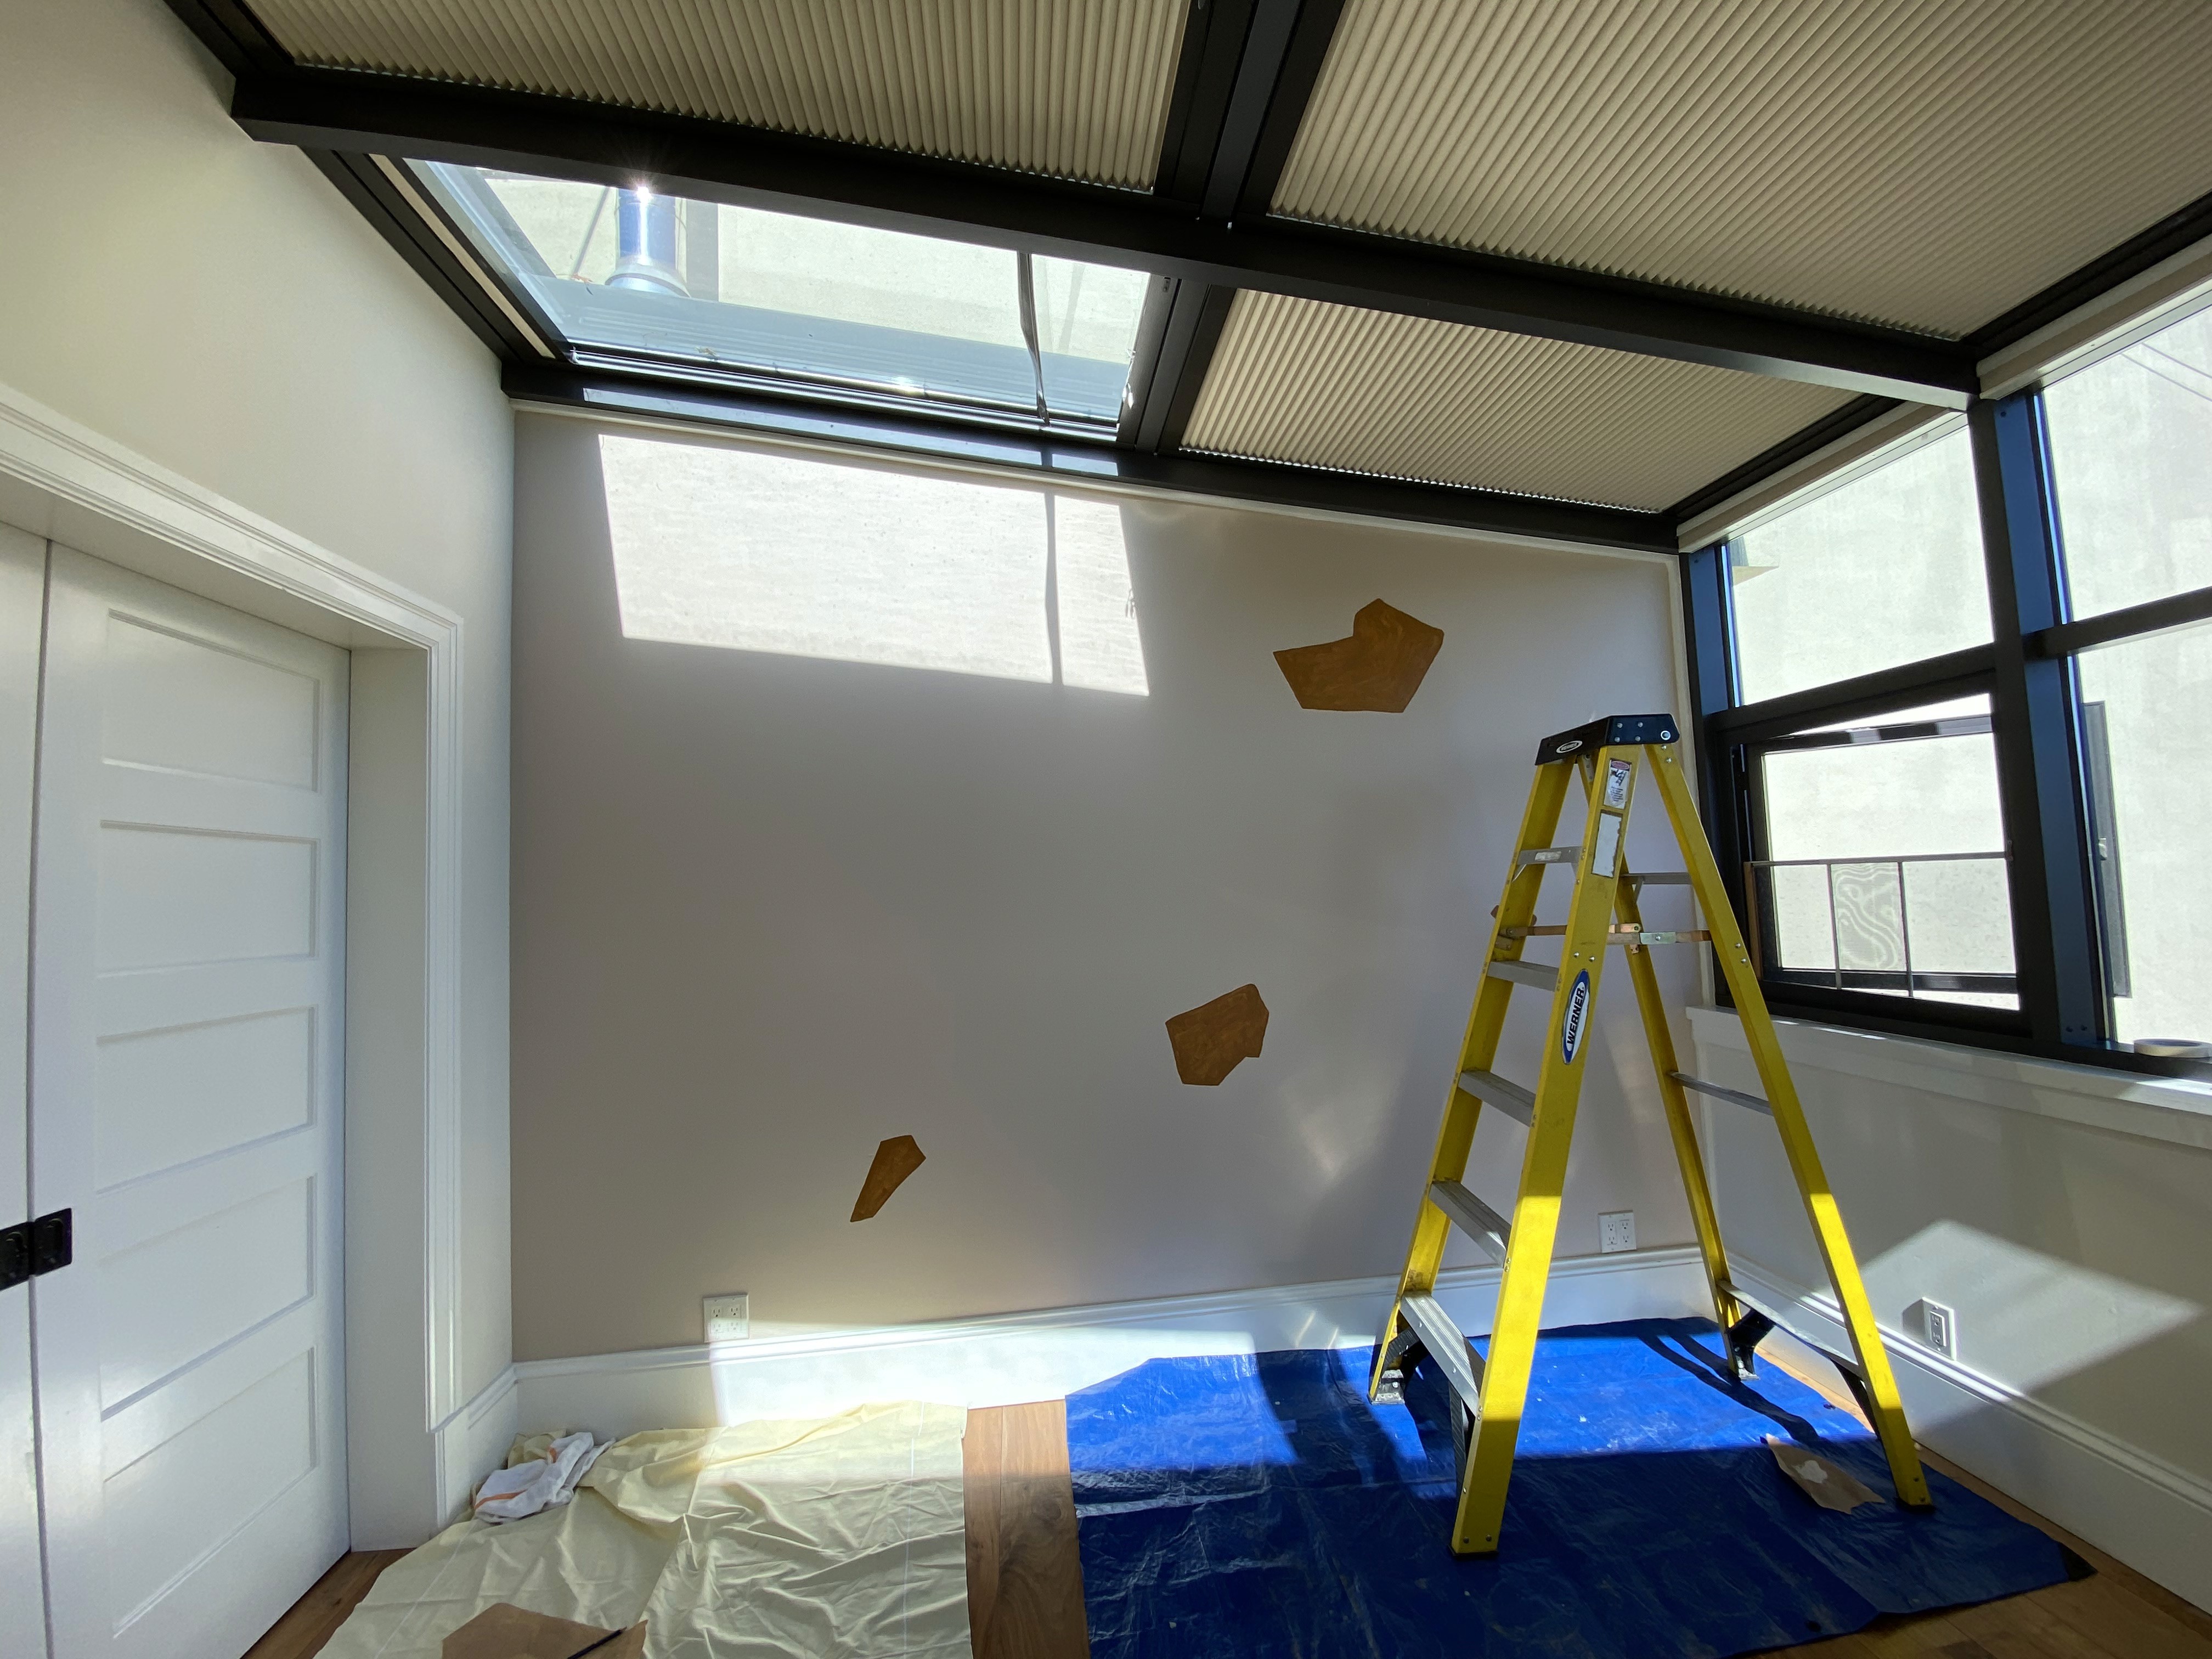
Prep the wall by painting a couple coats of a background color. While not strictly necessary, I definitely recommend a background color to help your accent wall pop from the rest of the room.
Are you ready to paint?! I know it’s scary, but you gotta start somewhere.
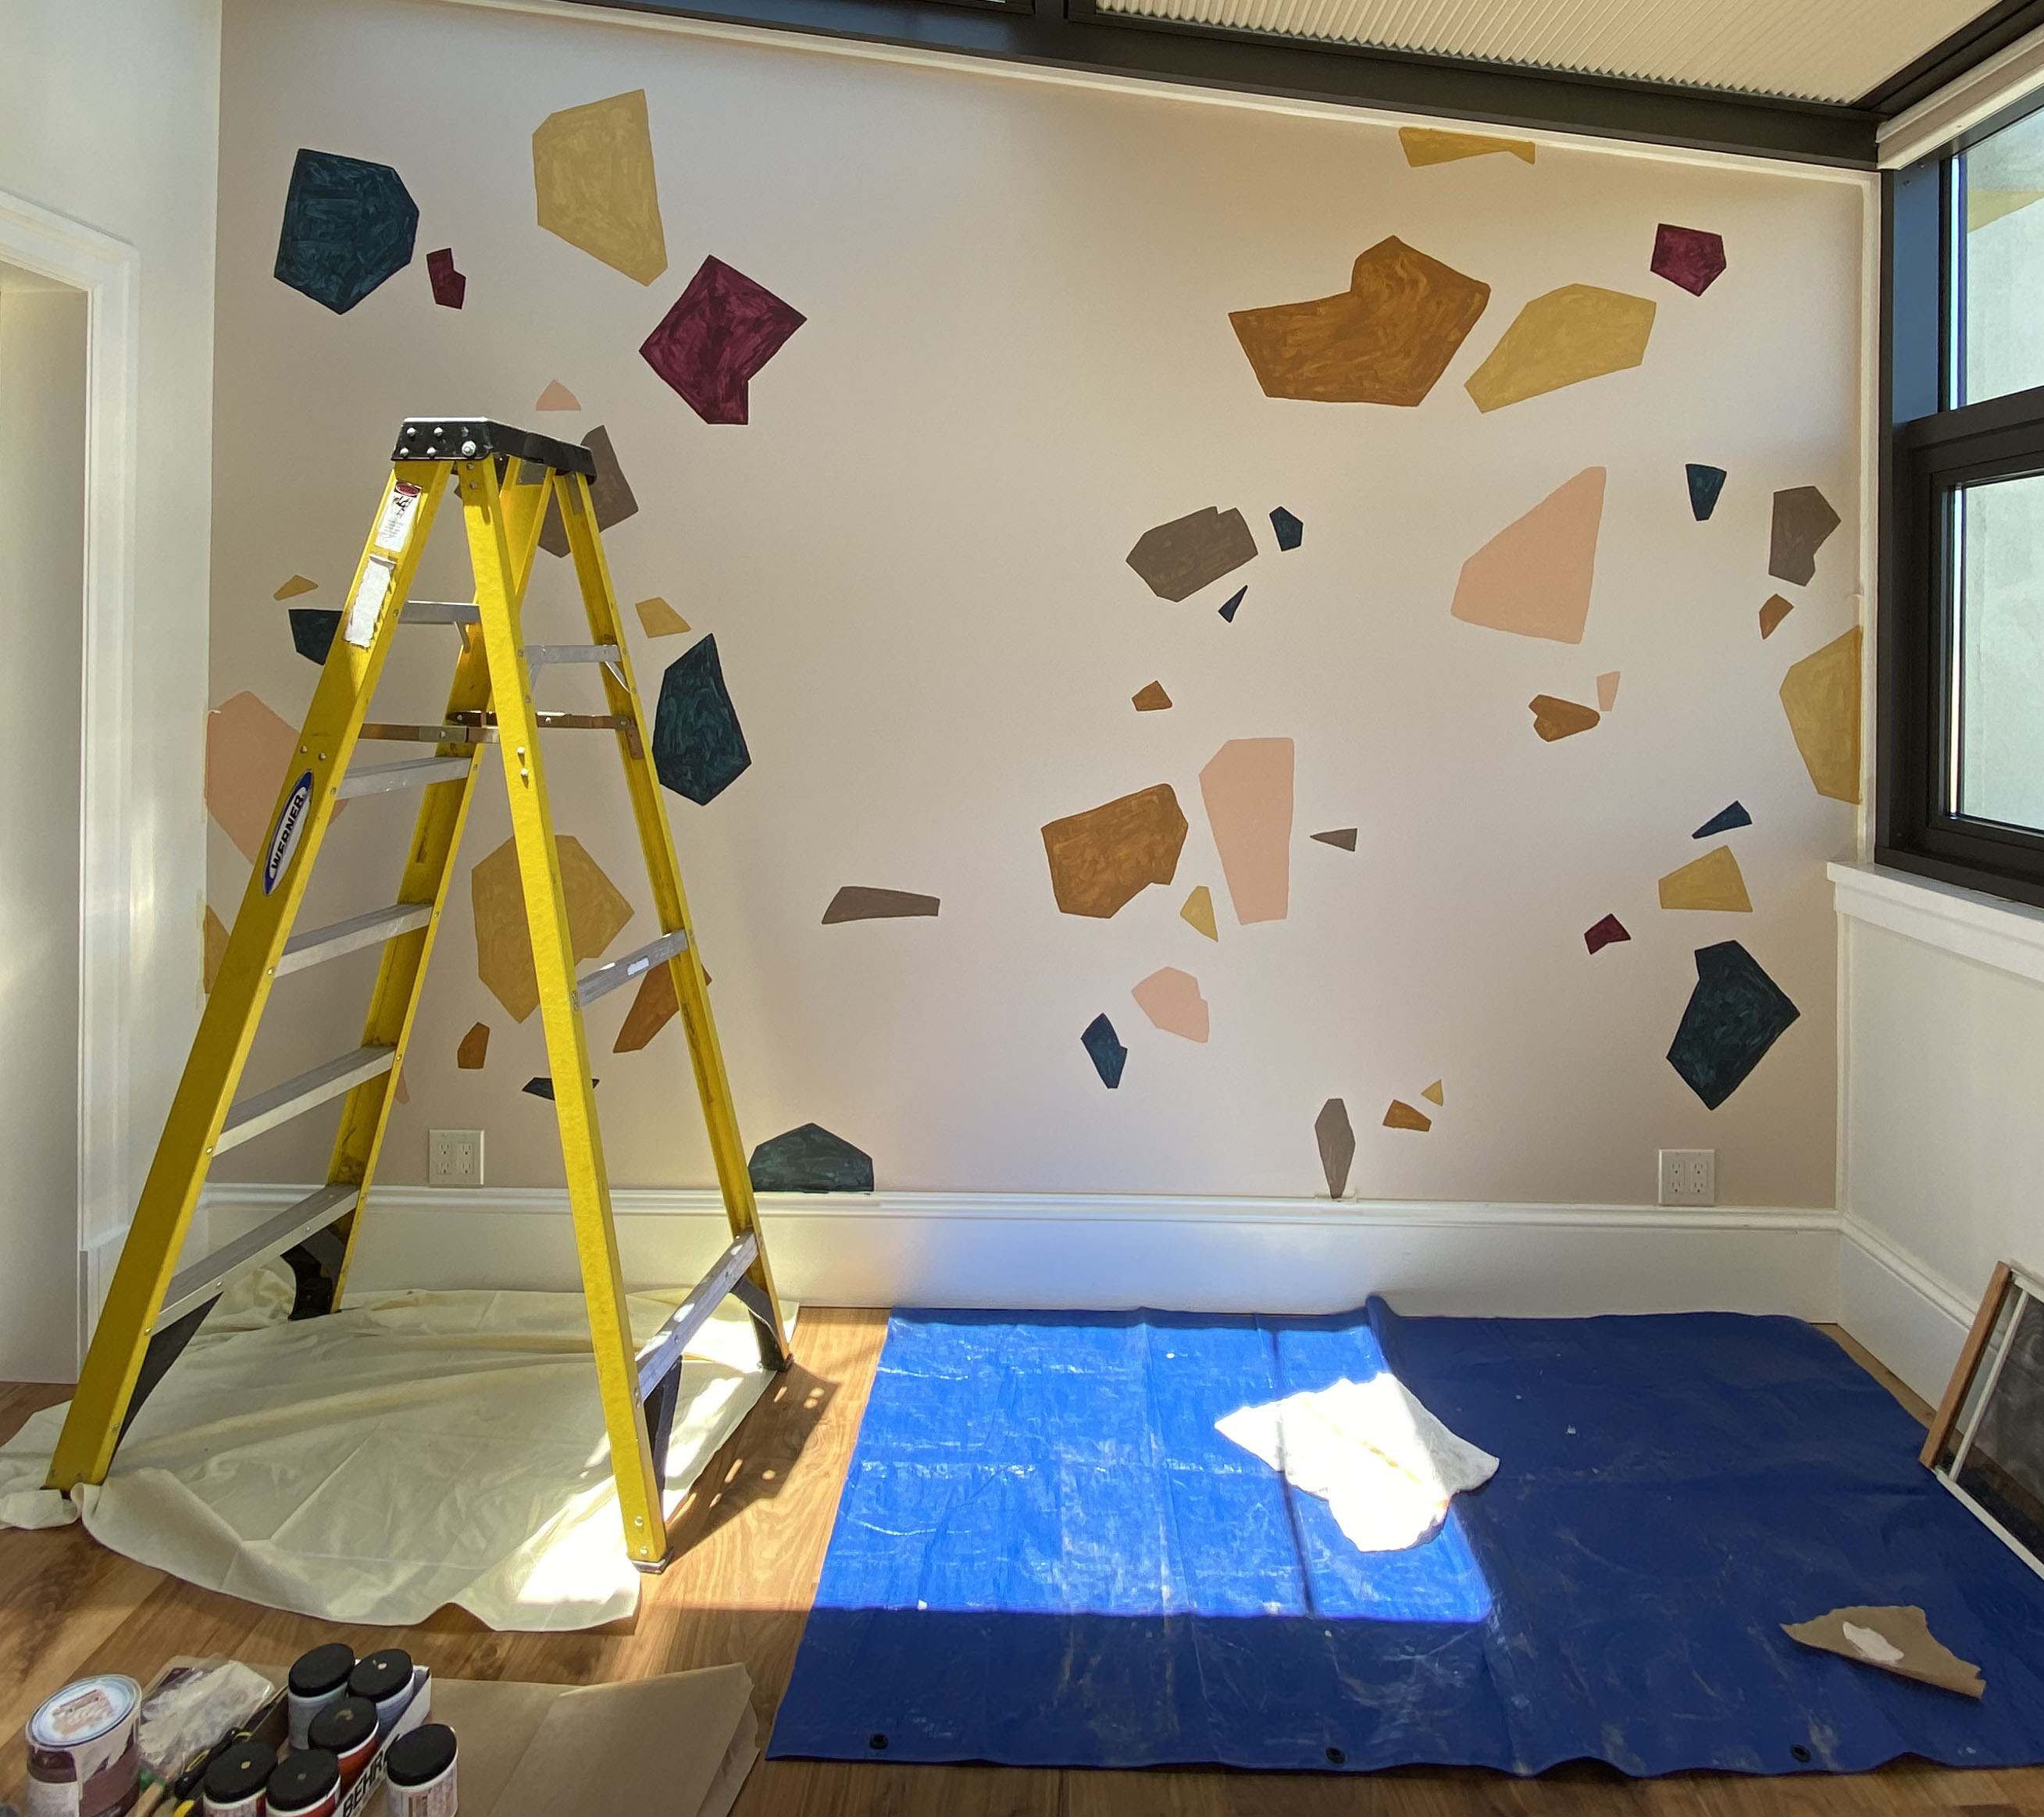
Pick a color and start by doing 5-10 shapes, scattered across the wall. Do this for each color, and then assess where you’re at. For the big ones, I did sketch an outline in pencil first.
Finishing
OK, time to take a step back. Do you have some spots you want to fill in? Or you can keep it uneven and have some areas that are more open. I ended up filling most of the space, but used smaller shapes and gaps to create some clustered areas.
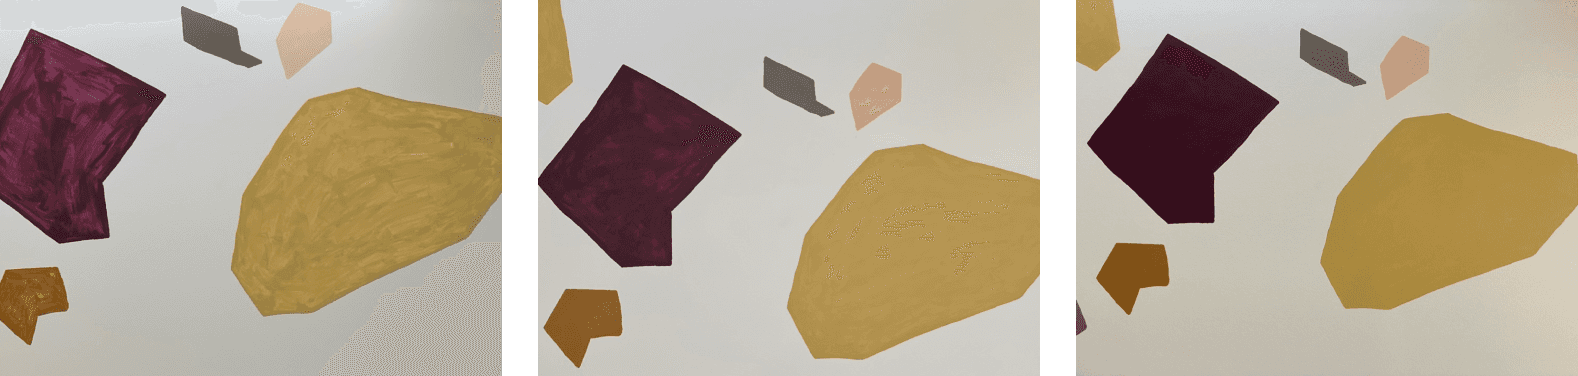
Lastly, if your paint is too thin, go over it with another coat or two. Here’s how mine looked after one, two, and three coats of paint. You can do this quicker since you don’t need to paint all the way to the edges necessarily.
Wrap up
Here’s how it all turned out! I like how a few of the shapes are cut off on the edge, as if the pattern would have extended past the wall. I think it would have looked nice with a few more on the top, but I would have needed a taller ladder.