Tips and tricks for miniature hand pies.
Here's how to avoid sticky dough that's hard to work with, and get a cute, crisp little crust. Perfect for pi'ice cream sandwiches or just eating like a cookie.
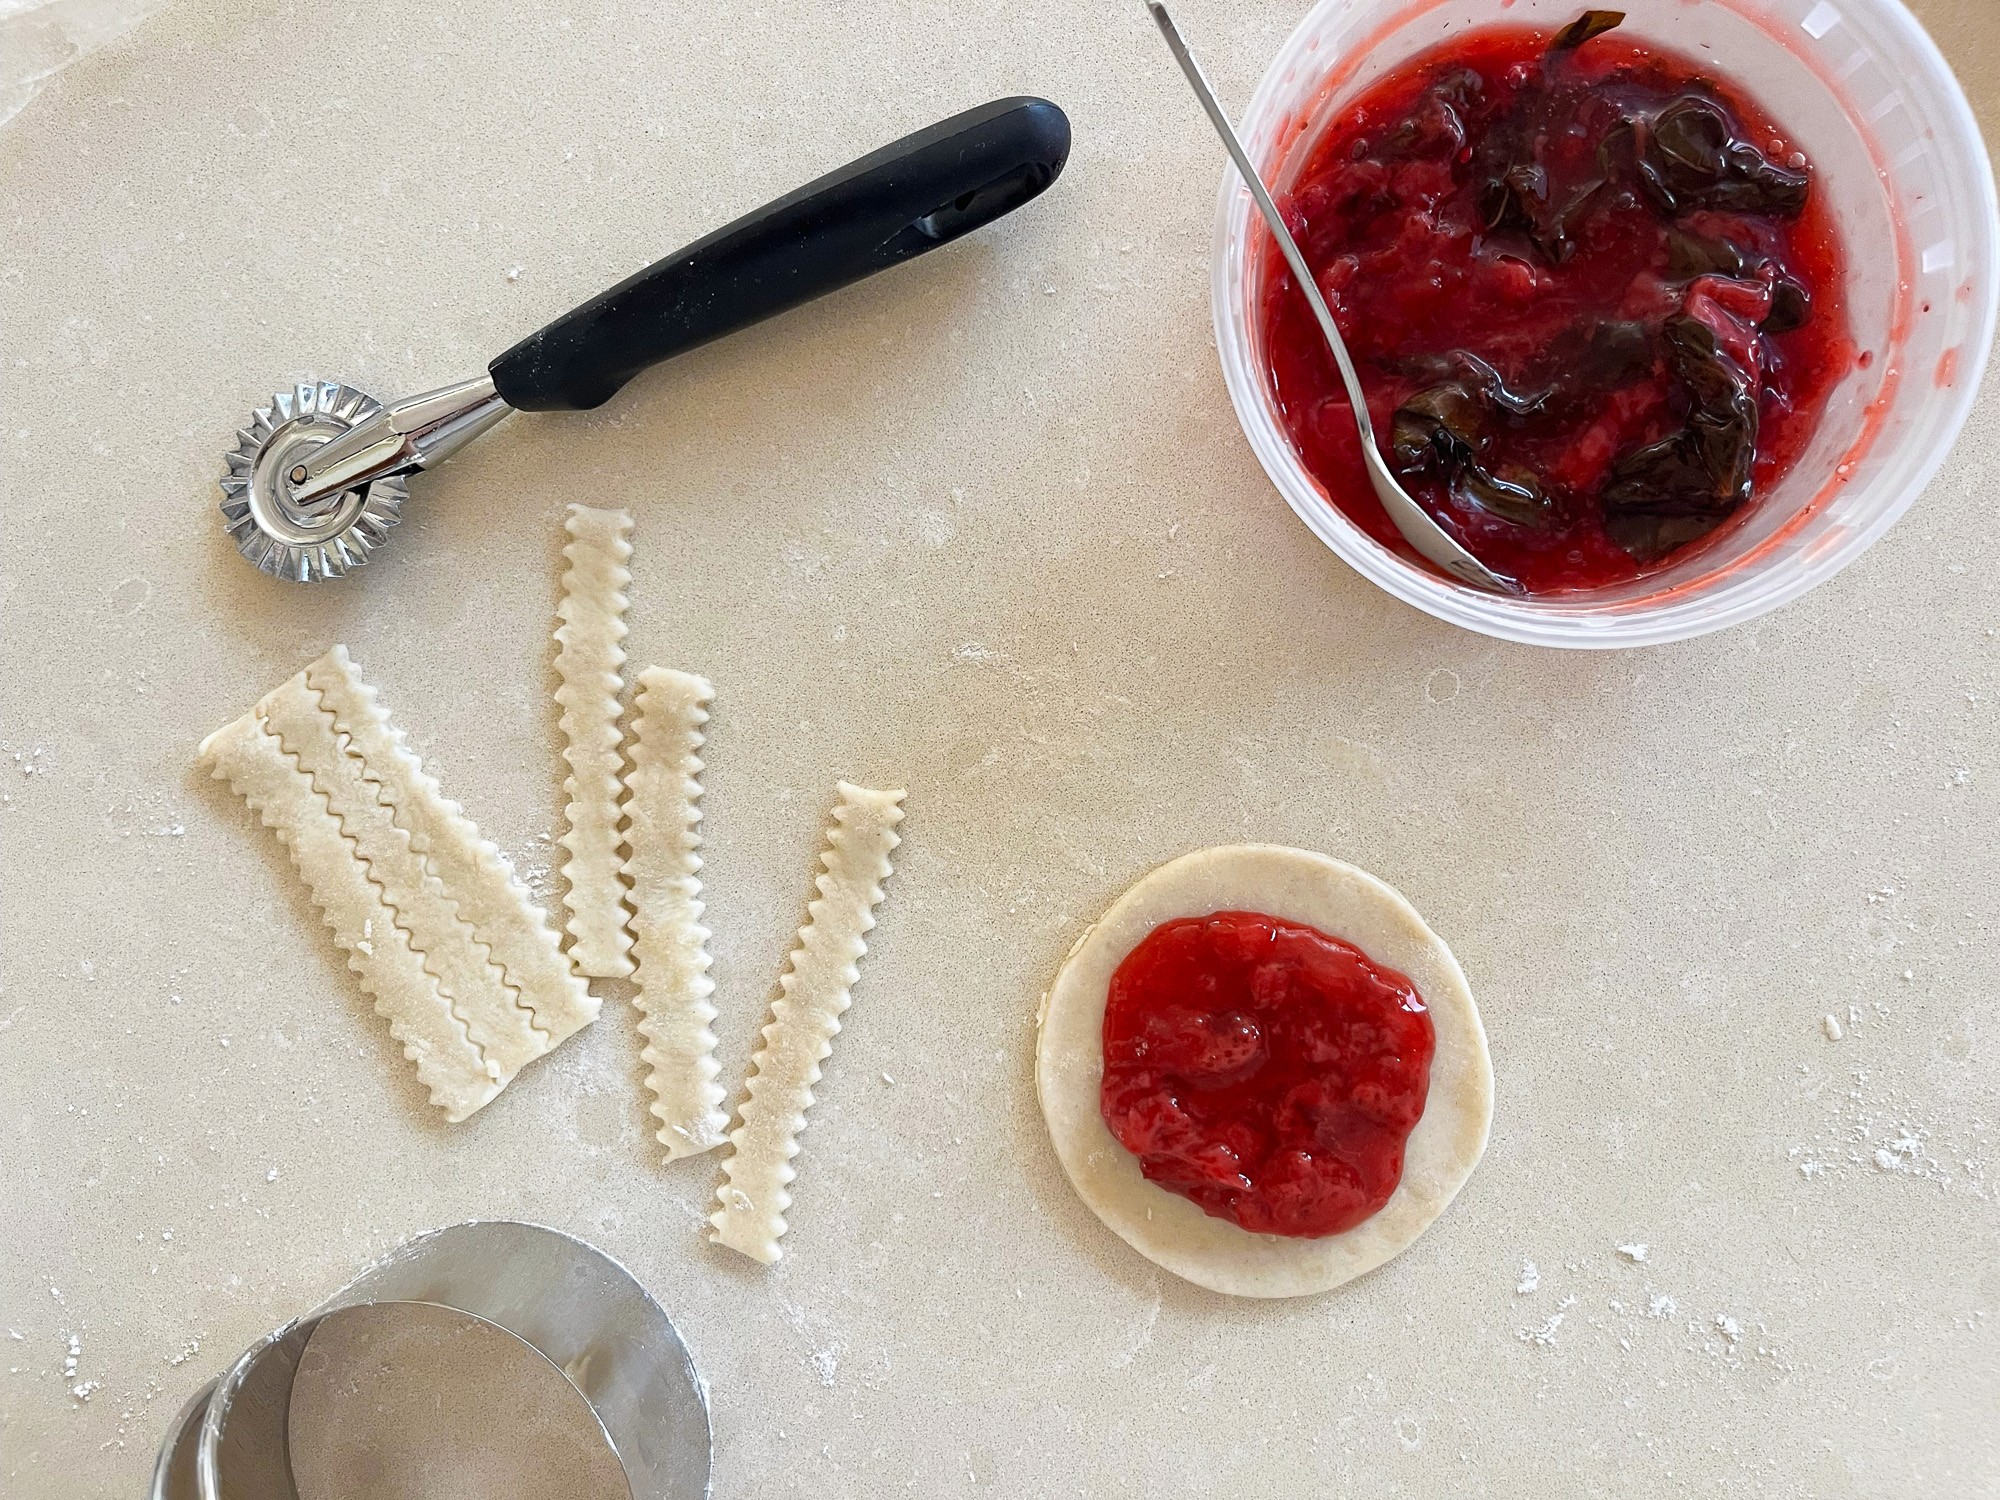
Use a sharp, round cookie cutter
Use a cookie cutter rather than a glass cup — the thicker rim will smoosh the dough and seal it together. A sharp cut allows the layers to separate and puff in the oven.
As for the lattice, I think a fluted rotary cutter is the cutest, but a pizza wheel or just a knife will work too.
Pre-cook your filling, and don't overfill
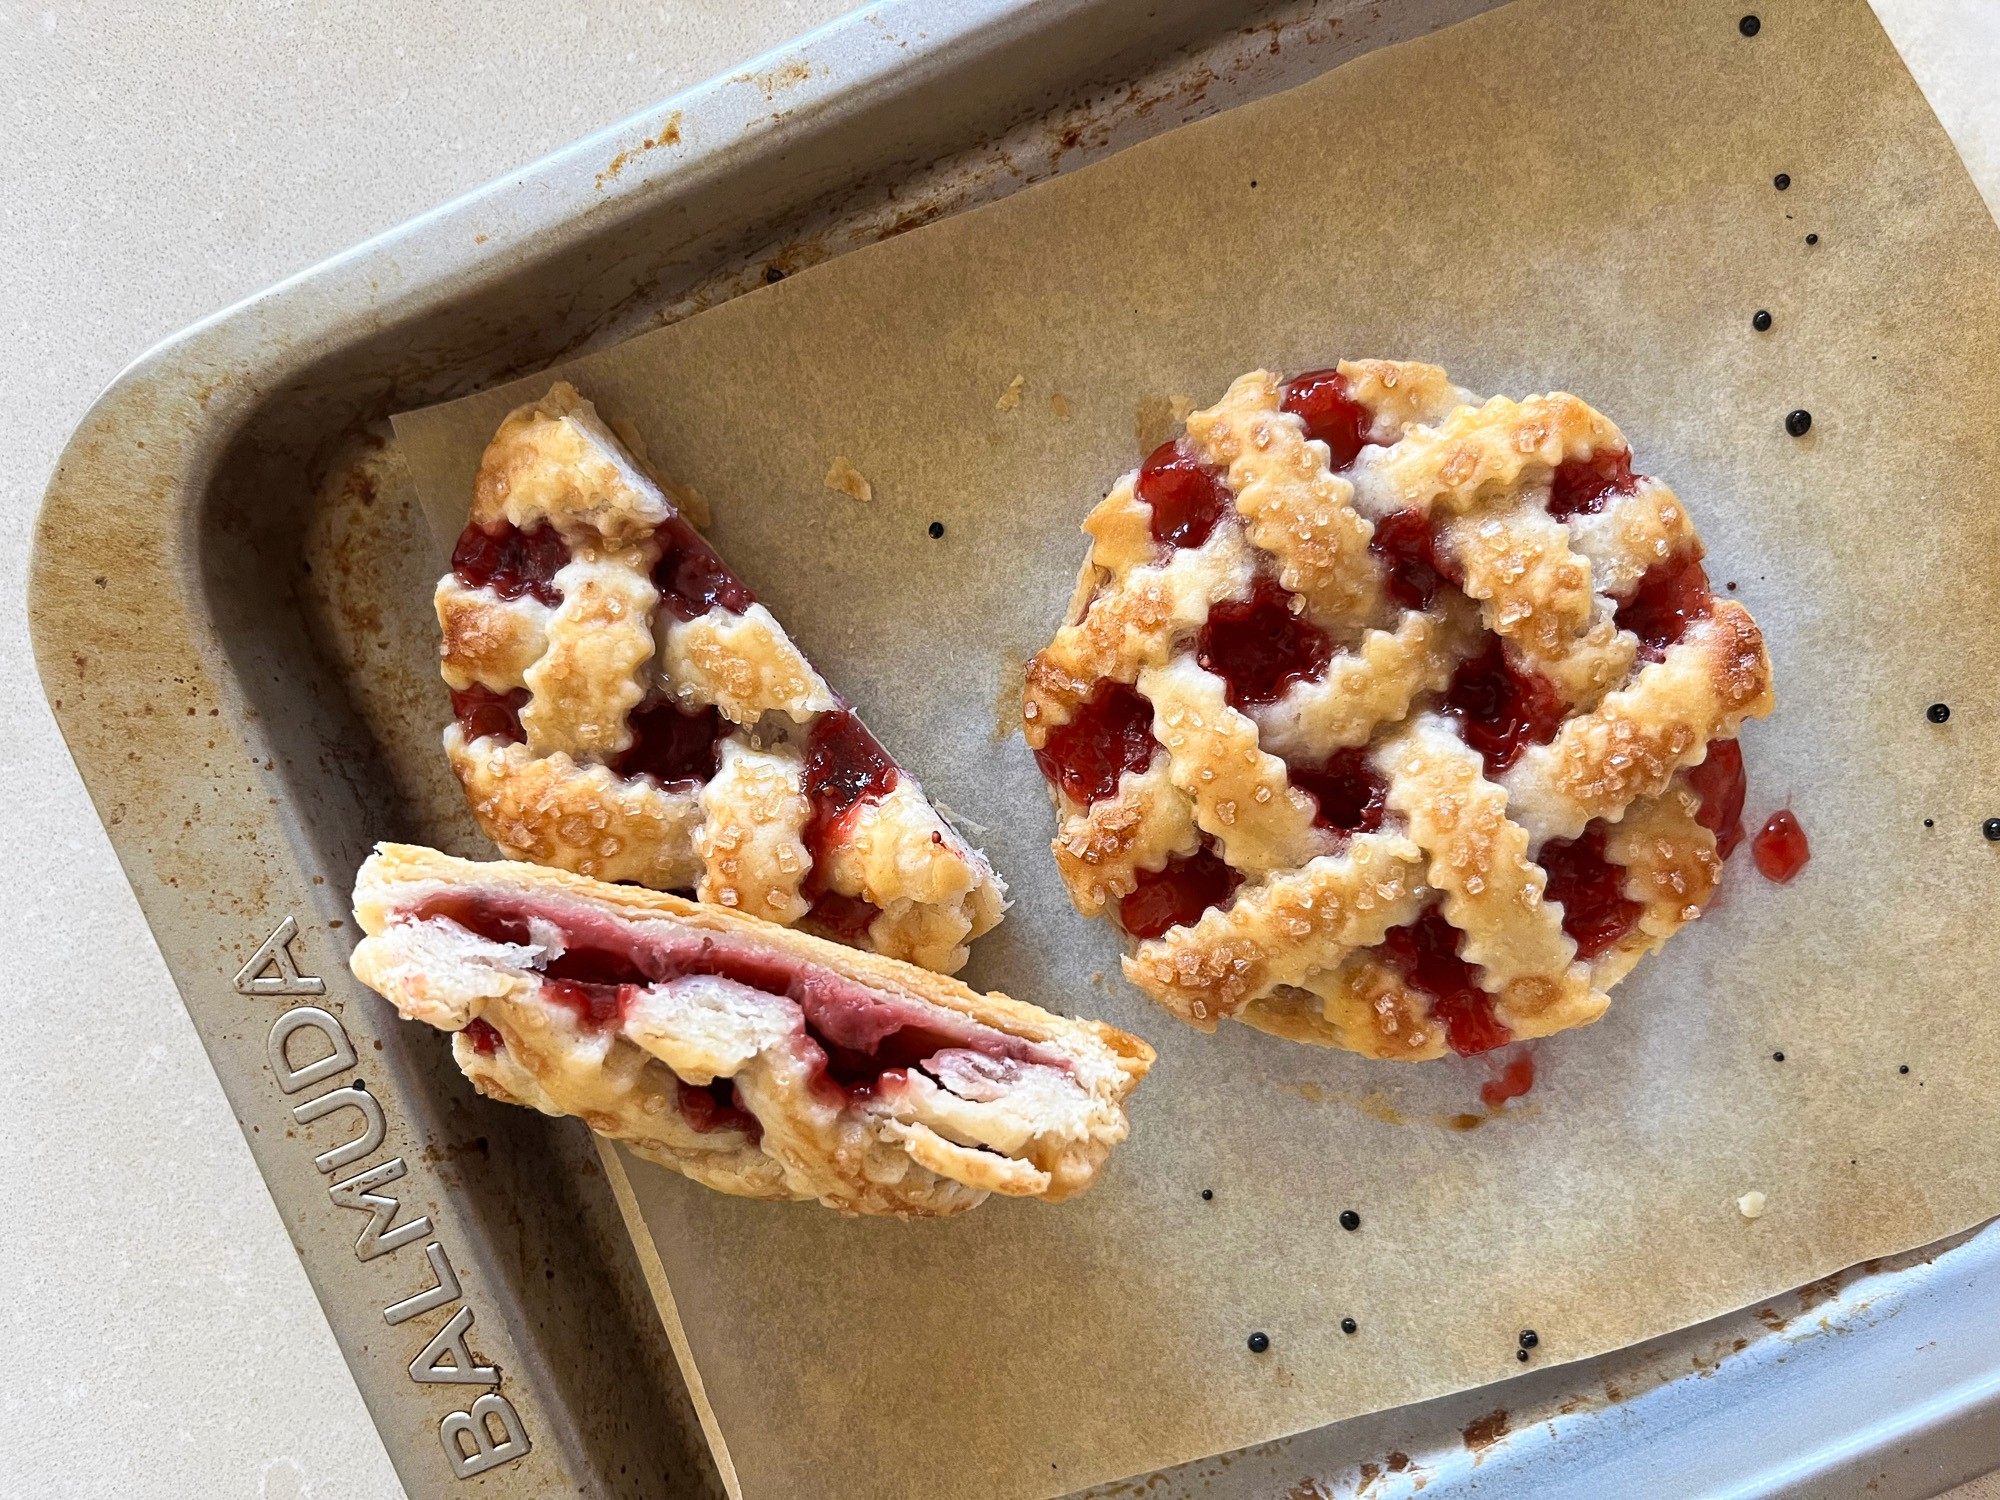
A thick filling is key to keeping things nice and neat. By pre-cooking, the juices will start to evaporate and thicken so it (mostly) won't run out.
I bake mini pies flat on the baking sheet — this means there isn't a bowl shape like a pie pan to keep the juices in. Leaked juices will not only look messy, but can burn on the baking sheet.
Similarly, you don't want to overfill your mini pies, or they may spill out during baking. Leave at least a half inch border on the edge.
To pre-cook your filling, cut your fruit into small pieces and cook in a saucepan with sugar, flavorings, and a thickener (like flour) if desired. The exact amounts will depend on what type of fruit you use. You can scale down any pie recipe if you aren't confident making it up. Cook it until it has a texture like chunky applesauce or compote. Store-bought jam also works perfectly!
For example, I used 200g strawberries, juice from half a lemon, and 2 tbsp of sugar. After cooking for 15 minutes, the fruit was soft and beginning to break apart. I stirred in 1/2 tbsp tapioca starch mixed into a slurry with a little water, and cooked another minute until thick.
Chill the dough, often
As always with pie dough, it will be easier to work with if it is cold. This is even more of a problem with mini pies because they take longer to assemble. You have to fiddle with a bunch of small pieces of dough — this means more time out of the fridge getting warmed up by your hands.
Unless my kitchen is frigid, I wrap the dough in plastic wrap and chill for 10+ minutes between every step. A typical process could look like:
Roll out the dough.
Chill.
Cut out circles and lattice strips.
Chill.
Assemble pies.
Chill again before a final trim of the edges.
It's very hard to cleanly cut soft dough. If the dough is stretching, sticky, or not cutting all the way through, it is probably too warm.
Another issue you can have with mini pies is you cut with a round cookie cutter, and it shrinks into an oval. This happens when the gluten tightens up from over-handling. Chilling and letting it rest before cutting the circles can help with this too.
The most efficient lattice method
For a full sized pie, you usually start a lattice by laying all the strips in one direction, then pulling back every other strip and laying one down in the opposite direction. For a mini 3x3 lattice, it's more efficient to start from the center.
Place one strip across the center.
Cross one strip in the other direction, to make a cross.
Place two strips in the original direction, on each side of the first strip.
Lift the ends of the first strip from step 1, so you can lay your last two strips underneath. Lay the ends back down.This should create an over-under-over weave.
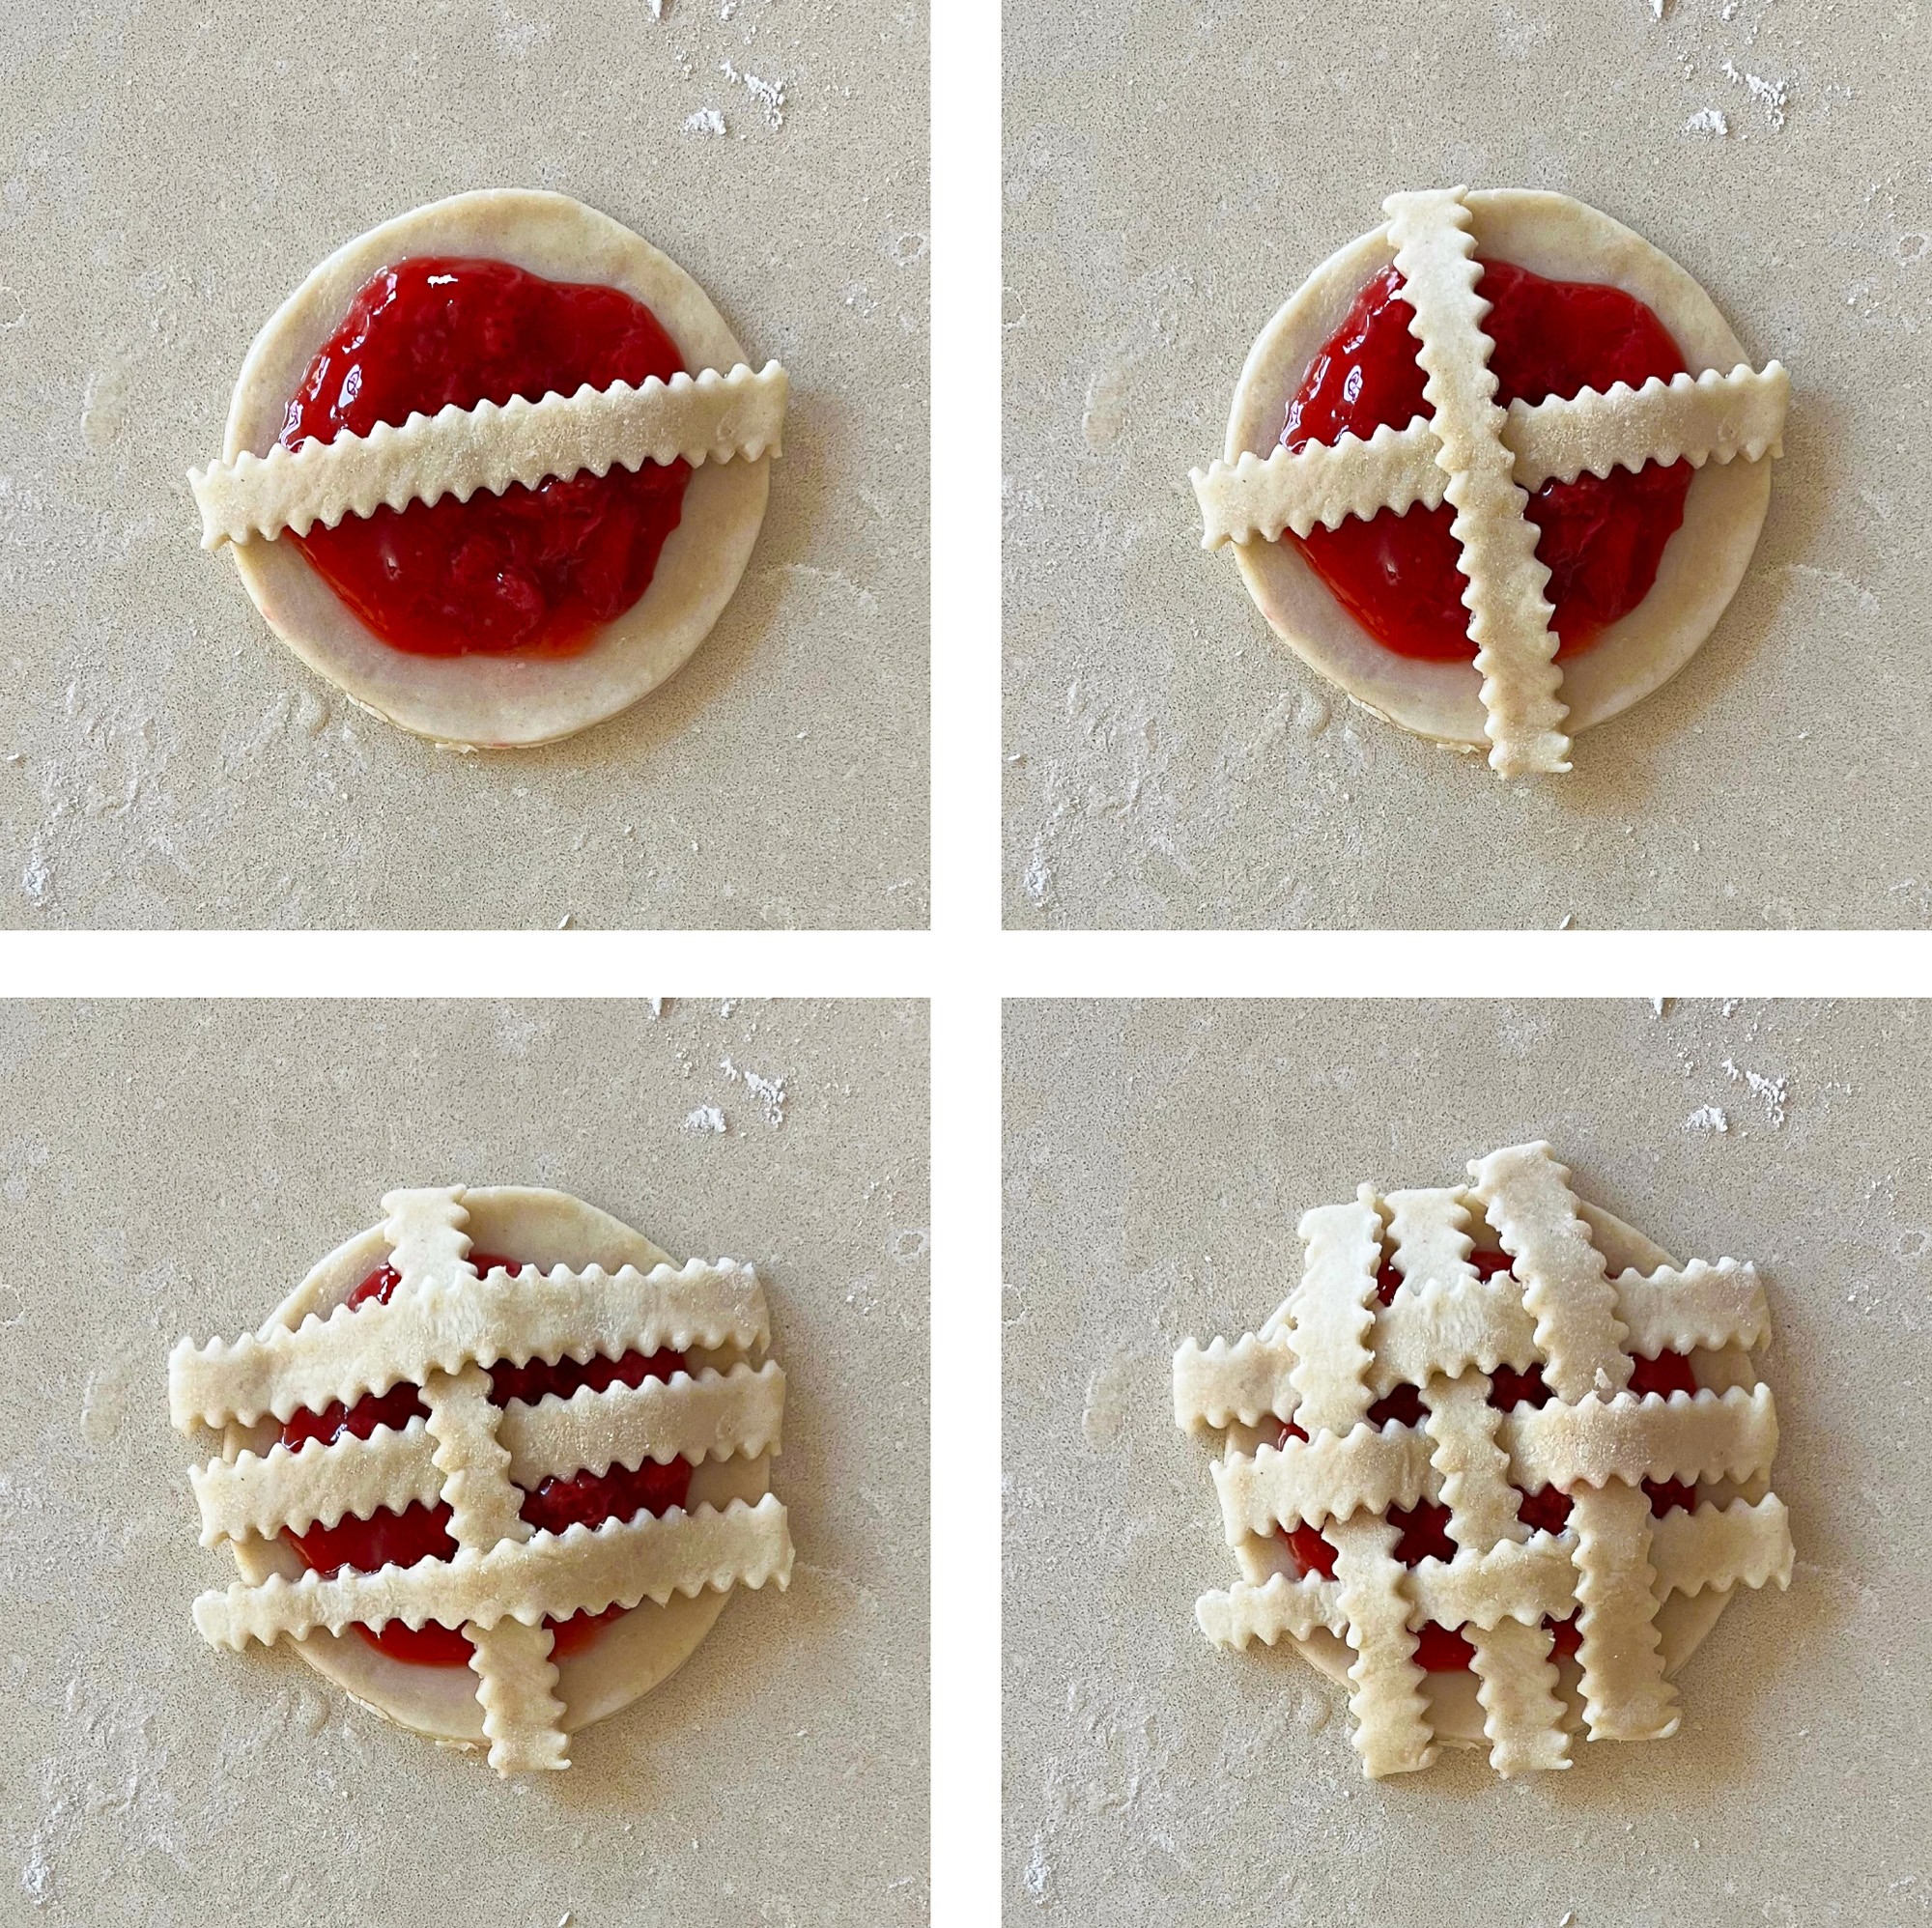
This method allows you to build the lattice as efficiently as possible, with minimal lifting and moving of pieces. If you are only making one mini pie, it's not a big deal. But if you're making a dozen, you can avoid a lot of handling increasingly warm dough.
Give it a final trim with the cookie cutter
Whether you make a lattice or have a simple vented top crust, give it one last cut with the cookie cutter. This cleans up the edges if the lattice is hanging over, or the top crust isn't exactly lined up.
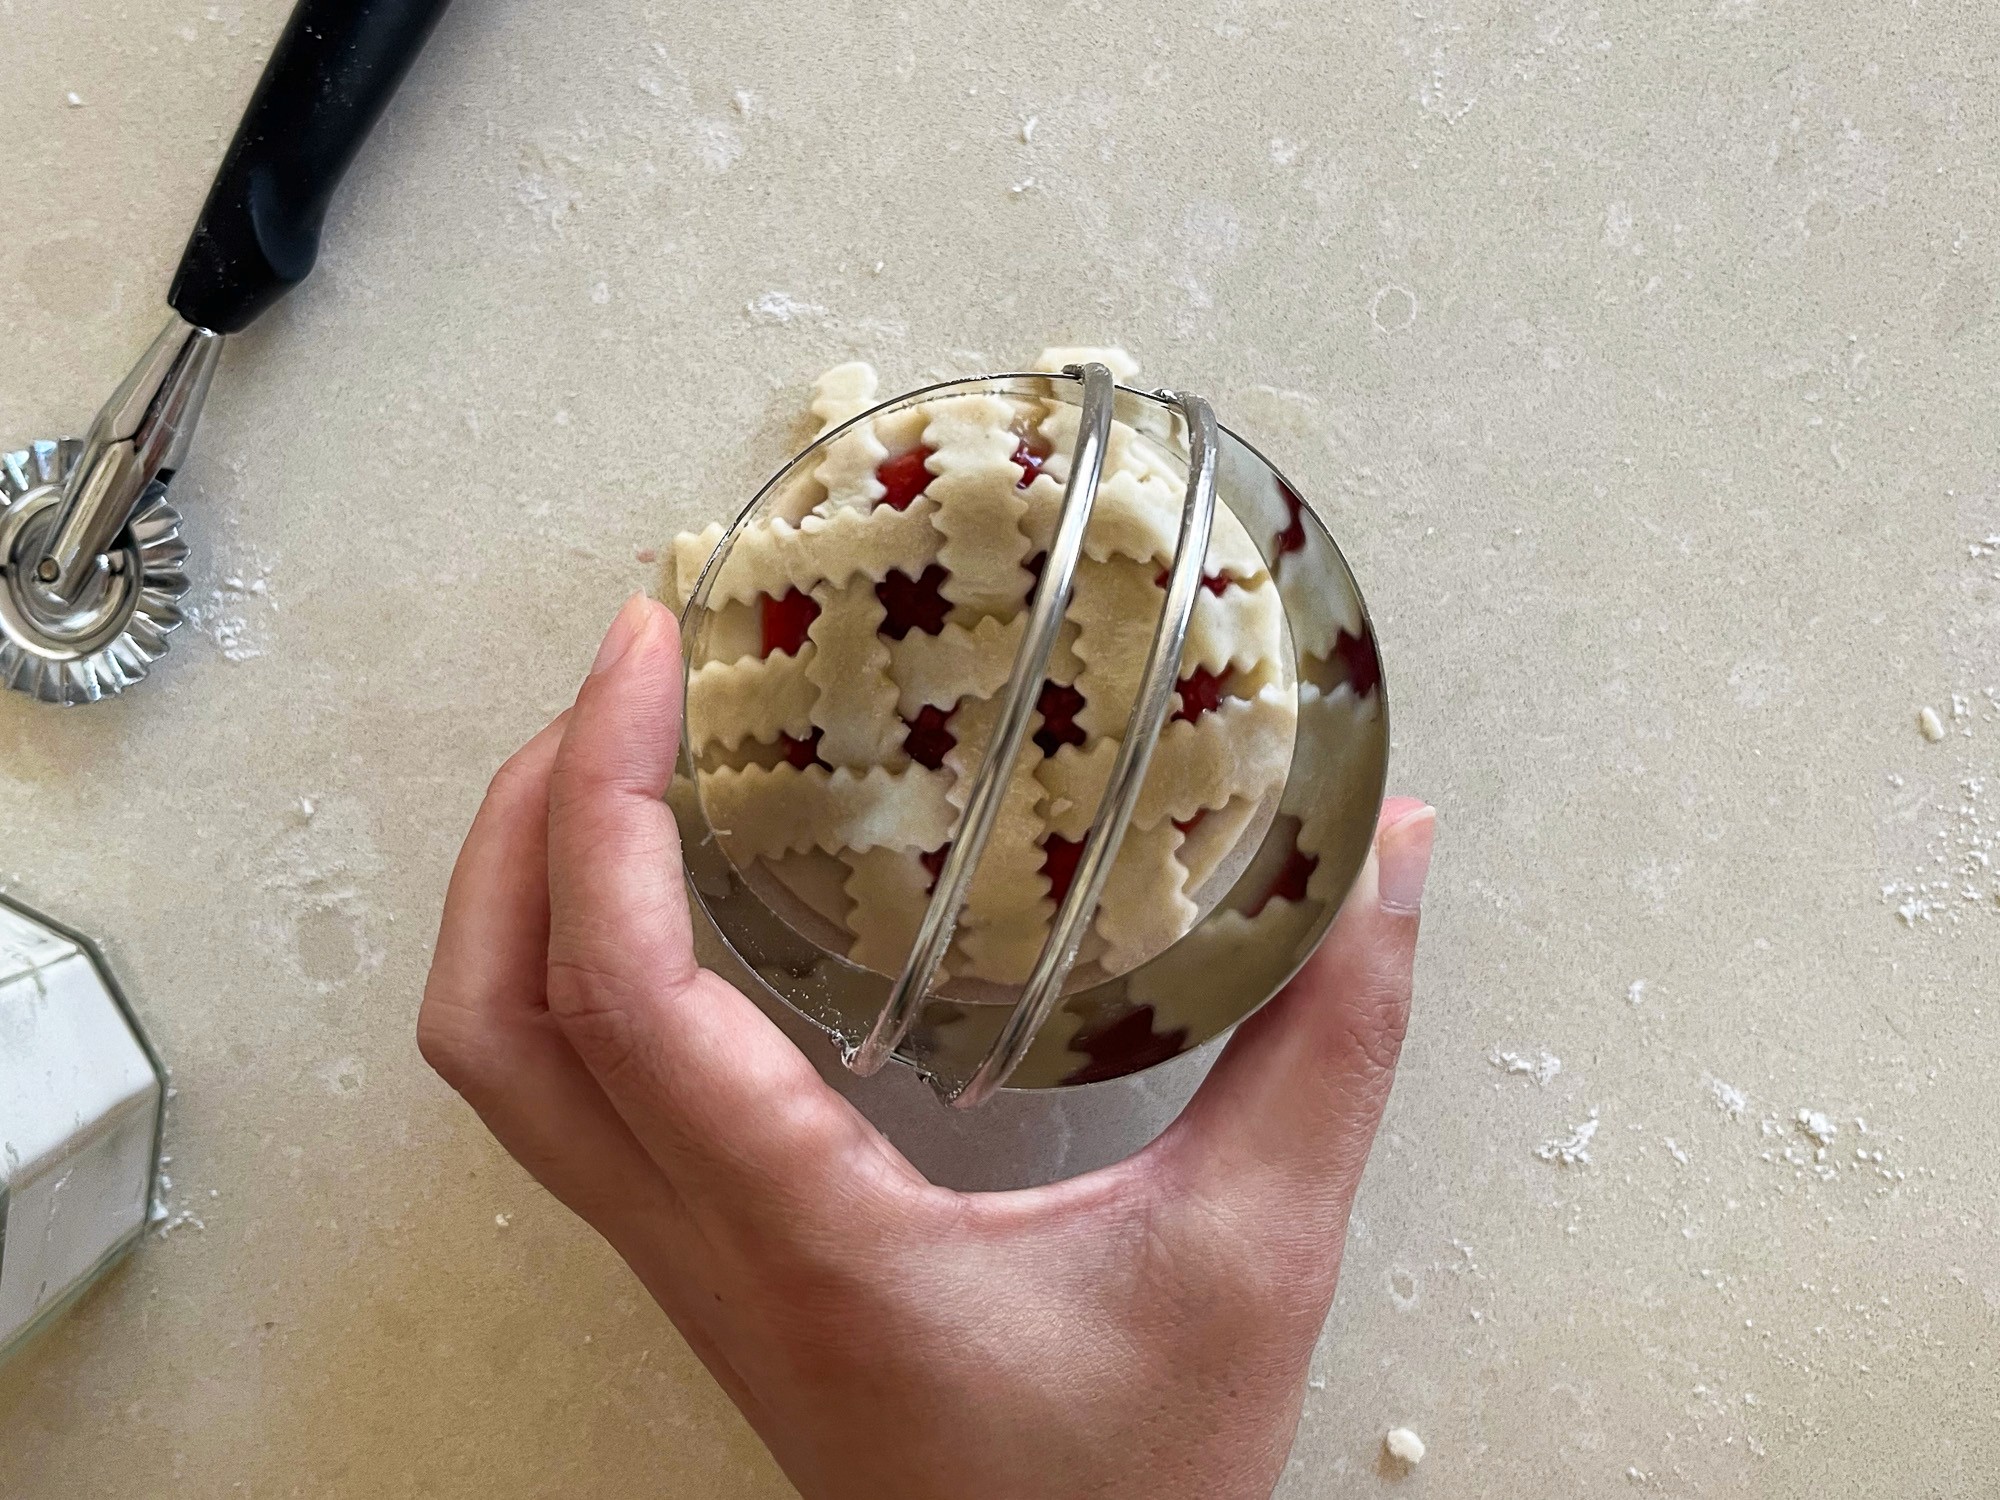
Definitely chill the pies in the fridge before this final trim, if your dough warmed up at all. Again, this will give you the cleanest cuts.
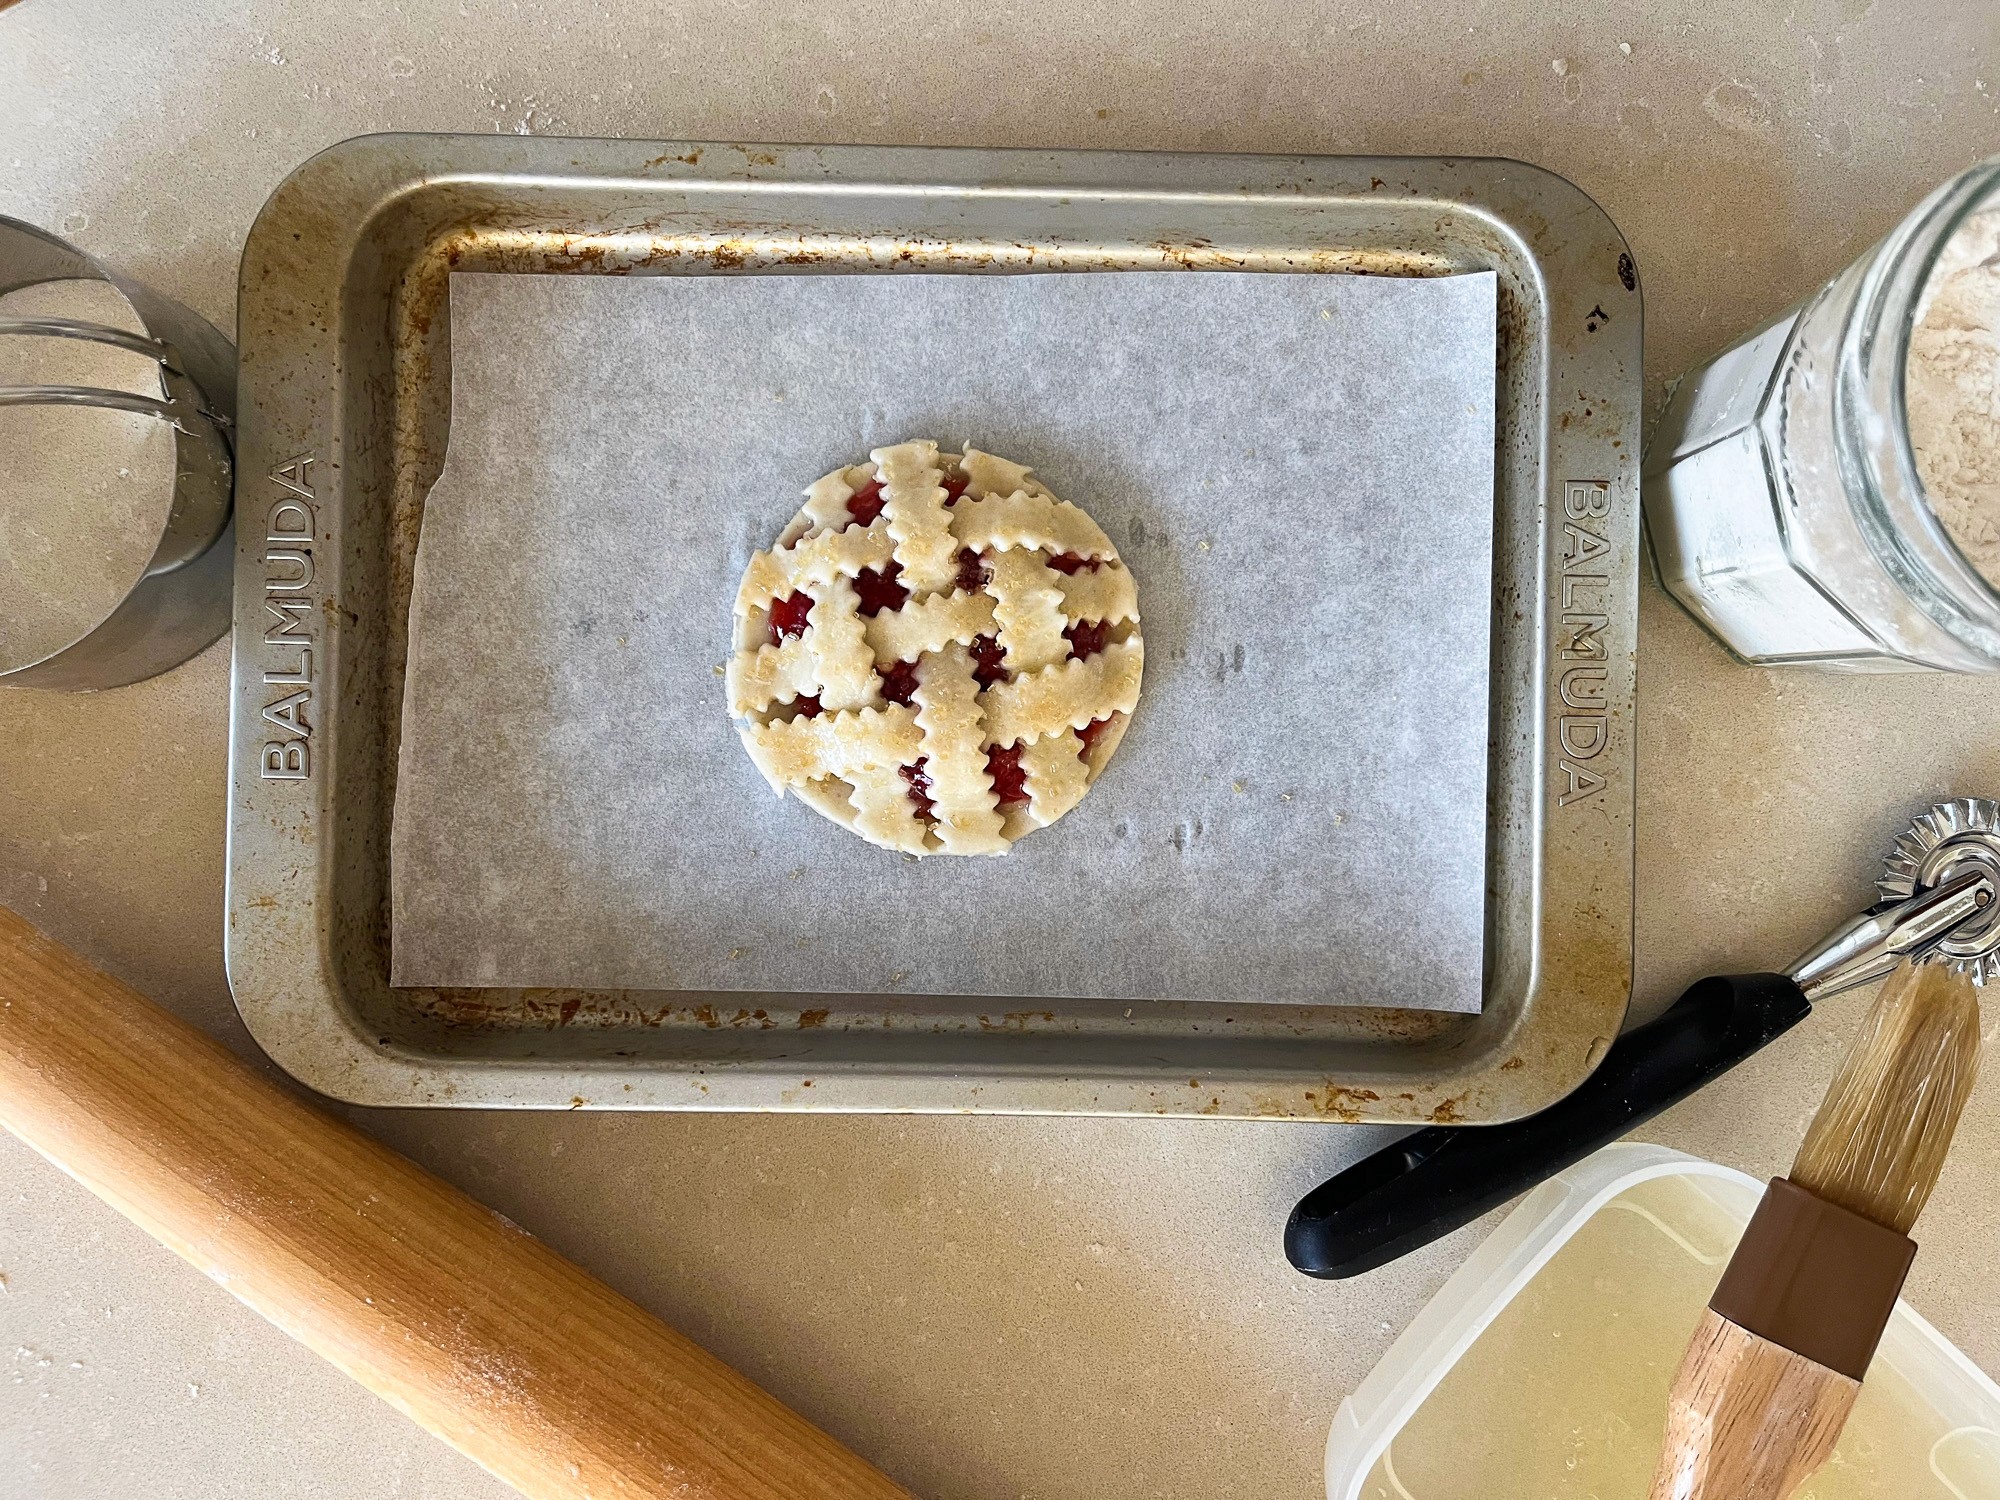
A bit of egg wash and large grain sparkly sugar will give it a cute finish, and you're ready to bake!
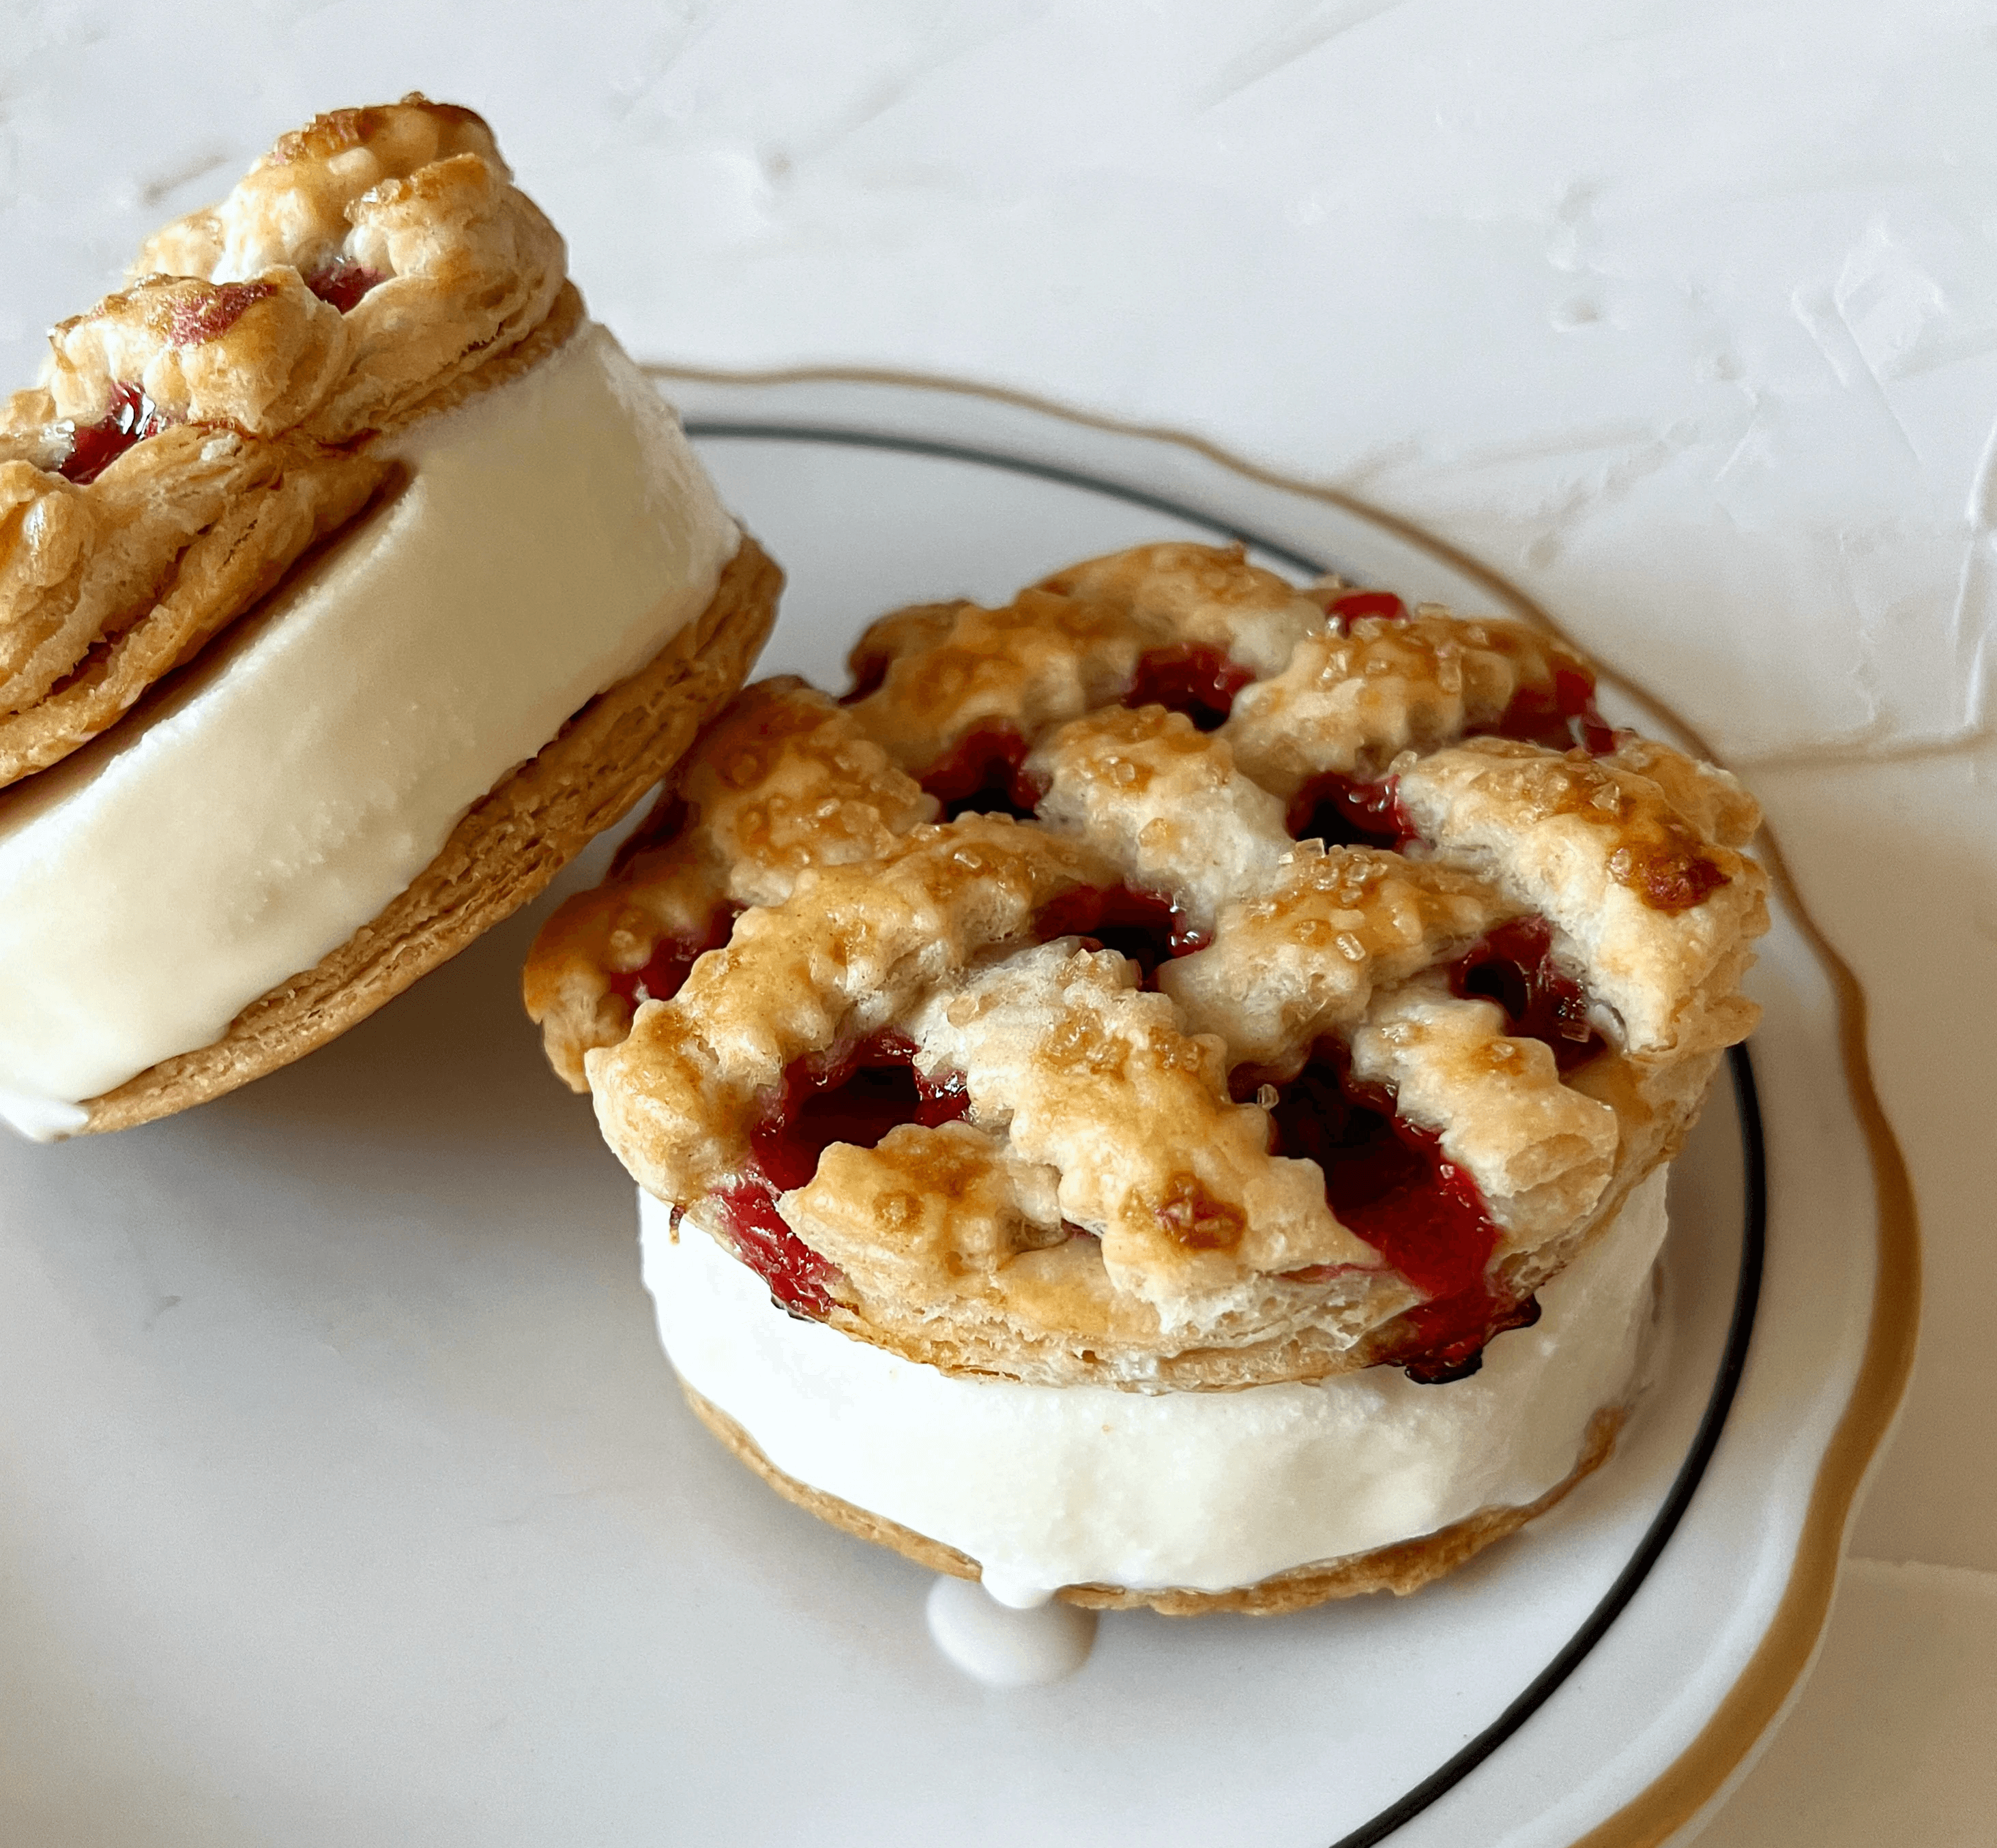
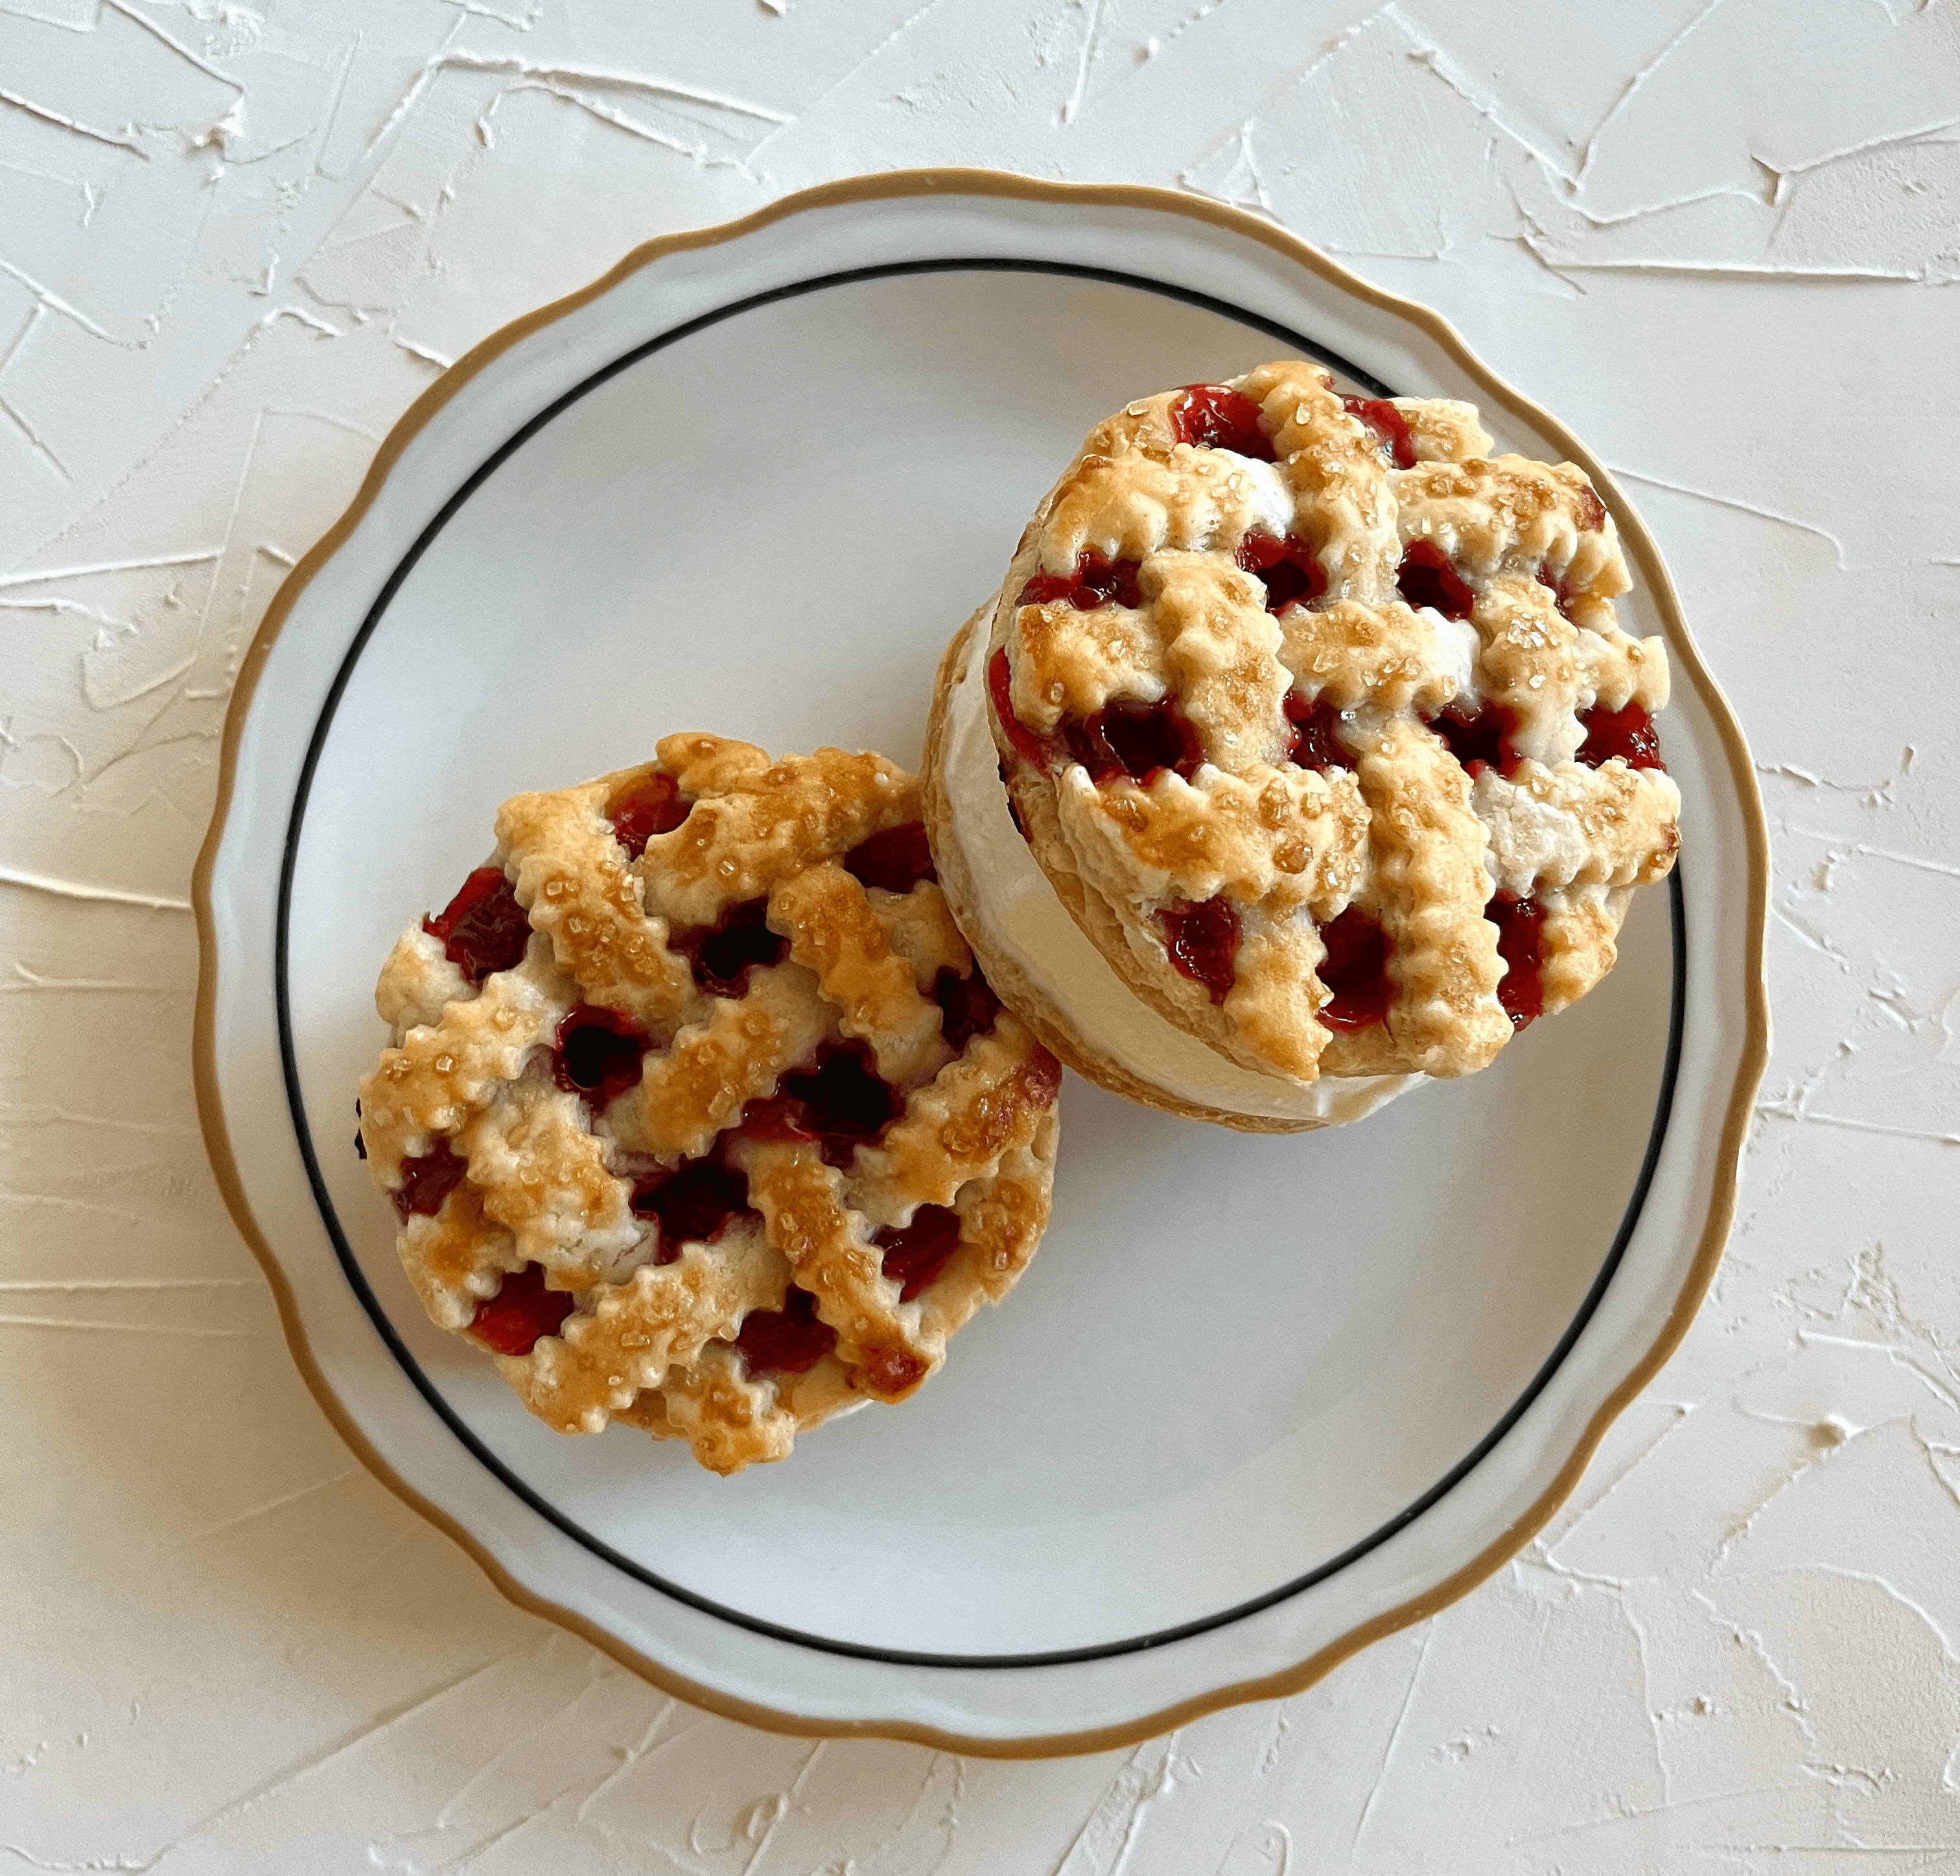
Bonus tip for pi'ice cream sandwiches
For a pi'ice cream sandwich bottom, use a flat disc of dough. Without the filling, the plain disc will contract while baking. You need to weigh it down, otherwise your bottoms will be smaller than the tops. Not ideal for sandwiches!
This is similar to when you make mille feuille and place a second baking tray on top of the pastry. However, I found a baking tray makes the disc too flat — I want to see flaky layers! If the top pie has a flaky puffy edge, and a super thin bottom will look unbalanced.
I found a foil tin with a handful of pie weights to be about right, but you may need to experiment.