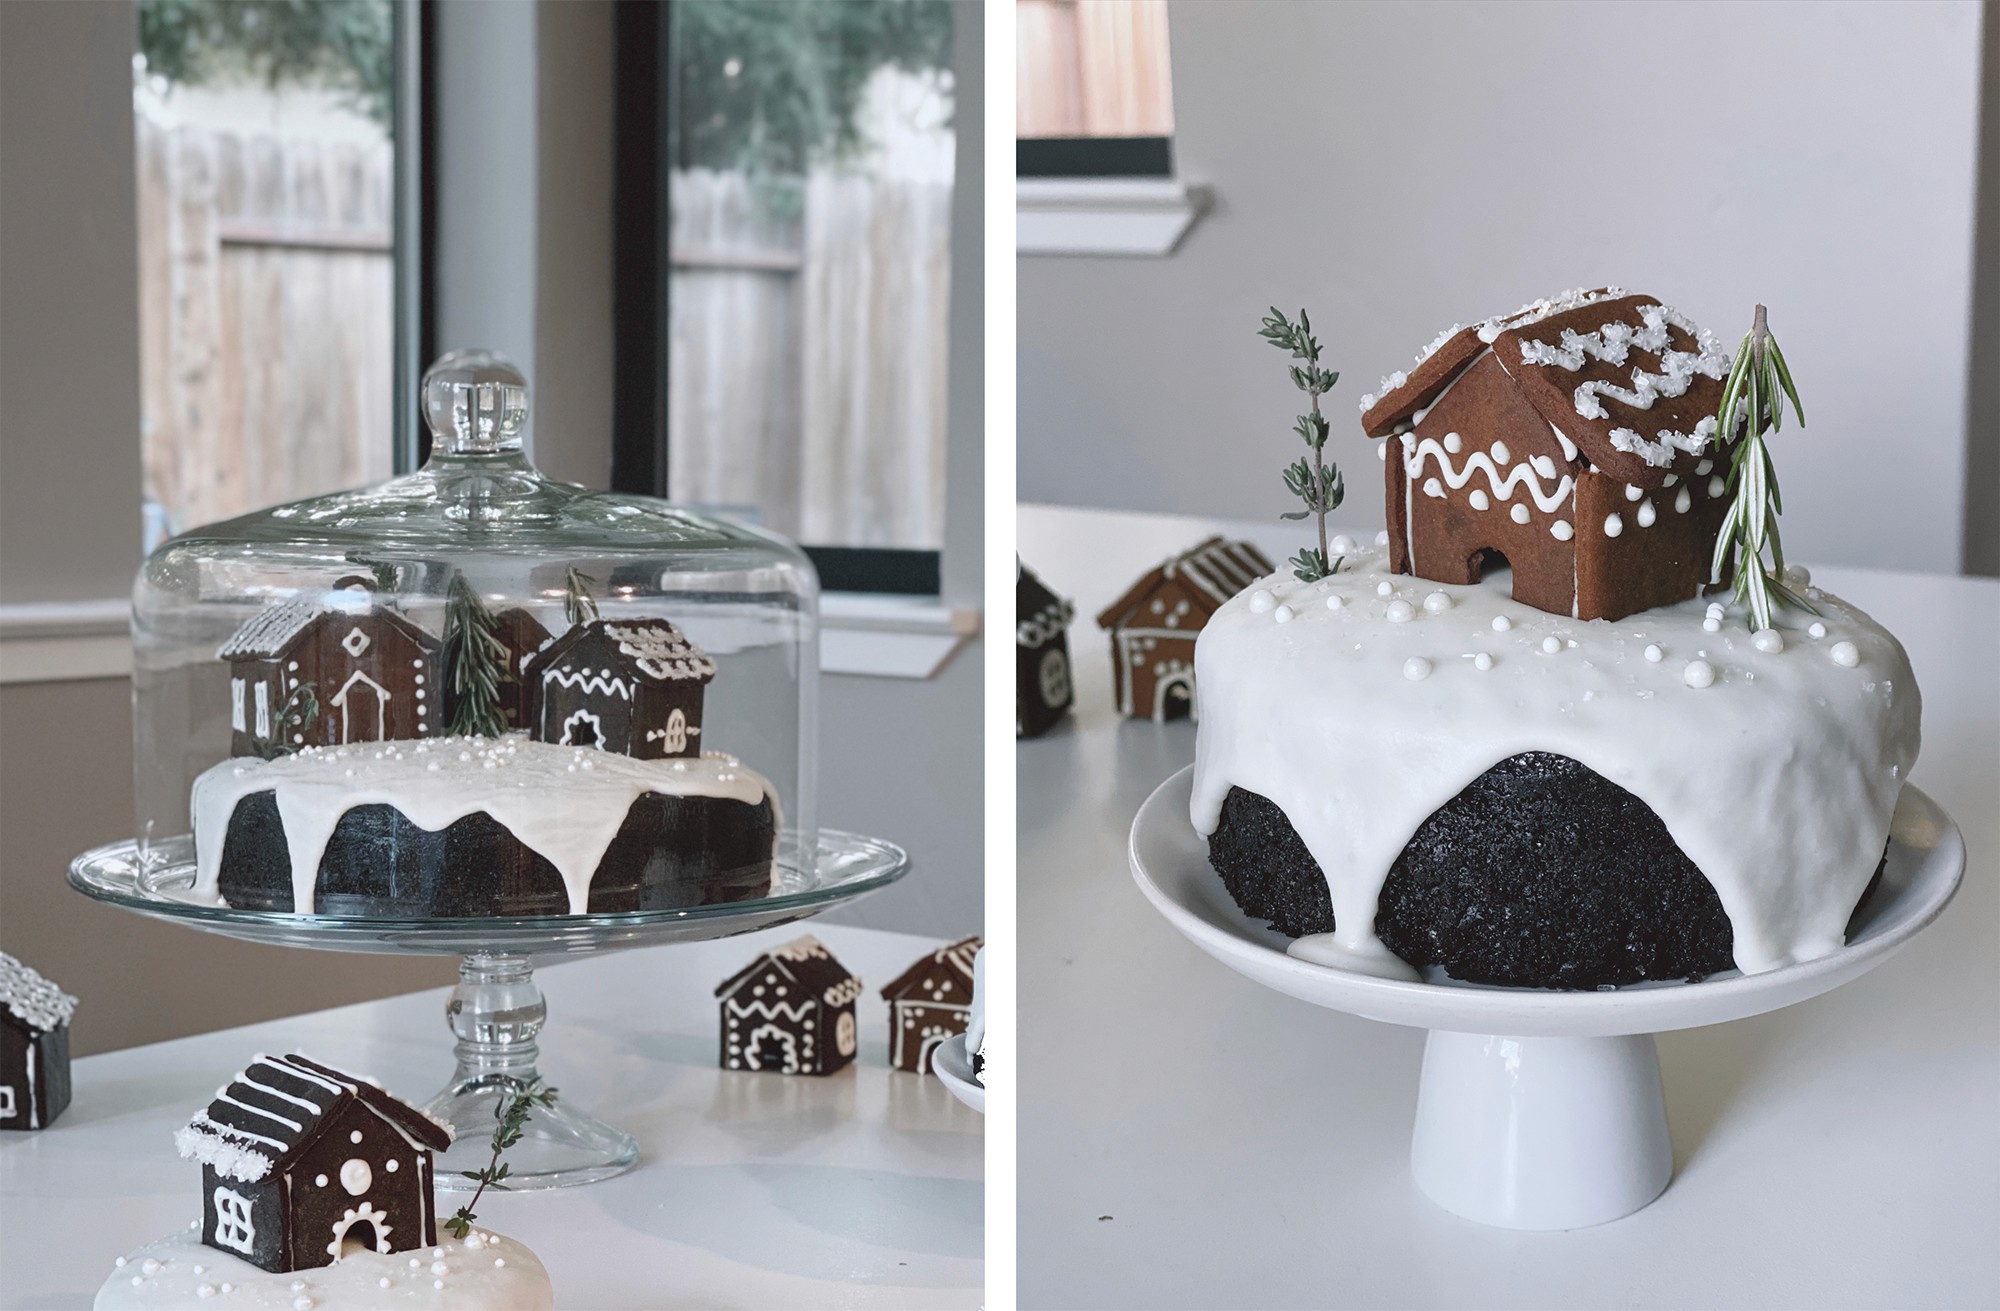
Chocolate cake with pepperminty frosting and miniature gingerbread houses

Variety, layering, and texture is what makes this come together into a display-worthy centerpiece. There is variation built into the sizes and colors of houses, types of sprinkles, and sizes of cakes.
A cozy gingerbread village is a striking centerpiece that is also dessert for your festive dinner!
I'll walk you through what components you need and how to put them together. The focus won't be on specific recipes or baking techniques to use, though I'll provide a few suggested ones. If you have your own preferred recipes for gingerbread, icing, or cake, you can totally use those instead!
The components
What really makes this work is having a variety of sizes and textures for each component. Playing with scale creates focal points and emphasizes the cozy, organic village-feel.
These are the key components and why it works visually:
Cake: 1 large cake and 2 smaller cakes
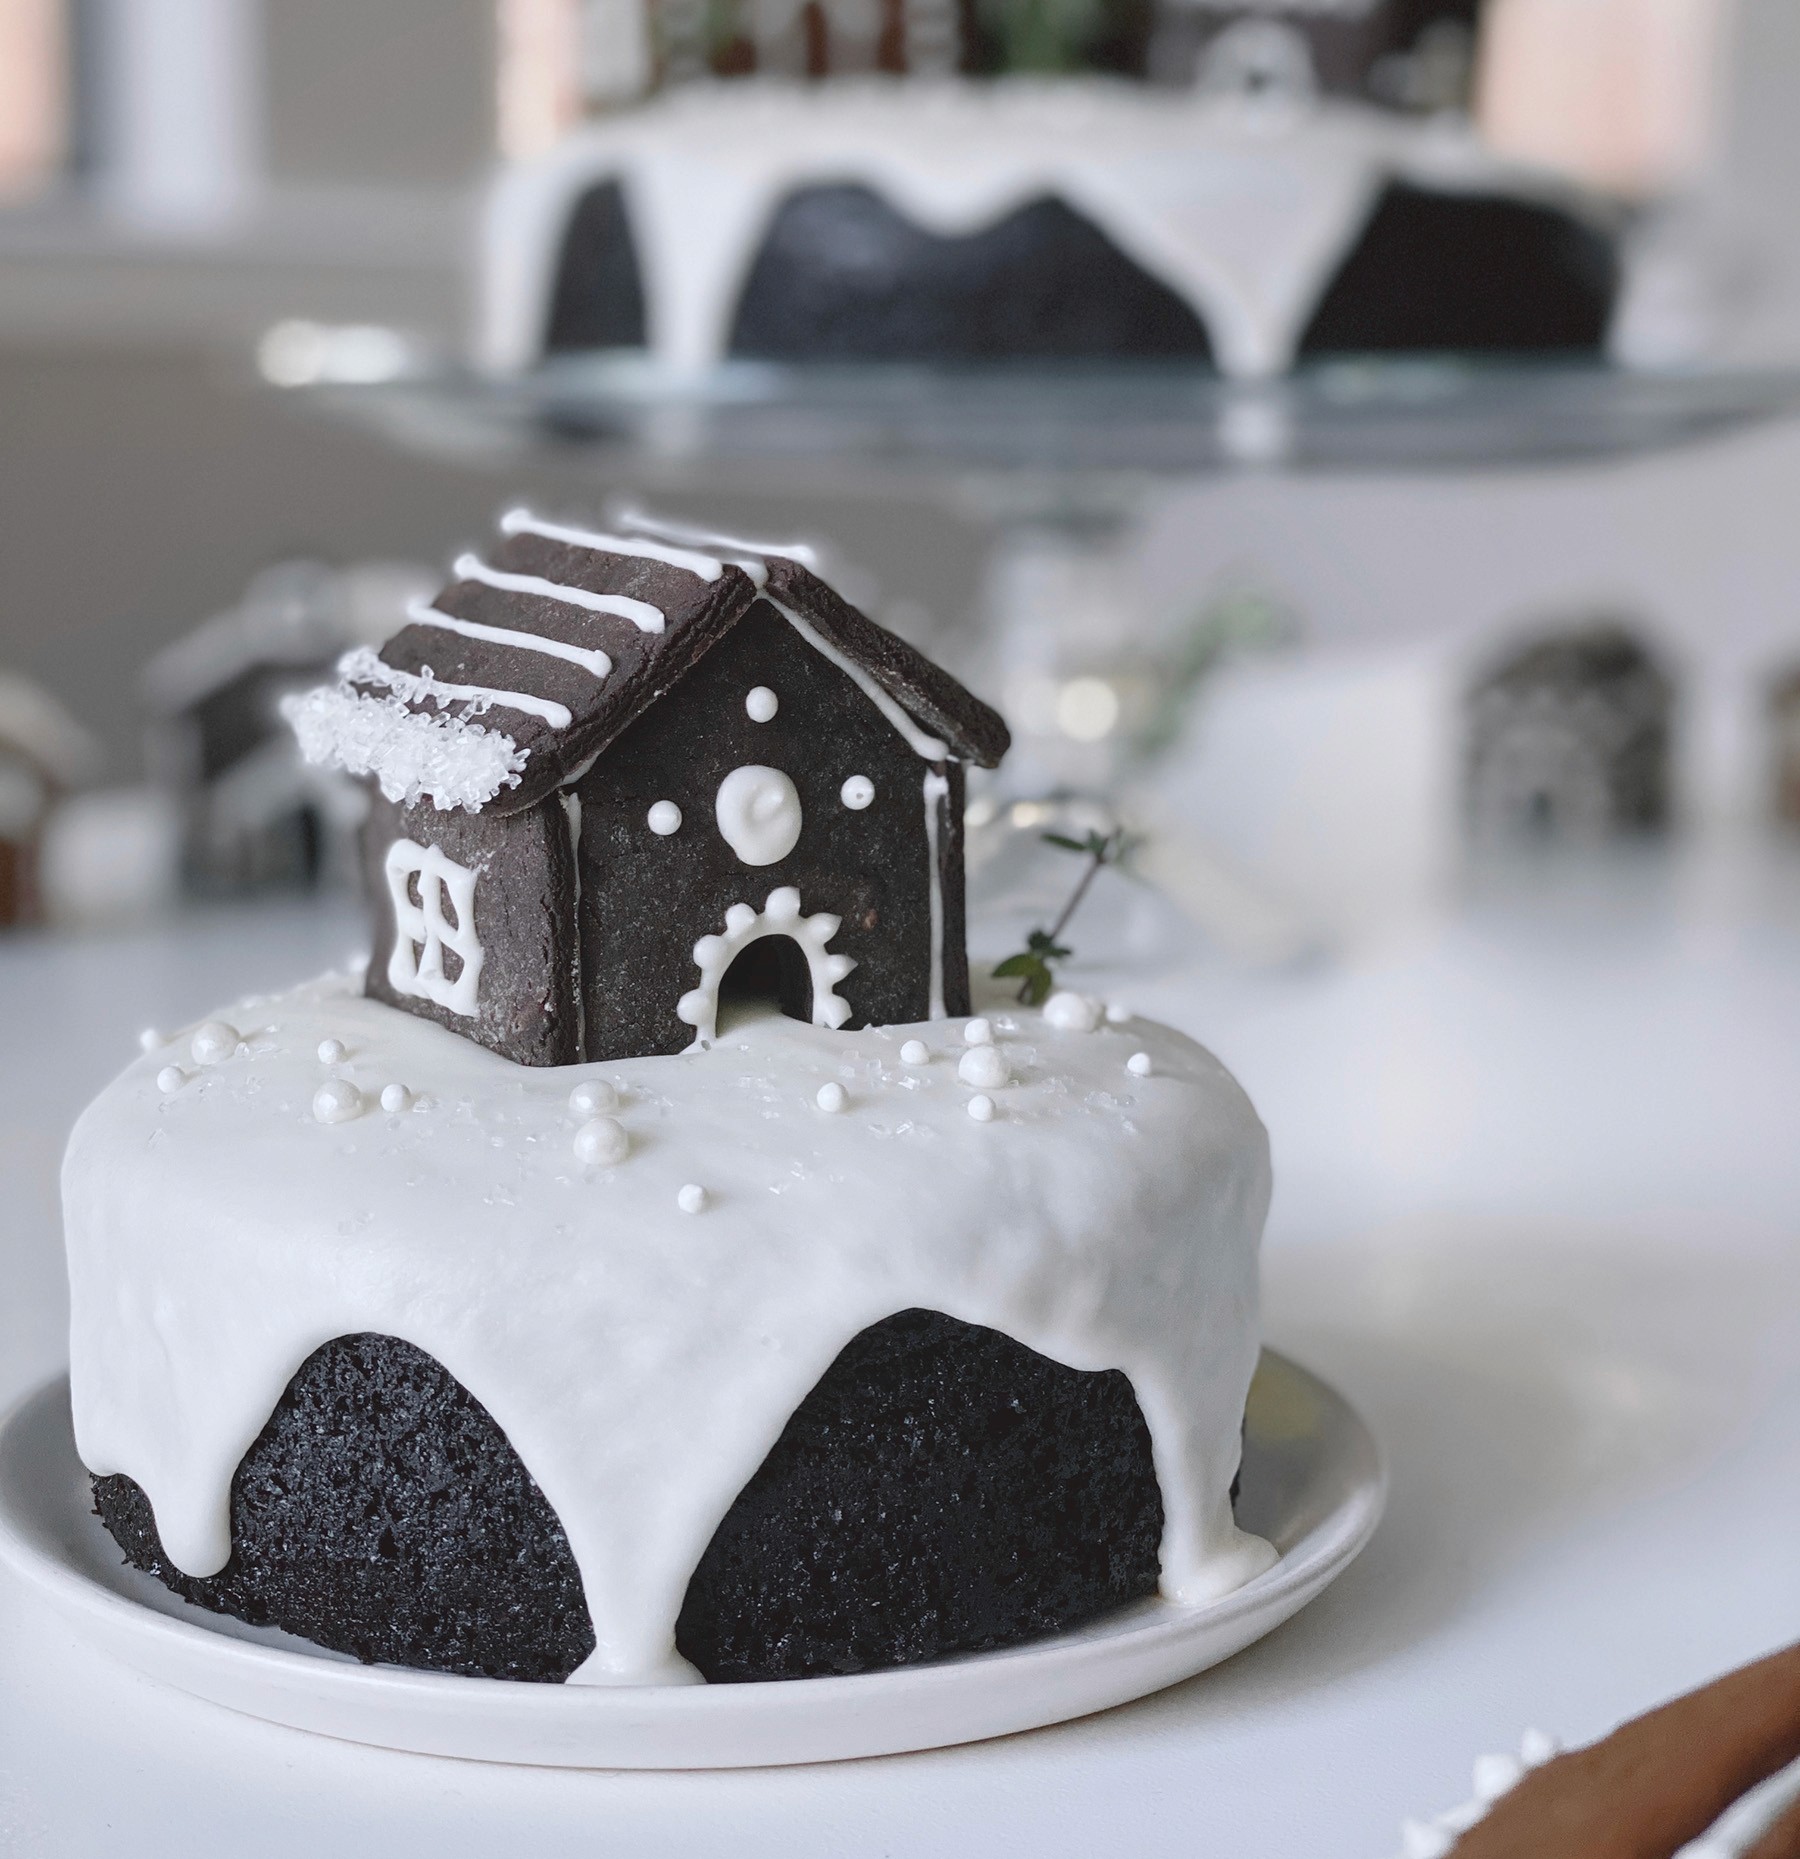
Glaze: Thick like a snowdrift with the cake peeking out
Gingerbread cookies: 2 colors of gingerbread and 2 sizes of houses
Decor: Multiple types of sprinkles, and various herbs for mini trees
Display: Different height plates and cake stands
Gingerbread houses
The gingerbread houses will keep for 1-2 weeks in an airtight container, so this is ideal to do ahead.
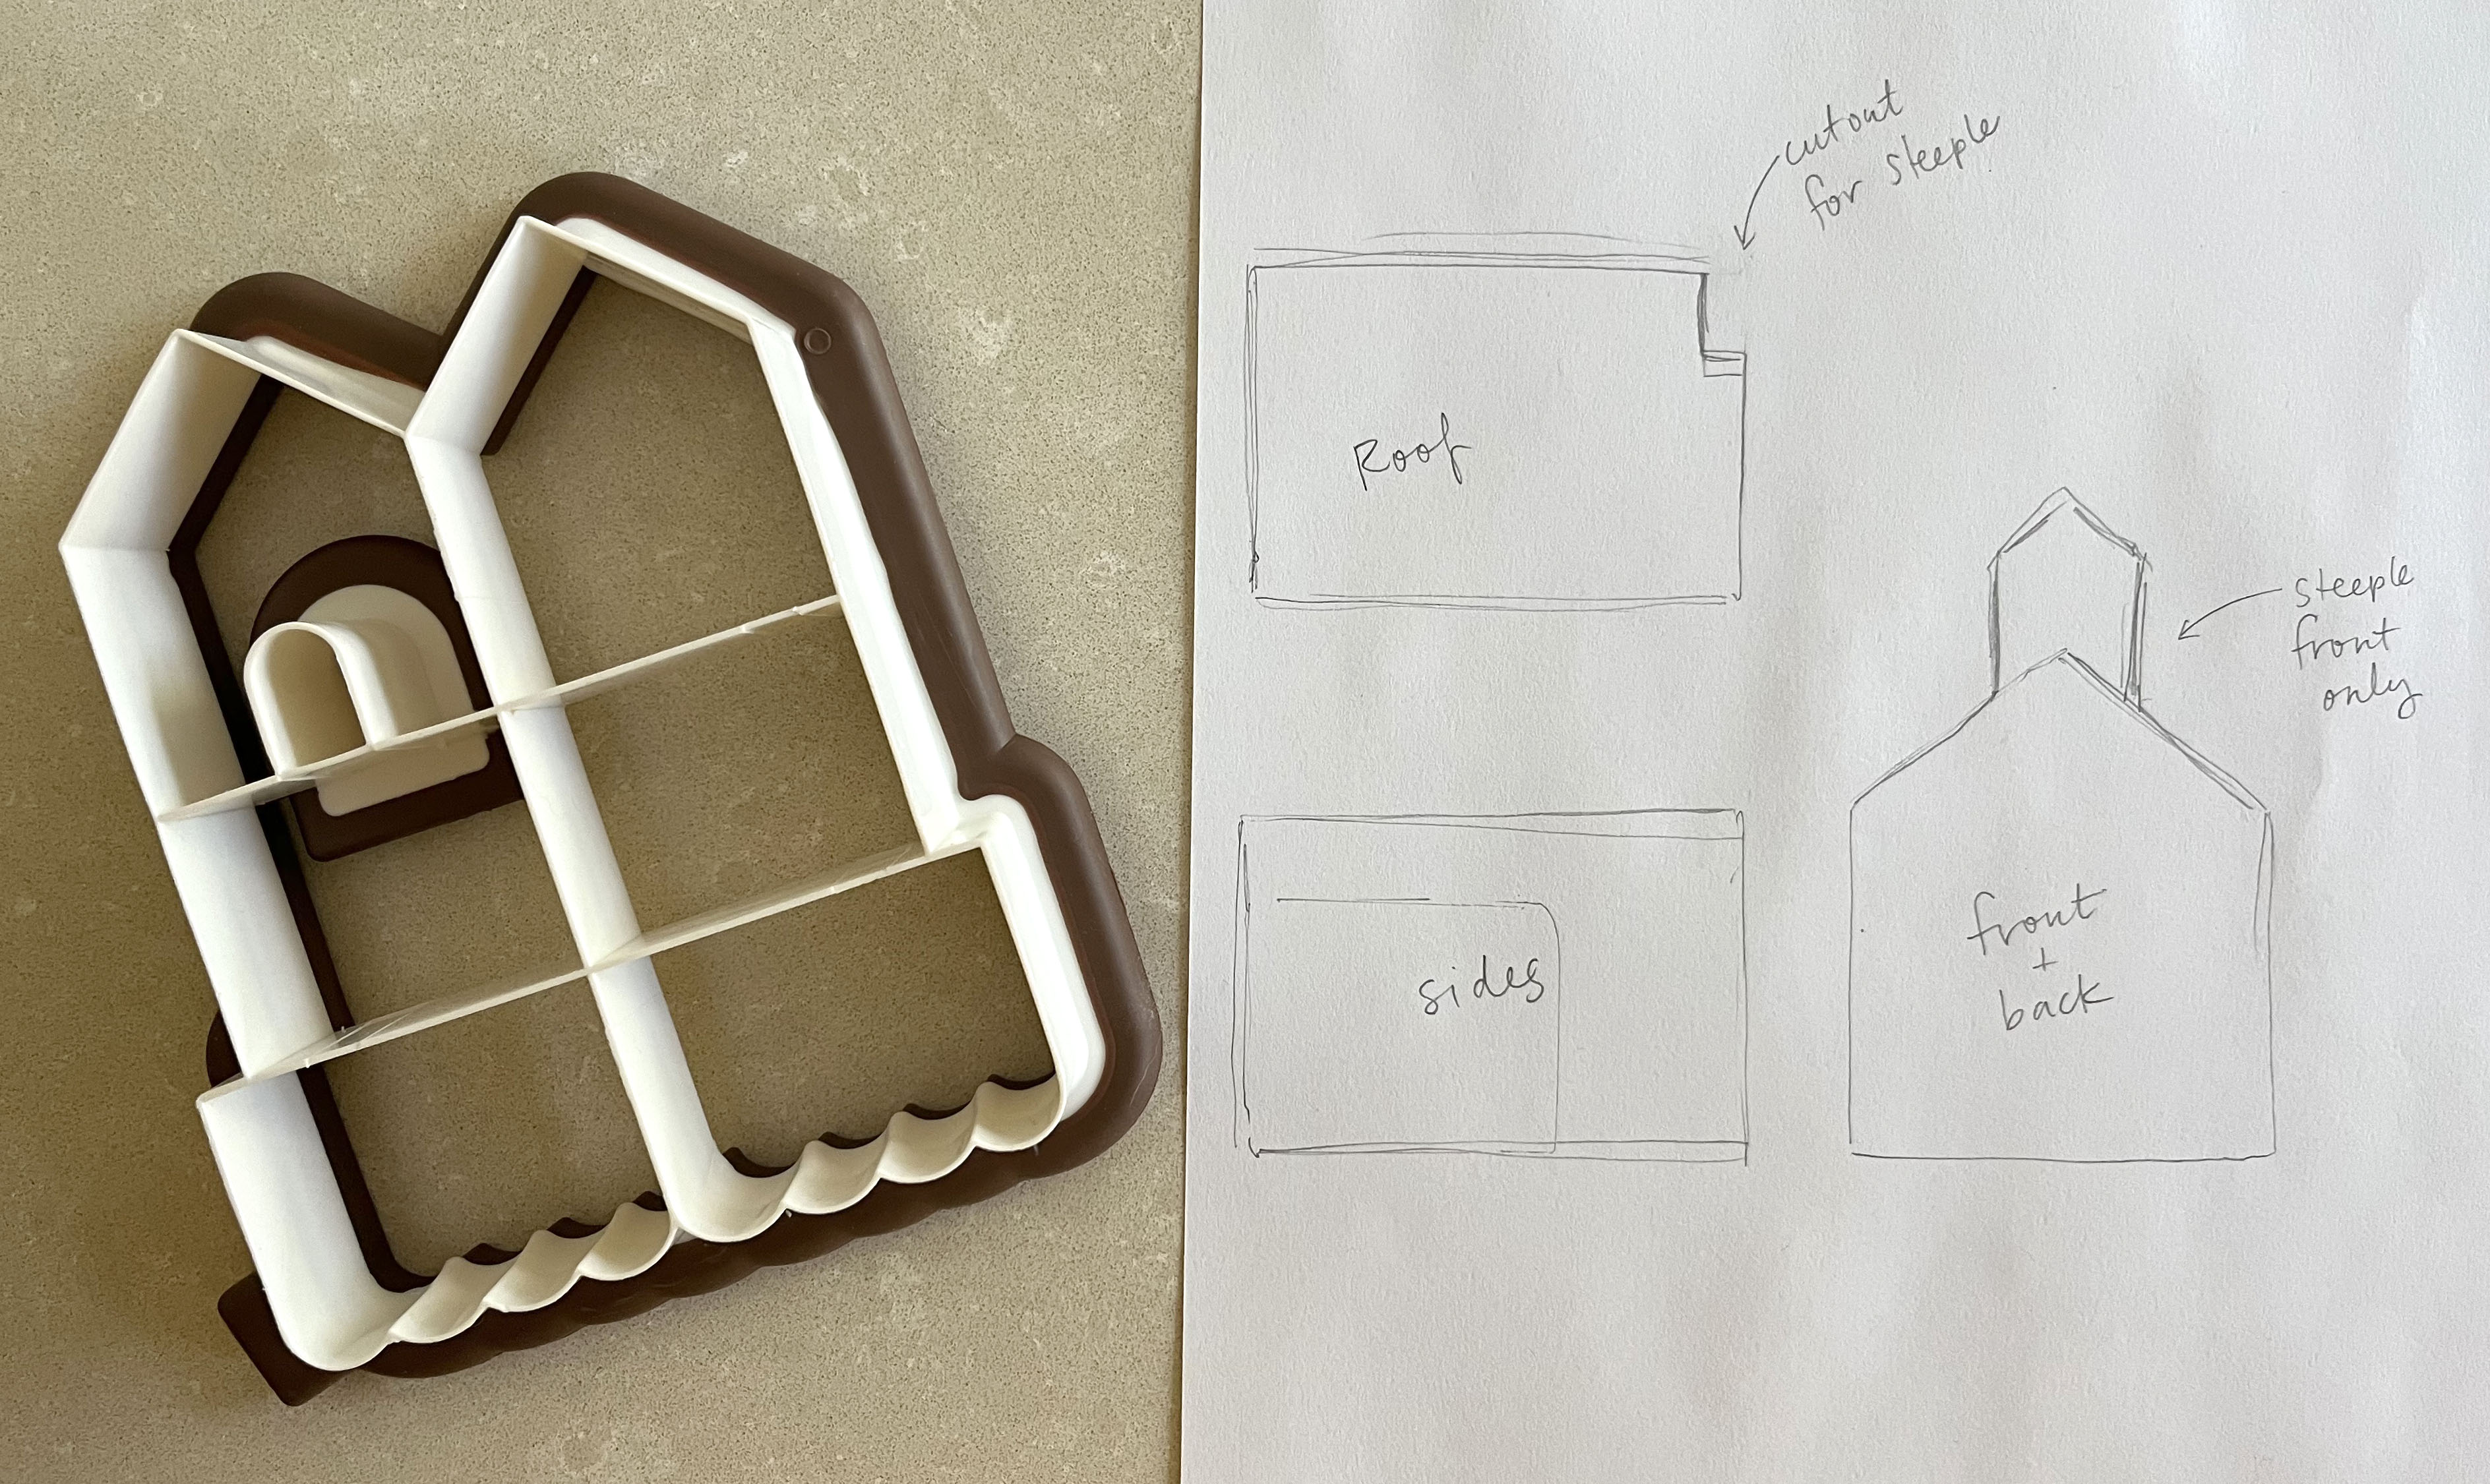
The special equipment you will need is a mini gingerbread house cookie cutter, and a pattern for larger houses/churches. You want a cutter than cuts the sides, roof, front, and back all at once. For the larger buildings, I suggest using paper to sketch out a pattern that you can cut out and lay on the dough to trace. The exact size will depend on the size of your cutter, since you want them about 1.5x the height/width of your cookie cutter houses. I gave them little church steeples on the front, so I also needed to cut notches on the roof where the steeple would poke through.
Make one batch of normal gingerbread cookies. I like Kim Joy's recipe.
Make a second batch of chocolate gingerbread cookies by substituting up to 1/6 of the flour with cocoa powder. Black or special dark will help get more color difference.
Roll out the dough to the thickness of a coin, about 1/8" thick.
Use a paring knife to cut 2 larger houses (1 from each dough) using your pattern. With the rest of your dough, cut houses using your cookie cutter.
Bake according to the recipe.
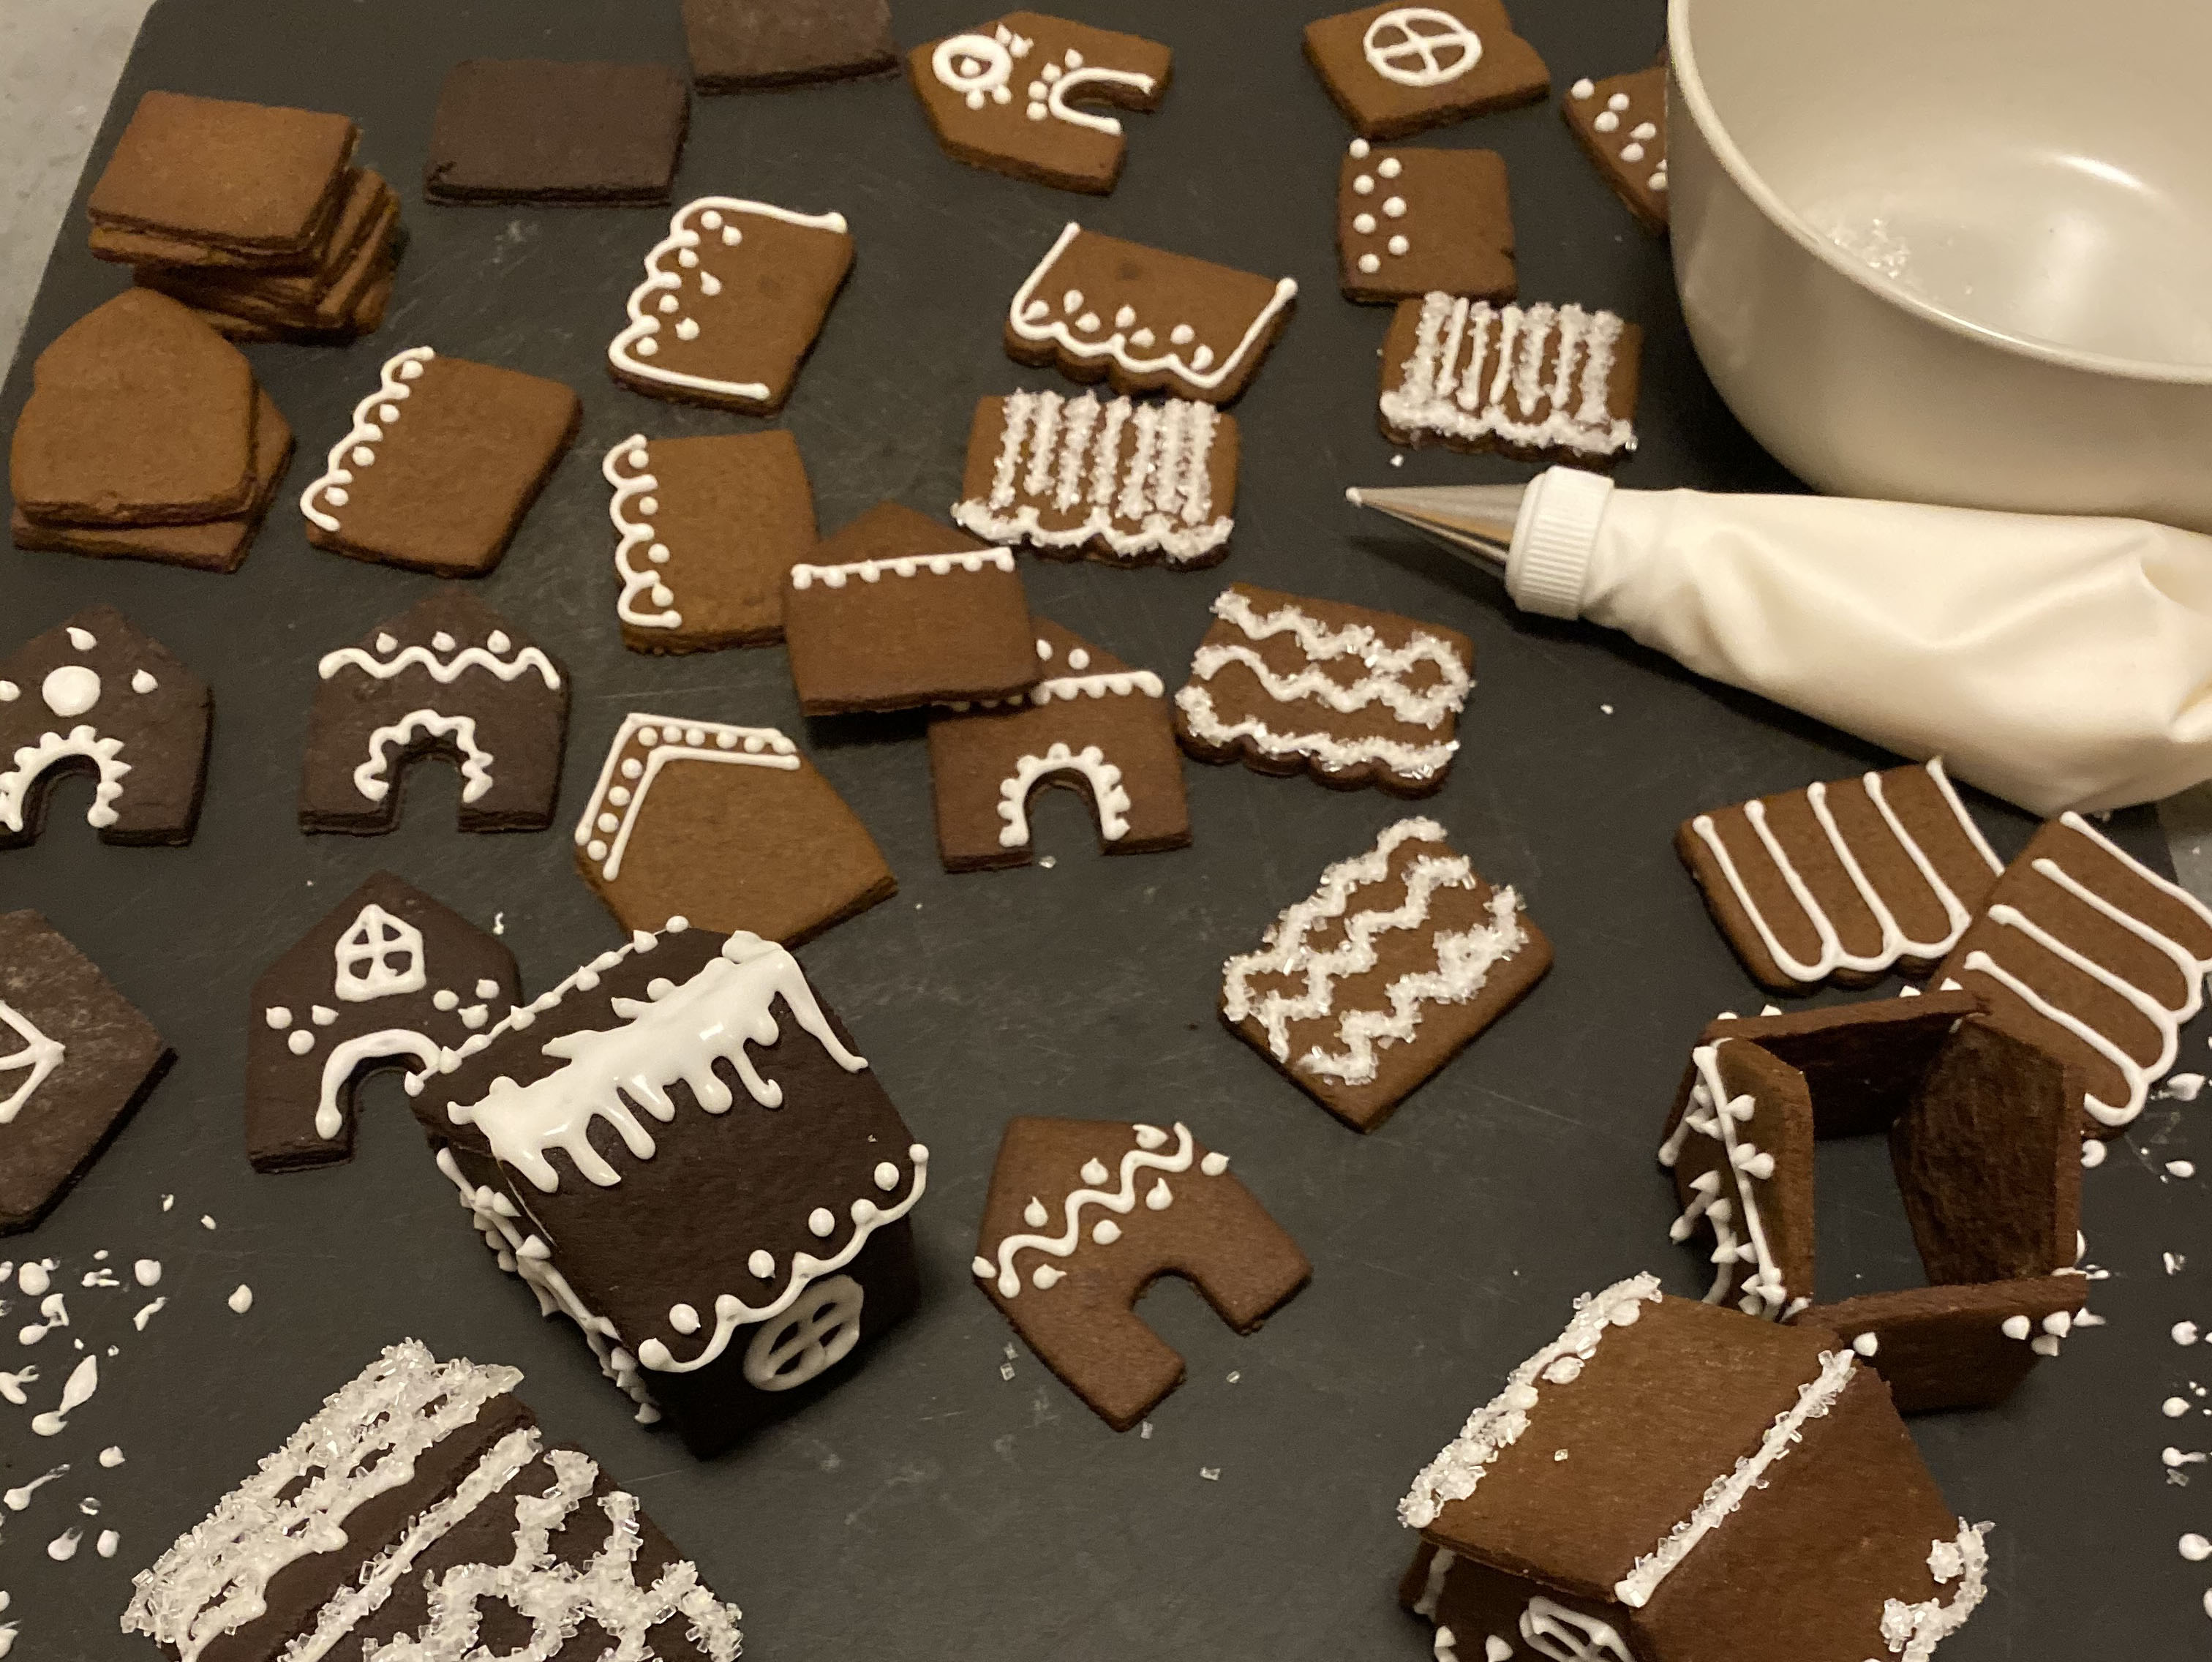
Decorate the cooled cookie pieces with piped royal icing. You have A LOT of houses to get through, so there's no need to do anything fancy. You can get enough variation with just dots, lines, and squiggly lines. Pressing wet royal icing gently into a plate of sparkling sugar is another easy way to get texture.
As the pieces dry, you can start assembling the houses. Attach the walls and roof with royal icing.
Store in an airtight container for up to 2 weeks.
Cake
I adapted the cake from Bravetart's Devil's Food Cake recipe to fit into one 9" plus two 5" pans. The cake can be made ahead and saved at room temperature overnight, or frozen and defrosted.
Prepare one 9" and two 5" pans.
Combine 2 sticks of butter and 1 cup of coffee in a saucepan over low heat.
Once melted, remove from heat, then mix in 56g cocoa and 113g chopped chocolate, followed by 300g brown sugar, 2/3 tbsp vanilla, and 2/3 tsp salt.
Mix in 4 whole eggs and 2 yolks, then 170g flour and 2/3 tbsp baking soda. Whisk thoroughly to combine.
Divide the batter between your pans. You will have about 35oz of batter in the 9" pan and about 10oz of batter in each of the 5" pans.
Bake at 350° for 40-45 minutes. The smaller cakes may be done faster.
Cool and wrap in plastic wrap if not using the same day.
Assemble and decorate
Assemble the village on the day you plan to eat it.
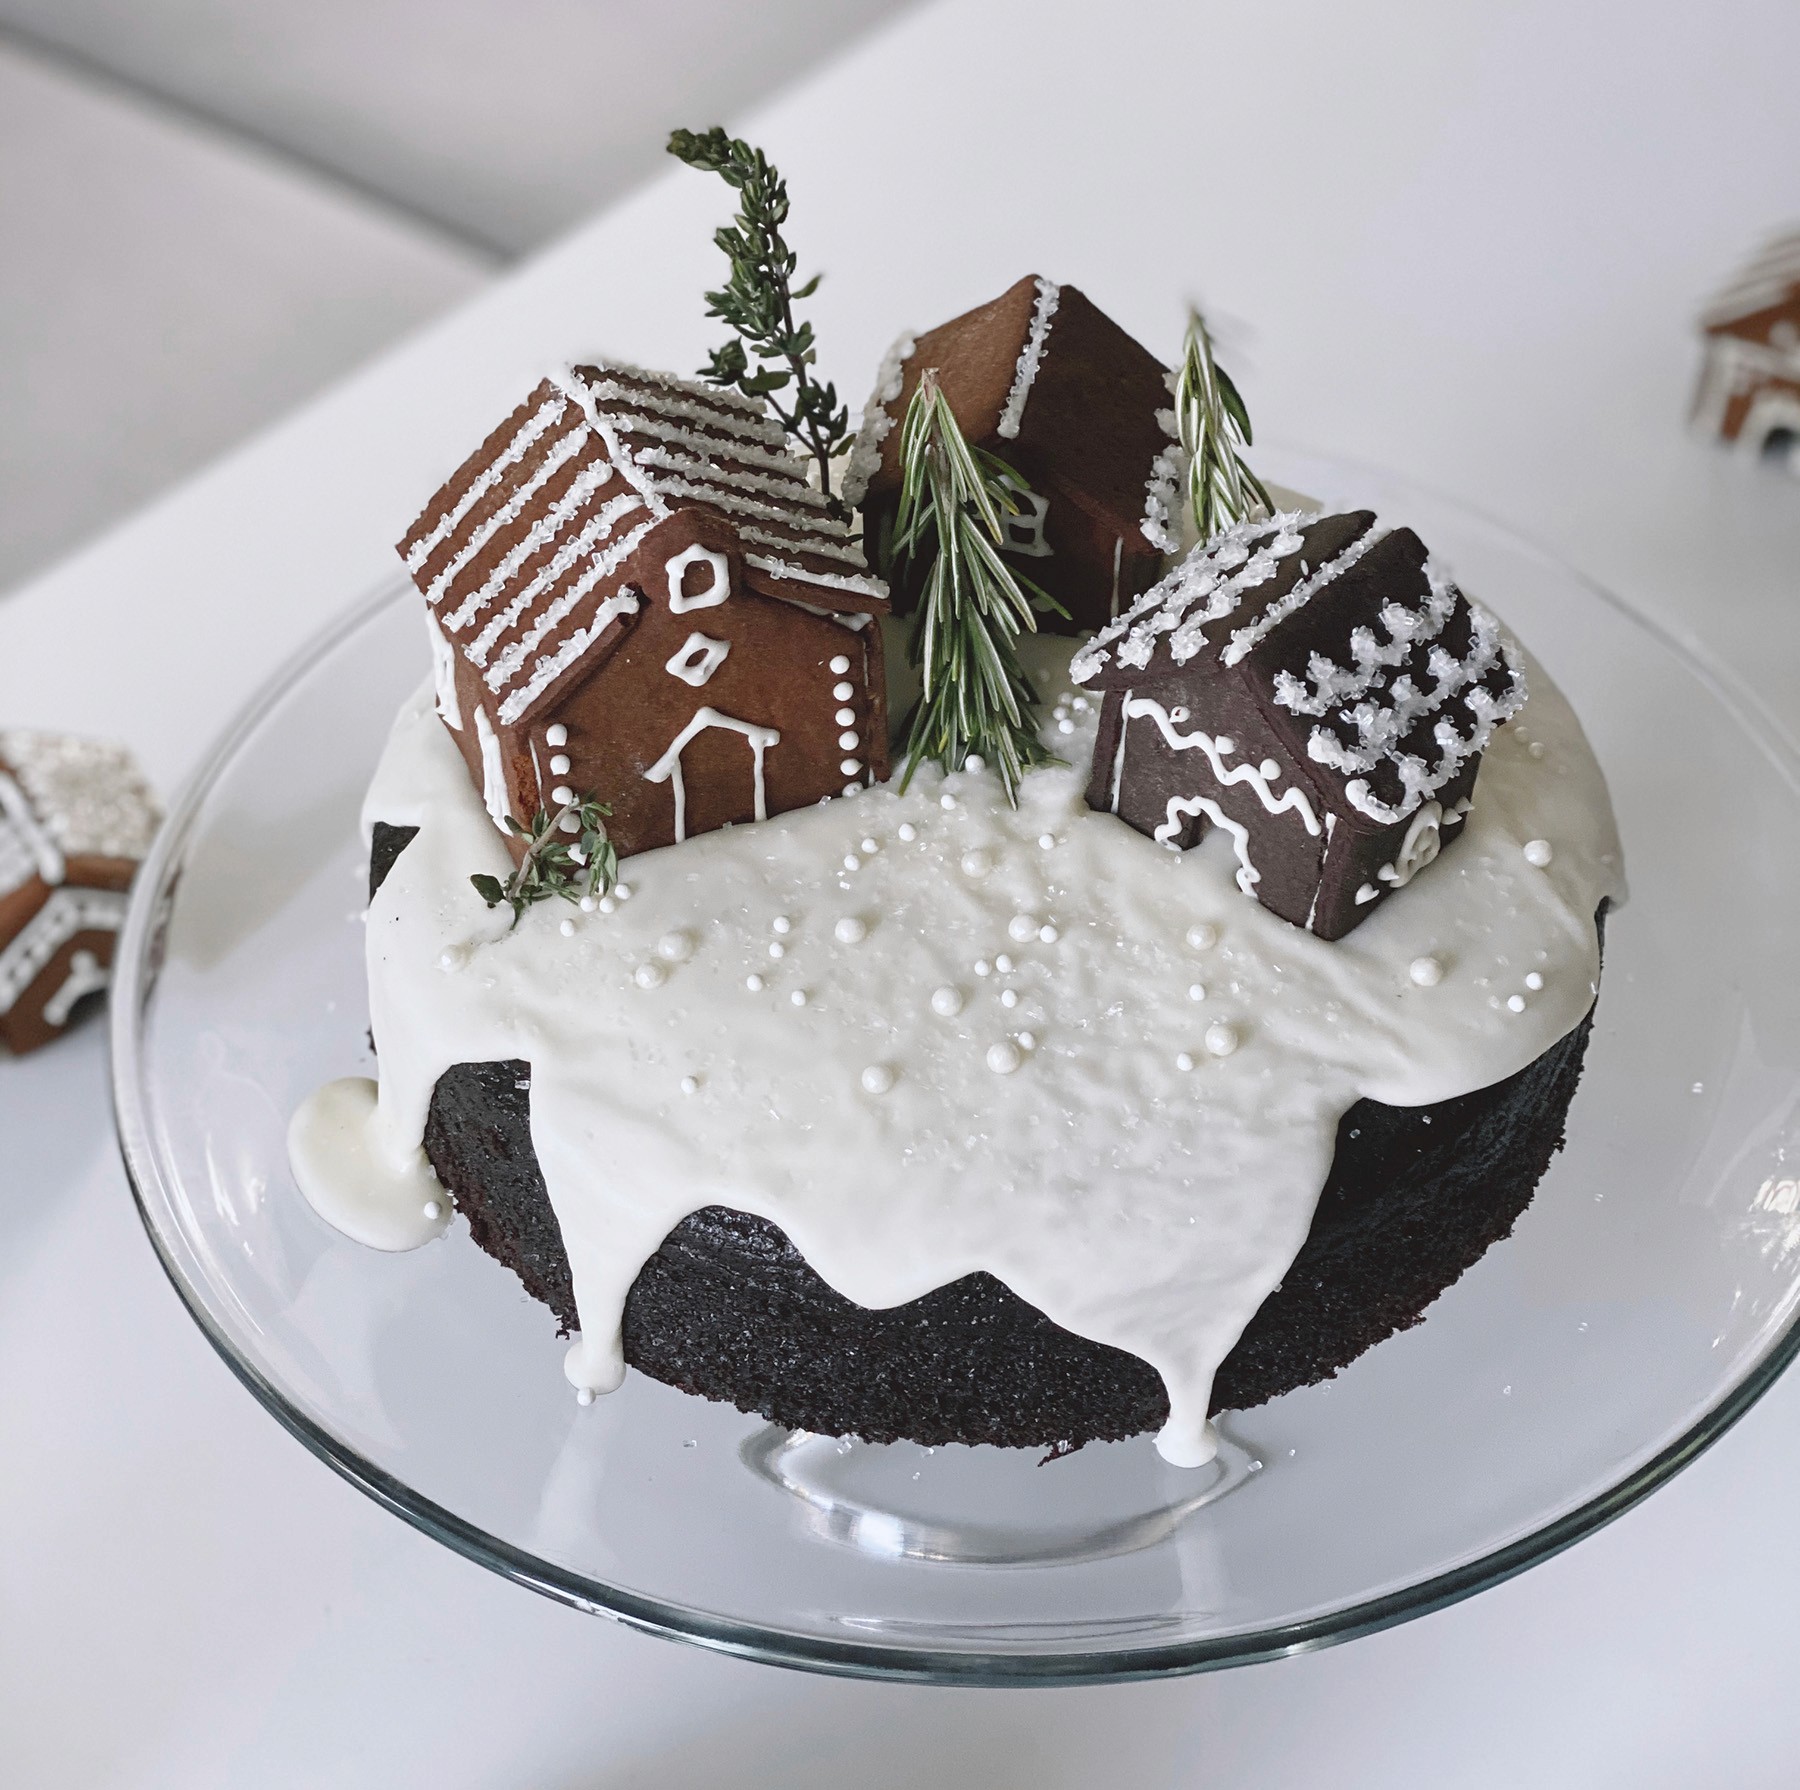
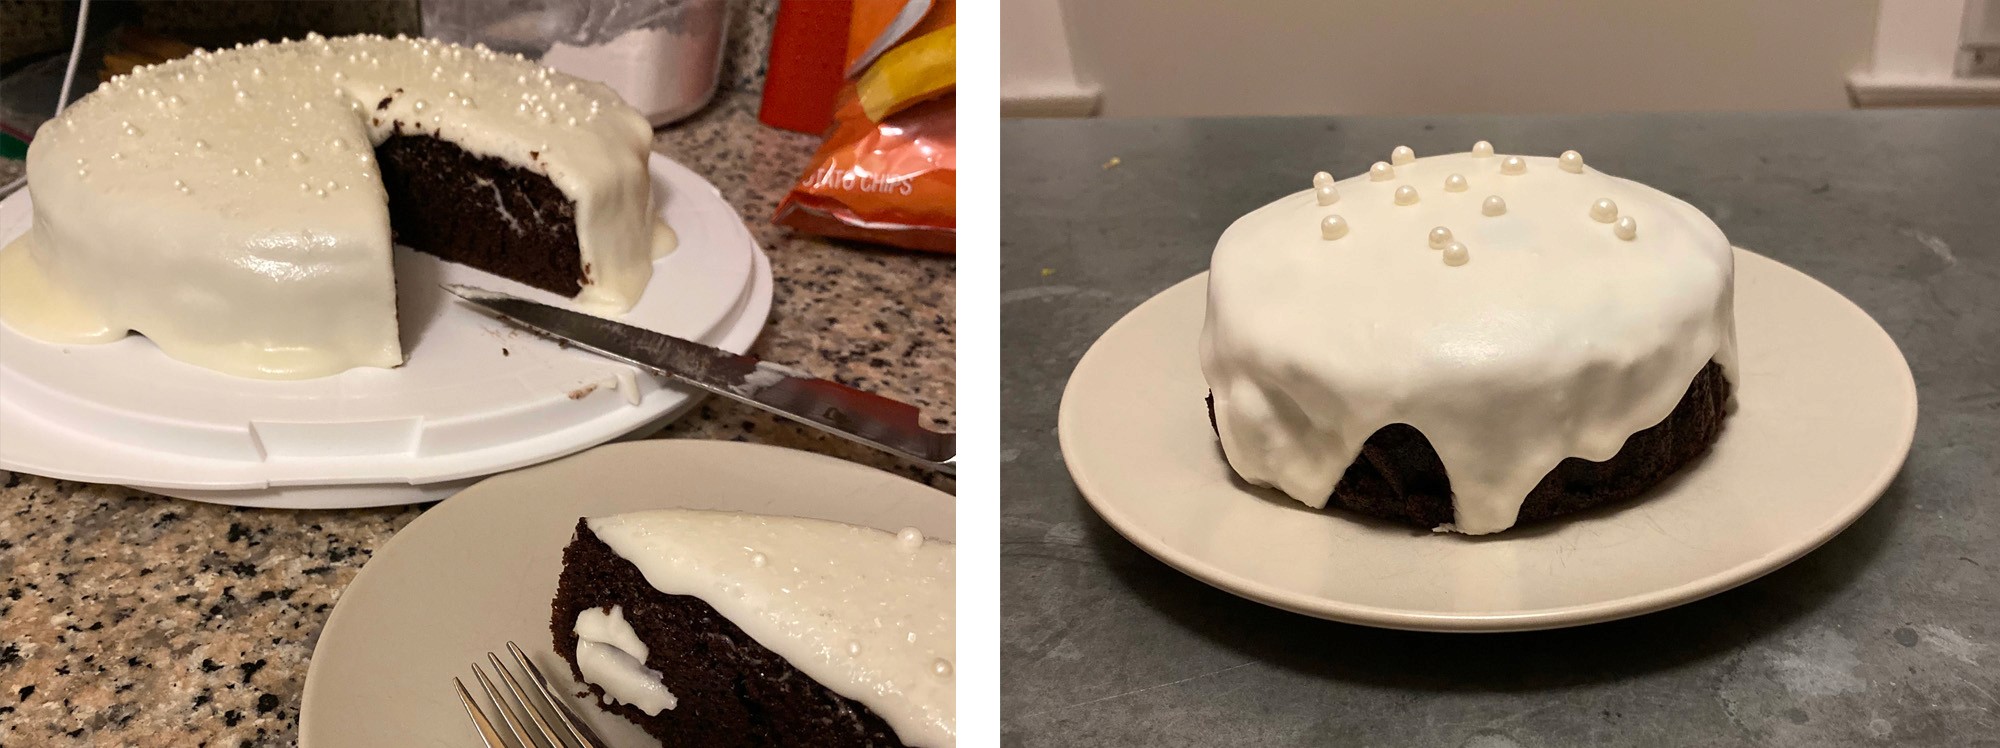
The trick is getting the glaze thin enough to smoothly cover the cake but not so runny that it just leaves a thin coating. It should look like a thick fluffy snowdrift, not like someone poured milk on your cake. (Note, mine was slightly too warm and looks a bit too drippy in spots.)
To make the glaze, melt 70g of butter and combine with 400g powdered sugar, 1/3 cup milk, and 1 tsp peppermint extract. (It's minty because it supposed to be snow and snow is cold, get it??)
Let the glaze cool until it falls off a spoon but doesn't flatten back into the bowl immediately. It should be slow moving like lava. If the icing becomes to stiff, you can rewarm it in the microwave.
Pour the glaze over the cake, pushing it gently over the edges to drip partway down the sides.
While the icing is wet, sprinkle with a variety of white sprinkles. I used large sparkling sugar and two sizes of white non-pareils / pearls.
You can see in my practice attempts that a wet glaze covers the whole cake and looks uninteresting and a single type of sprinkle looks dull.
↓ Don't do this! ↓
At this point you can arrange your houses on the cakes. I put 3 (including a church) on the large cake, and one house on each small cake. Add thyme, upside-down rosemary, or other herbs as trees.
Display
Last but not least is presentation! Use plates and cake stands to place your cakes at different heights. Your tallest cake stand should be the 9" cake, so it feels like it's sitting on a hilltop. I also had a domed cake stand, which gave it a snow-globe feel.
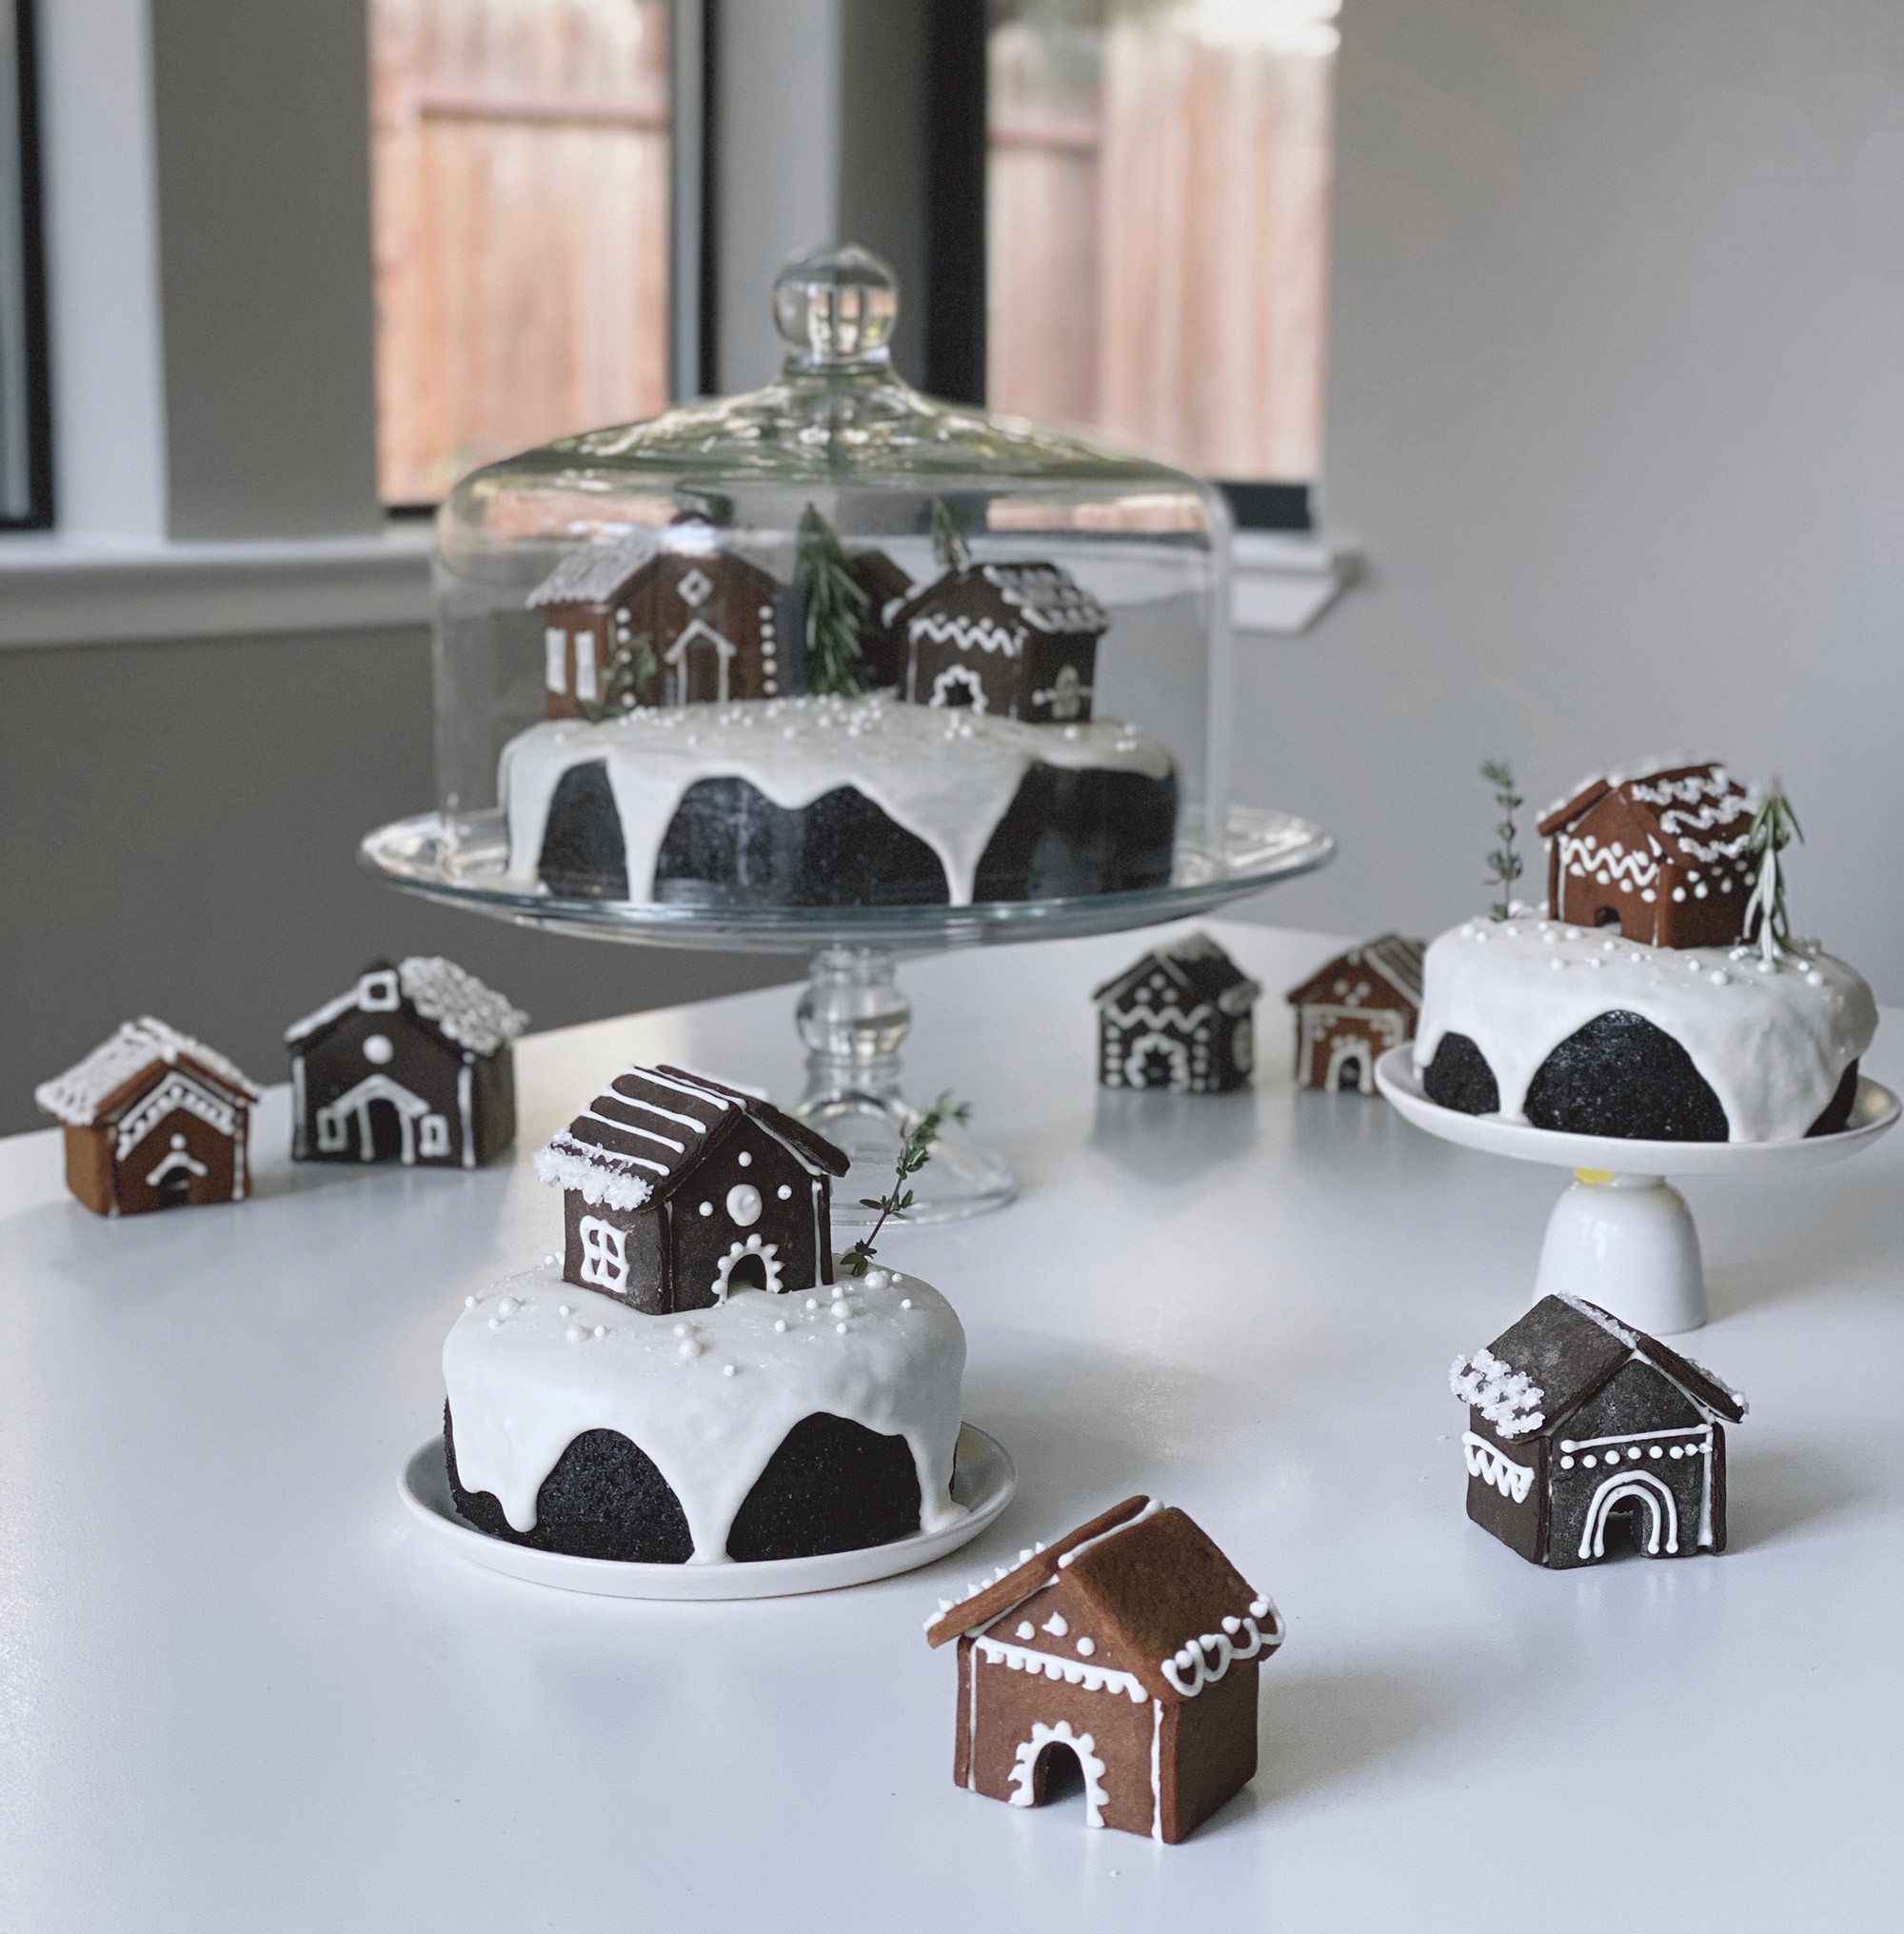
If you don't have cake stands, you can use plates sitting on upturned bowls. One of my small cakes is actually on a plate stacked on an egg cup.
Use a clean surface so the remaining houses can be scattered around at the lowest level. I used the tabletop directly, but a tablecloth or board would also work if you want to create a boundary for the village area.
That's it! To serve, remove the houses and slice the cakes. The large cake feeds 8-10 and the small ones can be quartered to feed 4 people each. You should have plenty of extra houses to serve one on each plate as well.
Need inspiration?
Check out my Gingerbread cake Pinterest board for ideas on styling your cake and decorating your houses.